
cropper
Atlanta Home and Garden Insider
  • Home
  • Categories
    • DIY Projects
    • Sustainable Practices
    • Design Trends
    • Landscaping
    • Lawn and Garden Care
  • Smart Home Tech
  • Interior Design Tips
  • Home Maintenance
November 12.2026
4 Minutes Read

Unwrap the Joy of Crafting: Create Your Own Christmas Stamp Ornament

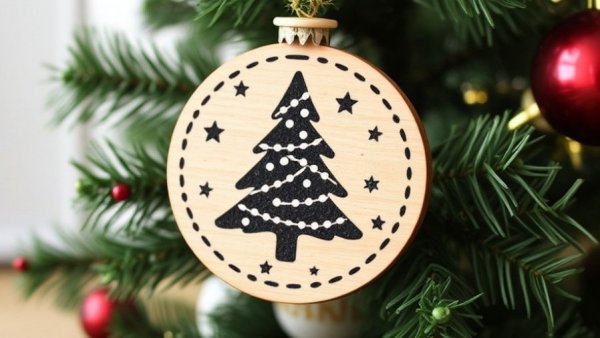
Chalk Couture Christmas Stamp Wood Ornament

Crafting Your Own Christmas Cheer: A Hands-On Guide

Add a personal touch to your holiday decorations this year with a charming DIY project that brings the spirit of Christmas into your home. This year, I embraced the season by creating a large Christmas stamp ornament using Chalk Couture transfers and a matching wood cutout. The delightful combination of Cherry and Bright White chalk paste gave my ornament a classic candy cane look, perfect for adorning a large tree, a wreath, or even a festive display in the kitchen.

Supplies You Need for This Holiday Craft

This project centers around a few essential supplies: the Christmas Stamp transfer, a matching wood cutout, Bright White and Cherry chalk paste, surface wax, a fuzzing cloth, a squeegee, a hole punch, and silver wire. Don’t worry about having everything perfect — the beauty of crafting lies in the unique touches you add along the way! For curling the wire, I used a Posca pen, but a pencil or paintbrush handle works just as well if you're in a pinch.

Painting the Base for Your Christmas Stamp

To get started, the first step was to paint the wood cutout with Bright White chalk paste. This not only serves as a fresh background but also emphasizes the red design once it's applied. A squeegee makes spreading the paste easier, though it’s not uncommon for things to get a little messy while crafting. But remember, perfection isn’t the goal; it’s the end result that counts!

Preparing for a Smooth Transfer

Once the white background was dry, I applied a thin layer of surface wax. This step is crucial; the wax adds protective sheen and prevents the transfer from adhering too tightly to the base, which can pull up your freshly painted background. After waxing, I pressed the transfer onto a fuzzing cloth to add a bit of fuzz, reducing its stickiness and allowing it to be lifted off more easily once the design is complete.

Aligning and Transferring the Design

With my transfer ready, I centered it over the wood cutout, carefully aligning the edges. Proper placement is key to ensuring that your design looks polished. Once satisfied with the position, I pressed the transfer firmly onto the wood to secure it in place. While it’s natural to worry about minor imperfections, stepping back and embracing the homemade charm makes crafting much more enjoyable.

Adding the Final Touches with Cherry Chalk Paste

Deciding on Cherry chalk paste for the stamp design was an easy choice for me since it's one of my favorite shades of red. It pairs beautifully with the Bright White background, giving the ornament a festive vibe. With a gentle touch of my squeegee, I spread the Cherry paste over the transfer, being careful not to press too hard. Time is of the essence, especially with larger transfers like this; I needed to work swiftly to keep the paste workable for a clean reveal.

The Joy of Revealing Your Christmas Creation

The reveal is always the most thrilling part of any craft. Slowly peeling back the transfer, I watched the vibrant red design appear against the white background. It's especially satisfying to spot any missed areas during this stage — if you catch one, gently lay the transfer back down and touch up with more paste as needed. The results? A stunning cherry-red Christmas stamp ornament that pops against its fresh white backdrop!

Why DIY Projects Matter for Homeowners

Taking on DIY projects like the Christmas stamp ornament not only fills your home with personal touches but also creates memorable experiences with loved ones. These activities encourage creativity, alleviate stress, and, most importantly, let you embrace the joy of giving during the holiday season. Plus, homemade ornaments have the unique ability to evoke nostalgia every Christmas, reminding us of the times we spent crafting together.

Common Misconceptions About DIY Crafts

Many people believe that successful crafting requires expensive tools or professional skills, but that’s simply not true. The essence of DIY crafting lies in creativity and willingness to learn. Every mistake provides a chance to grow and try something new. So, if you're hesitant because you think you lack the ability, remember that every expert was once a beginner.

As the holiday season approaches, I encourage all homeowners, especially those aged 40-65, to take time for creative pursuits. Not only do they promote relaxation and joy, but they also introduce a unique flair to your holiday decor. So go ahead, gather your supplies, and create something delightful!
Interior Design Tips

5 Views

0 Comments

Write A Comment

*
*
Please complete the captcha to submit your comment.
Related Posts All Posts
11.21.2026

Create a Festive Atmosphere with DIY Wooden Santa Craft

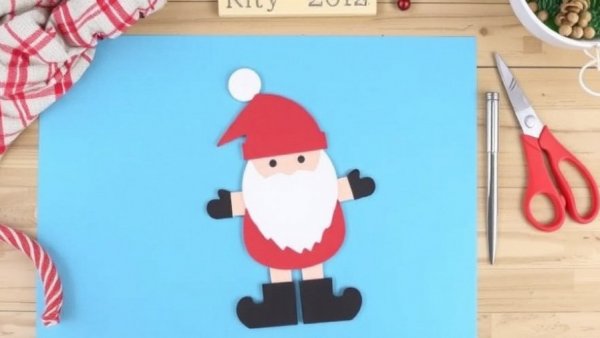
Update Bring Cheer to Your Home with a DIY Wooden Santa The holiday season is a perfect time to embrace creativity, and what better way to do that than crafting your very own DIY wooden Santa cutout? This delightful project not only allows for personal flair but also acts as a charming holiday decor piece that can elevate your home’s festive spirit. With a few materials and some imagination, you can create an adorable Santa that adds personality and warmth to your celebrations. Your DIY Santa Craft Journey Starts Here This project kicked off my holiday creativity as I opened my November craft box, filled with wooden pieces destined to become Santa. Layered cutouts are perfect for this kind of work, as they transform a simple idea into a stunning three-dimensional figure with depth and character. I used bright hues like red, green, and white, complemented by a soft vanilla, while dark stained wood served as a backdrop that perfectly highlighted Santa's jolly appearance. Choose Your Color Scheme for a Personal Touch One of the joys of crafting is the chance to tailor a project to your home’s unique style. Think about the color palette of your holiday decor—perhaps a traditional deep red or a whimsical pale pink and icy blue. Mixing warm and cool tones can give your Santa a contemporary edge. This versatility allows for more than just a festive decoration; it can be a conversation starter at any gathering. Essential Supplies for Creating Your Santa Cutout To embark on this festive crafting journey, here are the essential supplies you’ll need: Layered wooden Santa cutouts White chalk paste, acrylic paint, or chalk paint Colors: Red, Green, and Vanilla Small brushes or foam daubers Ruby Red POSCA pen Sandpaper and Distress Ink Wood glue An old toothbrush for paint splattering Keep in mind that this project is great for utilizing craft supplies you may already have, making it both accessible and budget-friendly. Painting Technique: A Step-by-Step Guide Once you’ve sorted your wooden pieces by color, it’s time to start painting! This method speeds up the process while allowing you to visualize the final product. Santa's red suit and hat need one or two coats to ensure a vibrant finish, while the warmer tones for his face and hands will require careful layering. Remember, thin coats are key to avoiding paint oversaturation. To create a beautiful texture on Santa’s hat, consider swirling the brush during application. This detail adds a dynamic visual element that enhances richness to the traditional color. Adding playful accents with a Ruby Red POSCA pen brings your wooden Santa to life. The uniqueness of freehand lines or dotted patterns embodies the charm of a handmade craft. Creating the Perfect Distressed Look After completing the painting, take your project to the next level by adding a rustic touch. Lightly sand the edges and raised areas of your painted wooden pieces to imitate natural wear. Adding a touch of Ground Espresso Distress Ink provides warmth and depth, making the artwork feel cozy and inviting—a touch that resonates deeply during the holiday season. Final Assembly: Bringing Santa to Life Before gluing your pieces, arranging them is crucial to ensure perfect spacing and understanding how each layer fits together. This step encourages exploration of your own creativity and the chance to adjust the positioning as you see fit. Finally, secure everything together and step back to admire your handiwork—a wooden Santa that embodies your holiday spirit, ready to add joy to your home. Crafting a Community Spirit Through DIY Projects Engaging in DIY projects like this allows not only for the expression of creativity but also fosters a sense of connection, especially in our current times. Sharing this craft with loved ones can become a memorable bonding experience, breathing life into traditions while showcasing individuality in home decor. Celebrate and Spread Joy: Your Call to Action! As you prepare for the most wonderful time of the year, don’t hesitate to dive into this DIY wooden Santa project. Gather your family, friends, or neighbors to share this delightful experience, creating lasting memories and perhaps some new festive traditions. Happy crafting!

11.19.2026

Transform Dollar Tree Lanterns into Stunning Holiday Decor with Chalk Couture

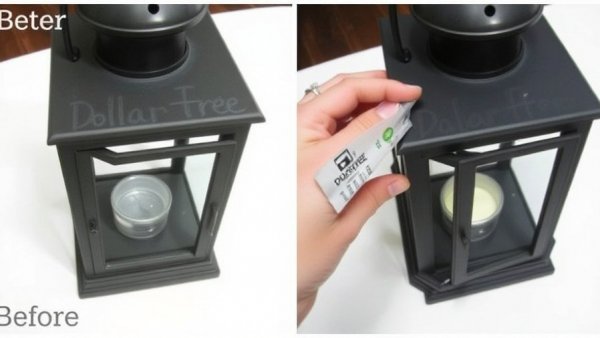
Update Transforming Dollar Tree Lanterns into Elegant Home Accents Crafting a stunning home accent doesn’t have to break the bank. With a bit of creativity and some quality materials, you can turn simple items from discount stores like Dollar Tree into unique decorative pieces. One such project is giving a standard plastic lantern a makeover with Chalk Couture paste. This process not only enhances the lantern's appearance but allows you to add a personalized touch to your holiday decor. Getting Started: Materials and Preparation When I first spotted the plastic Flame Glow Lantern at Dollar Tree, its glowing interior sparked an idea. Initially cute, I envisioned it transforming into a chic ornament that fits seamlessly within my holiday arrangements. To prepare the lantern, the first step was to slightly sand the black plastic surface. This scuffing helps create a texture for the Chalk Couture paste to adhere to, while also reducing the glossy finish that often accompanies plastic pieces. For this project, I used a basic craft mat beneath to protect my workspace and kept the lantern's batteries out of the way. The right preparation is key to achieving the best results! Painting with Chalk Couture Paste: The Finishing Touches Using Chalk Couture paste made a noticeable difference in the lantern’s overall look. The initial coat of black paste provided a matte finish. I applied it quickly to the outer frame, carefully avoiding the clear window sections. This not only transformed the glossy surface into something reminiscent of painted metal but also helped reduce the plastic shine that can detract from the aesthetic. Once the black base dried, the exciting part began. I took a metallic shade called 'My 2¢'—a lovely penny hue—and began to layer it over the black, focusing on the edges and some areas of the frame. The key here was to apply the metallic paste randomly, ensuring that the lantern mimicked the qualities of aged metal found in rustic decor. The result? A beautiful, warm piece that exudes comfort and style! Enhancing with Greenery: Adding Nature to Your Decor No holiday decor is truly complete without a touch of nature. I picked up some artificial eucalyptus and sprigs of vibrant red berries from Dollar Tree, which I glued onto the top of the lantern. Instead of a uniform design, I embraced asymmetry, giving each side its own unique flair. This scattered approach not only showcases the decorations but emphasizes the natural beauty of the greenery. As I attached the greenery, I made sure to hold each stem down until the glue set firm. This easy trick keeps your fingers safe and guarantees a more durable decorative arrangement. The mix of green with the glint of metallic paste beautifully complements the holiday spirit! Why DIY Crafts Matter in Holiday Decor Besides creating an enchanting atmosphere in your home, engaging in DIY projects like this one fosters creativity and allows for personal expression. There’s a deep satisfaction in crafting something with your own two hands, and it often leads to cherished traditions with family and friends. Already popular among homeowners aged 40-65, the DIY movement not only promotes sustainable practices through repurposing, but it also nurtures community connections. After all, sharing ideas, experiences, and finished works only strengthens the joyful spirit of the holidays. Conclusion: Embrace Your Creativity! Whether you’re a seasoned DIY enthusiast or a newcomer eager to give crafting a try, this lantern makeover is a perfect project to kick off the holiday season. It combines economic sensibility with artistic flair, transforming an ordinary item into something extraordinary. So gather your materials, channel your inner designer, and let your home reflect your unique style this holiday. Remember, when it comes to making your space inviting, creativity is the most important ingredient! Your turn! What holiday decor projects are you excited to try? Share your experiences and let’s inspire one another to create beautiful homes!

11.17.2026

Unlock the Art of Wood Burning Gel on a Serving Board for Beautiful Gifts

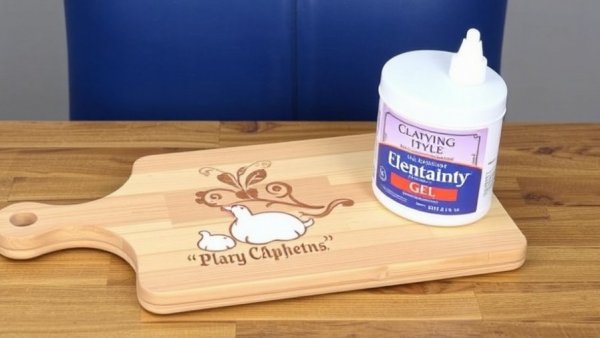
Update Transform Your Wooden Serving Board: Crafting with Wood Burning Gel Turning a simple wooden serving board into a cherished decoration isn’t just a craft; it’s a way to add warmth and personality to your kitchen space. Using wood burning gel, a reusable transfer, and a heat gun, I created a stunning design that elevates an ordinary board into a heartfelt gift, perfect for Christmas or any season. If you've ever wondered how this transformation happens, read on! Choosing the Right Wooden Board for Your Project The right foundation can make all the difference. For my project, I dug into my craft stash and pulled out a wooden serving board bought from a discount store. This is an affordable DIY project that can come to life with minimal investment. When selecting your board, opt for unfinished wood—check craft outlets like Walmart or local stores for various shapes. Look for a smooth surface; my initial board had a label that left a residue I didn’t like. After sanding and flipping it to the cleaner side, I was ready to start. The Importance of Wood Type and Treatment Different types of wood react uniquely when different finishes are applied, and wood grain can significantly influence the final look. Softwoods like pine burn differently than hardwoods such as cherry or oak. That natural variation is what adds character to your pieces, but fine-tuning each one requires a careful eye. Before you start, ensure the board surface is clean, smooth, and devoid of any deep grain that may affect the design outcome. Applying the Wood Burning Gel: Step-by-Step Beginning with a thick wood burning gel, I stirred it well for an even consistency before applying it to my board. Using a reusable transfer allowed me to set the design with ease; I secured it firmly before spreading the gel over the open areas. Ensure to keep your transfer flat to avoid any shifts. After completely covering the design, I gently lifted the transfer and cleaned it immediately, readying it for future use. Heat Activation: The Crucial Second Step Here comes the fun part! A heat gun is essential for developing the burned design—hair dryers just won’t cut it. I used my two-speed heat gun, keeping it a reasonable distance from the wood to avoid scorching. The magic happens as the gel starts to darken with the heat. Remember to keep the machine moving to avoid over-baking one spot, and always work in a well-ventilated area. Once you see the full design emerge, it’s permanent! Enhancing Your Board’s Aesthetic with Seasonal Decor While the burned design speaks for itself, adding decorations brings another layer of beauty. To add a touch of Christmas spirit, I adorned my board with red ribbon and greenery. This decorative touch is functional too; it can be removed and switched out with more neutral colors for year-round use. The word “home” makes this an ideal kitchen accent that resonates through all seasons. Embracing the DIY Spirit: Why It Matters Creating handmade gifts is not only perfect for personal expression; it also fosters a sense of community and belonging. Investing time in crafting enjoyable gifts reflects love and consideration for those we care about. Plus, embedding such creativity into our homes translates to a warmer, more inviting environment that family and friends can enjoy. Final Considerations for Future Projects As you approach your future DIY projects, remember that choosing the right materials and applying techniques with care leads to rewarding results. Whether it’s a serving board for a gift, a display piece for your kitchen, or just a fun afternoon project, each creation allows you to express a part of your personality. Utilize what you’ve learned from this project as a springboard for crafting unique, beautiful items that resonate with your home’s essence. With your newfound skills, I encourage you to take on this project for your next gift-giving occasion or as a fun hobby to add character to your home!

Atlanta Home Garden Insider

Essential Garden and Lawn Care Tips for Atlanta Metro Residents: Stay Updated for a Thriving Landscape!

Green Street Consulting LLC

email: kevin@greenstdigitalmarketing.com


© 2026 CompanyName All Rights Reserved. Address . Contact Us . Terms of Service . Privacy Policy

Terms of Service

Privacy Policy

Core Modal Title

Sorry, no results found

You Might Find These Articles Interesting

T
Please Check Your Email
We Will Be Following Up Shortly
*
*
*