

Transform Your Wooden Serving Board: Crafting with Wood Burning Gel
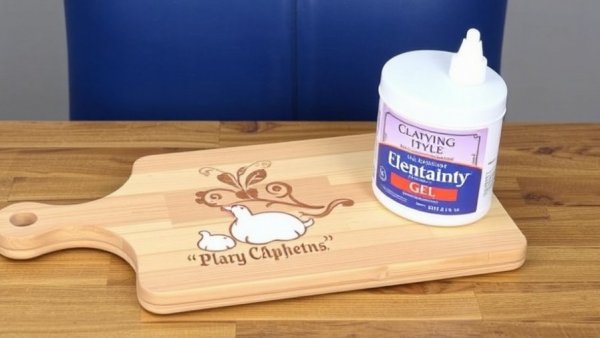
Turning a simple wooden serving board into a cherished decoration isn’t just a craft; it’s a way to add warmth and personality to your kitchen space. Using wood burning gel, a reusable transfer, and a heat gun, I created a stunning design that elevates an ordinary board into a heartfelt gift, perfect for Christmas or any season. If you've ever wondered how this transformation happens, read on!
Choosing the Right Wooden Board for Your Project
The right foundation can make all the difference. For my project, I dug into my craft stash and pulled out a wooden serving board bought from a discount store. This is an affordable DIY project that can come to life with minimal investment. When selecting your board, opt for unfinished wood—check craft outlets like Walmart or local stores for various shapes. Look for a smooth surface; my initial board had a label that left a residue I didn’t like. After sanding and flipping it to the cleaner side, I was ready to start.
The Importance of Wood Type and Treatment
Different types of wood react uniquely when different finishes are applied, and wood grain can significantly influence the final look. Softwoods like pine burn differently than hardwoods such as cherry or oak. That natural variation is what adds character to your pieces, but fine-tuning each one requires a careful eye. Before you start, ensure the board surface is clean, smooth, and devoid of any deep grain that may affect the design outcome.
Applying the Wood Burning Gel: Step-by-Step
Beginning with a thick wood burning gel, I stirred it well for an even consistency before applying it to my board. Using a reusable transfer allowed me to set the design with ease; I secured it firmly before spreading the gel over the open areas. Ensure to keep your transfer flat to avoid any shifts. After completely covering the design, I gently lifted the transfer and cleaned it immediately, readying it for future use.
Heat Activation: The Crucial Second Step
Here comes the fun part! A heat gun is essential for developing the burned design—hair dryers just won’t cut it. I used my two-speed heat gun, keeping it a reasonable distance from the wood to avoid scorching. The magic happens as the gel starts to darken with the heat. Remember to keep the machine moving to avoid over-baking one spot, and always work in a well-ventilated area. Once you see the full design emerge, it’s permanent!
Enhancing Your Board’s Aesthetic with Seasonal Decor
While the burned design speaks for itself, adding decorations brings another layer of beauty. To add a touch of Christmas spirit, I adorned my board with red ribbon and greenery. This decorative touch is functional too; it can be removed and switched out with more neutral colors for year-round use. The word “home” makes this an ideal kitchen accent that resonates through all seasons.
Embracing the DIY Spirit: Why It Matters
Creating handmade gifts is not only perfect for personal expression; it also fosters a sense of community and belonging. Investing time in crafting enjoyable gifts reflects love and consideration for those we care about. Plus, embedding such creativity into our homes translates to a warmer, more inviting environment that family and friends can enjoy.
Final Considerations for Future Projects
As you approach your future DIY projects, remember that choosing the right materials and applying techniques with care leads to rewarding results. Whether it’s a serving board for a gift, a display piece for your kitchen, or just a fun afternoon project, each creation allows you to express a part of your personality. Utilize what you’ve learned from this project as a springboard for crafting unique, beautiful items that resonate with your home’s essence.
With your newfound skills, I encourage you to take on this project for your next gift-giving occasion or as a fun hobby to add character to your home!

Write A Comment