

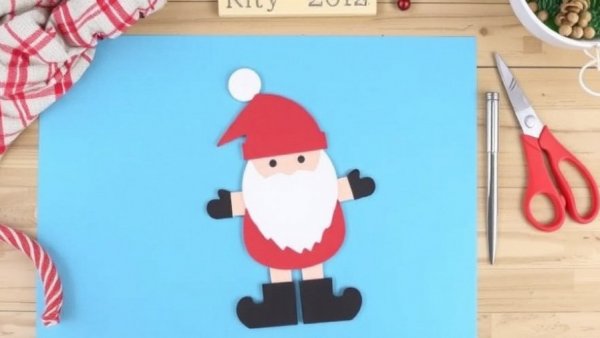
Bring Cheer to Your Home with a DIY Wooden Santa
The holiday season is a perfect time to embrace creativity, and what better way to do that than crafting your very own DIY wooden Santa cutout? This delightful project not only allows for personal flair but also acts as a charming holiday decor piece that can elevate your home’s festive spirit. With a few materials and some imagination, you can create an adorable Santa that adds personality and warmth to your celebrations.
Your DIY Santa Craft Journey Starts Here
This project kicked off my holiday creativity as I opened my November craft box, filled with wooden pieces destined to become Santa. Layered cutouts are perfect for this kind of work, as they transform a simple idea into a stunning three-dimensional figure with depth and character. I used bright hues like red, green, and white, complemented by a soft vanilla, while dark stained wood served as a backdrop that perfectly highlighted Santa's jolly appearance.
Choose Your Color Scheme for a Personal Touch
One of the joys of crafting is the chance to tailor a project to your home’s unique style. Think about the color palette of your holiday decor—perhaps a traditional deep red or a whimsical pale pink and icy blue. Mixing warm and cool tones can give your Santa a contemporary edge. This versatility allows for more than just a festive decoration; it can be a conversation starter at any gathering.
Essential Supplies for Creating Your Santa Cutout
To embark on this festive crafting journey, here are the essential supplies you’ll need:
- Layered wooden Santa cutouts
- White chalk paste, acrylic paint, or chalk paint
- Colors: Red, Green, and Vanilla
- Small brushes or foam daubers
- Ruby Red POSCA pen
- Sandpaper and Distress Ink
- Wood glue
- An old toothbrush for paint splattering
Keep in mind that this project is great for utilizing craft supplies you may already have, making it both accessible and budget-friendly.
Painting Technique: A Step-by-Step Guide
Once you’ve sorted your wooden pieces by color, it’s time to start painting! This method speeds up the process while allowing you to visualize the final product. Santa's red suit and hat need one or two coats to ensure a vibrant finish, while the warmer tones for his face and hands will require careful layering. Remember, thin coats are key to avoiding paint oversaturation.
To create a beautiful texture on Santa’s hat, consider swirling the brush during application. This detail adds a dynamic visual element that enhances richness to the traditional color. Adding playful accents with a Ruby Red POSCA pen brings your wooden Santa to life. The uniqueness of freehand lines or dotted patterns embodies the charm of a handmade craft.
Creating the Perfect Distressed Look
After completing the painting, take your project to the next level by adding a rustic touch. Lightly sand the edges and raised areas of your painted wooden pieces to imitate natural wear. Adding a touch of Ground Espresso Distress Ink provides warmth and depth, making the artwork feel cozy and inviting—a touch that resonates deeply during the holiday season.
Final Assembly: Bringing Santa to Life
Before gluing your pieces, arranging them is crucial to ensure perfect spacing and understanding how each layer fits together. This step encourages exploration of your own creativity and the chance to adjust the positioning as you see fit. Finally, secure everything together and step back to admire your handiwork—a wooden Santa that embodies your holiday spirit, ready to add joy to your home.
Crafting a Community Spirit Through DIY Projects
Engaging in DIY projects like this allows not only for the expression of creativity but also fosters a sense of connection, especially in our current times. Sharing this craft with loved ones can become a memorable bonding experience, breathing life into traditions while showcasing individuality in home decor.
Celebrate and Spread Joy: Your Call to Action!
As you prepare for the most wonderful time of the year, don’t hesitate to dive into this DIY wooden Santa project. Gather your family, friends, or neighbors to share this delightful experience, creating lasting memories and perhaps some new festive traditions. Happy crafting!

Write A Comment