

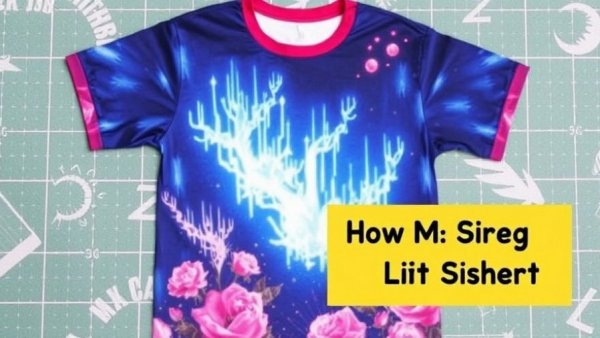
Creating a Cozy Winter Wardrobe: Your Guide to Sublimation
Winter is a magical time, especially with the prospect of curling up on the couch with a cozy shirt that captures the season's essence. Recently, I embarked on a delightful DIY project where I created a charming winter-themed shirt featuring a design from Snowy’s Creamery. This project not only brought warmth through creativity but also offered practical tips for others looking to try their hand at sublimation at home.
Why Choose Sublimation for Your Winter Design?
The joy of crafting seasonal attire is knowing you can wear it for more than just one occasion. Sublimation shirts allow for vibrant, playful designs that echo winter's charm without tying them to a specific holiday. I opted for Snowy’s Creamery as it evokes a fun vibe with bright colors and an ice cream theme, making it wearable all winter long.
Selecting the Perfect Shirt for Sublimation Designs
Not all fabrics are created equal when it comes to sublimation. For best results, aim for shirts with a high polyester content; I found that the 62% polyester fabric perfectly supported my vibrant design. Higher polyester percentages tend to yield brighter colors, making it essential to choose wisely. White or light-colored shirts are optimal since sublimation works by embedding ink into the fabric—a technique that doesn’t perform well with dark colors.
Gathering Your Materials: What You Need
To embark on your sublimation journey, you’ll need specific materials. For this project, I utilized:
- A light 62% polyester shirt
- Snowy’s Creamery sublimation design
- A heat press
- Heat-resistant tape
- A wool mat for even pressing
- Parchment paper to prevent ink bleed
Having these supplies on hand is crucial for a smooth crafting experience. The design package even includes pressing instructions, which can be incredibly helpful for beginners.
Preparing for the Perfect Press
Setting up your workspace is essential for achieving a successful result. I smoothened out my shirt on a wool mat to ensure an even surface, which helps in making consistent contact during the pressing process. For thinner shirts, I recommend placing parchment paper inside to prevent any ink from transferring to the backside. This added layer of protection goes a long way in ensuring the final product looks its best.
Securing Your Design: Taping for Precision
Once your shirt is prepped, the next step is to position the sublimation design accurately. Here, taping the design in place is non-negotiable. Any movement can lead to blurred or misaligned designs—especially around detailed areas such as text. A steady hand while pressing is key; I ensured everything was secure before carefully handling the heat press.
Mastering Heat Pressing Techniques
Before you begin the pressing, set your heat press to 360 degrees Fahrenheit and start with an initial press of 60 seconds. This can vary based on your heat press model, so refer to your sublimation package for guidance. During pressing, check on the progress by peeling back a corner of the design. If colors appear faded, simply press those areas for a bit longer while keeping the paper in place. It’s all about balancing heat, pressure, and timing for optimal results, so be attentive.
Reaping the Rewards: The Finished Shirt
The moment you pull the shirt away from the heat, anticipation builds. Your warm and cozy Snowy’s Creamery shirt is now ready for those chilly winter days. This DIY project not only allows for creativity but also provides a way to enjoy the fruits of your labor in a practical and comfortable manner.
Next Steps: Explore More DIY Crafting Ideas!
Now that you've mastered making sublimation shirts, the sky's the limit! From custom graphic tees to personalized gifts, sublimation opens a world of creative possibilities. Take the plunge into other seasonal designs or explore unique sublimation projects you can incorporate into your decoration or gift-giving.
Ready to unleash your creativity? Dive into projects that express your personal style and add warmth to your winter wardrobe. Embrace the wonderful world of DIY, and create pieces that are not just fashionable but full of fun memories.

Write A Comment