Add Row
Add Element
cropper
update
Atlanta Home Garden Insider
update
Add Element
  • Home
  • Categories
    • DIY Projects
    • Sustainable Practices
    • Design Trends
    • Landscaping
    • Lawn and Garden Care
  • Smart Home Tech
  • Interior Design Tips
  • Home Maintenance
August 03.2025
3 Minutes Read

Transform Your Shower with Epoxy Flooring: A Complete Guide for Homeowners

Modern bathroom with epoxy shower floor, bright lighting.

Is Epoxy Flooring Right for Your Shower?

Epoxy flooring is celebrated for its exceptional durability, making it a favorite in garages and commercial spaces alike. However, many homeowners often wonder, "Can you epoxy a shower floor?" The answer is a resounding yes! Not only does epoxy enhance the appearance of your shower, but it also adds value to your bathroom. This article delves into the process of applying epoxy to your shower floor and offers essential tips to help you avoid common pitfalls.

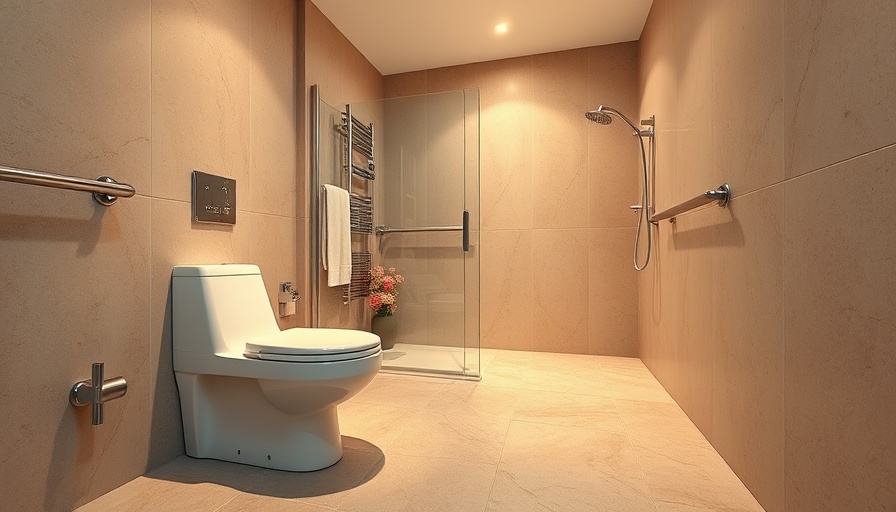
The Case for Epoxy Shower Floors

One of the primary reasons to consider epoxy for your shower floor is its waterproof properties. Homeowners can rest assured knowing that epoxy provides an effective sealant against moisture, preventing water damage and mold growth. Additionally, epoxy flooring is customizable, allowing you to choose colors and finishes that align with your desired aesthetic. From glossy finishes to decorative flecks, the design possibilities are endless.

Getting Started: Preparation is Key

Before diving into the installation, it's crucial to prepare your shower floor adequately. Begin by cleaning the surface thoroughly, ensuring it is dry and free of debris. An epoxy shower floor kit is your best friend here, containing everything you need for a successful application. Ensure the room is warm, as cold temperatures can hinder the epoxy from curing effectively.

How to Apply Epoxy on Your Shower Floor

The application process involves several steps to ensure a perfect finish. Here’s a simple guide:

  1. Prepare Your Surface: Make sure your shower floor is clean and dry. Remove any existing grout or residue that could interfere with adhesion.
  2. Mix Your Epoxy: Following the kit's instructions, mix the epoxy components thoroughly to activate its binding properties.
  3. Application: Use a trowel or sponge to evenly spread the epoxy across the surface, ensuring that all corners and crevices are filled.
  4. Allow to Cure: Patience is vital. Let the epoxy cure for at least 12 hours before using the shower to maintain its integrity.

Common Mistakes to Avoid

While applying epoxy may seem straightforward, there are common missteps to be aware of. One of the biggest errors is not allowing the floor to cure for the recommended time. Rushing the process can lead to uneven surfaces and premature wear. Additionally, failing to create a warm environment for curing can result in a lack of adhesion.

Upkeep: Maintaining Your Epoxy Shower Floor

After investing time and effort into your newly epoxied shower floor, it’s essential to maintain its shine. Regular cleaning with mild soaps and avoiding harsh chemicals will keep your floor looking brand new. Many epoxy materials boast durability for up to 15 years with proper care, giving you a long-lasting solution that enhances your bathroom's appeal.

What Homeowners Are Saying

The feedback from homeowners who have tackled an epoxy shower floor is overwhelmingly positive. Many appreciate the ease of maintenance and the stunning appearance it lends to their bathrooms. Moreover, users often remark on the satisfaction of executing a DIY project that results in a functional and beautiful space.

Take the Leap: Transform Your Bathroom Today!

If you are considering enhancing the aesthetic and functionality of your shower, applying epoxy is a fantastic option. With proper preparation and care, your epoxy shower floor can last for years, providing a luxurious feel every time you step in. Don’t hesitate to give your bathroom the update it deserves!

Home Maintenance

0 Views

0 Comments

Write A Comment

*
*
Related Posts All Posts
08.04.2025

Why Swiffer is the Ideal Option for Cleaning Vinyl Plank Flooring

Update Can You Really Use a Swiffer on Vinyl Plank Flooring? Cleaning your home is essential for maintaining a healthy environment, especially for vinyl plank flooring that can elevate your interior aesthetic while requiring specific care. You may wonder if Swiffer, a popular cleaning brand, is safe to use. The simple answer is yes! Swiffer products, especially the Wet Jet, are designed to effectively clean and maintain vinyl flooring without causing damage. The Benefits of Using Swiffer on Vinyl Floors Using a Swiffer on vinyl flooring comes with distinct advantages that will make your cleaning routine easier. Here are a few benefits: Easy Application: Swiffer products are designed for convenience. The mops are light, easy to maneuver, and ideal for busy homeowners. Gentle on Floors: Swiffer Wet Jet effectively cleans without scratching, so you can maintain the luxurious look of your vinyl floors. Quick Drying: One of the top benefits of using Swiffer is that it dries quickly, reducing the risk of any water damage to your flooring. Versatile Cleaning: Whether it’s dusting away pet hair with dry cloths or removing stains with Wet Jet solutions, Swiffer caters to your cleaning needs. Your Go-To Swiffer Products When it comes to selecting the right Swiffer products for vinyl plank flooring, here are the top few to consider: Swiffer Wet Jet: The ideal choice for liquid spills and deep cleaning. It includes a cleaning solution that effectively lifts tough stains without causing harm to the floor. Swiffer Dry Cloths: Use dry cloths to quickly gather dust and debris. They are very convenient for a light clean between deeper cleaning sessions. Swiffer Dusters: Great for reaching into corners and areas where dirt collects, ensuring you maintain a spotless home. Cleaning Tips for Maintaining Vinyl Flooring Maintaining your vinyl flooring requires a bit more than just choosing the right cleaning tools. Here are practical tips to extend the life and beauty of your vinyl floors: Sweep Regularly: Make it a habit to sweep or use your Swiffer to pick up crumbs and pet hair frequently. Spot Clean Stains Immediately: Address any spills or stains right away. Leaving them can lead to more work down the line. Avoid Harsh Chemicals: When cleaning, stick with products designed for vinyl flooring; harsh chemicals can lead to discoloration over time. Use Mats and Rugs: Place area rugs at entryways to minimize dirt from shoes, and help protect your floors. Common Misconceptions About Vinyl Flooring Care There are a few myths surrounding cleaning vinyl plank flooring that can mislead homeowners: Myth: Water Ruins Vinyl Floors. While too much water can be harmful, using Swiffer Wet Jet in moderation is quite safe. Myth: All Mops are Safe on Vinyl Floors. Not all cleaning tools are created equally—opt for softer, non-scratch alternatives like Swiffer to avoid damage. Myth: Cleaning Vinyl is Complicated. In reality, maintaining vinyl flooring is simple with the right tools and techniques. Conclusion: The Smart Choice for Your Home Choosing Swiffer products is an excellent way to maintain the pristine condition of your vinyl plank flooring. This dynamic brand not only simplifies the cleaning process but also ensures that your floors remain spotless and beautiful. Don't forget to embrace additional cleaning habits like sweeping daily and using protective mats to further prolong the life of your flooring. Take charge of your home maintenance today! If you’re ready to invest in cleaning solutions, consider Swiffer to enhance your cleaning routine.

08.02.2025

Custom vs Standard Window Well Covers: Which Is Right For You?

Update Understanding Window Well Covers: A Homeowner's Guide Protecting your basement from water damage, pests, and accidents is crucial for any homeowner. That's where window well covers come into play. When it comes to choosing the right cover, you may find yourself torn between standard and custom options. Let’s explore the differences, so you can make an informed decision that fits your needs. Standard Window Well Covers: The Quick and Easy Solution Standard covers are akin to finding a ready-made outfit; they're easy to get, budget-friendly, and generally fit common window well sizes—like rectangular or semicircle models. Available in materials such as polycarbonate or metal, these covers often suit typical homes well. Advantages of Standard Covers Budget-Friendly: Standard covers are cost-effective and easily found in home improvement stores. Quick Installation: Simply measure your window well, select the correct size, and you’re good to go! Good for Common Wells: If your window well sizes are standard, these covers will provide adequate protection. Best for: Homeowners with standard window wells. DIY enthusiasts looking for a fast installation. Those aiming to save on costs. Custom Window Well Covers: Tailored for Perfection On the other end of the spectrum, custom covers are like tailored suits; they offer a precise fit specifically designed for your window wells, accommodating any unique shapes or slopes. This often results in superior protection and aesthetics. Benefits of Custom Covers Perfect Fit: Designed to fit the exact dimensions, ensuring no gaps that might allow water or debris to enter. Enhanced Protection: Custom covers excel at keeping out rain, snow, dirt, and wildlife. Stronger Materials: Many custom options can handle heavier loads, making them highly durable. Stylish Choices: Customization provides various options for material and color, allowing for better integration into your home’s aesthetics. Best for: Homes with uniquely shaped wells. Areas with extreme weather conditions. Families with young children or pets needing added safety. Making the Choice: Custom vs Standard Choosing between a standard and custom window well cover ultimately depends on your specific situation. Consider: Shape and Size: Is your window well unusual? A custom cover may be the answer. Weather Challenges: Frequent storms or heavy snow? A snug fit from a custom cover may offer peace of mind. Budget: If you’re aiming for savings and your windows are standard-sized, go with a standard cover. Real-Life Experiences: What Other Homeowners Are Saying In speaking with various homeowners, it's clear that experiences with window well covers vary widely based on personal preferences and individual circumstances. For instance, Jane from Ohio, who installed standard covers, found them sufficient until a heavy storm proved otherwise. Ultimately, she decided to invest in custom covers more suited to bedrock-like window wells. Meanwhile, Mark from Michigan succeeded with standard covers and avoids heavier structures around his home's foundation. Personal experiences such as these underscore the importance of weighing your options. Conclusion: Protecting What Matters Most Your window well covers can greatly affect the safety, efficiency, and aesthetic appeal of your home. Whether opting for a budget-friendly standard model or investing in a custom design tailored to your unique needs, what matters is that you choose the solution that best protects your home. Explore your options, consider your priorities, and don't hesitate to ask for professional advice when needed. After all, a well-chosen window well cover not only protects your home but enhances it. Ready to safeguard your home? Connect with us today to explore the best window well cover options tailored for your home!

08.02.2025

How to Build a Shower Curb for Dry Bathrooms: A Beginner's Guide

Update Why Building a Shower Curb is Essential for Homeowners For many homeowners, a shower curb is more than just a construction element—it’s crucial for maintaining a dry and safe bathroom environment. An improperly installed shower curb can lead to persistent water pooling on bathroom floors, creating slips and falls that can be hazardous, especially for older adults. Thus, understanding how to build a shower curb is an invaluable skill that promotes both functionality and safety in the home. Gathering Your Tools for Success Before diving into this DIY project, ensure you have all necessary tools and materials at hand. This includes: Non-corrosive screws Waterproof pan liner Gloves Liner glue Cement mortar Lath Portland cement Flat trowel A sturdy knife With these essentials, you can confidently tackle the task of constructing a durable shower curb. Understanding Material Choices The type of flooring in your bathroom is a key factor in determining the materials you will use for your shower curb. If your bathroom has wooden floors, for example, wooden bricks will suffice. Conversely, if your bathroom is outfitted with laminate flooring, utilize laminate bricks as they are suitable for your environment. When working on a concrete floor, remember that using lumber is inadvisable since it can absorb water. Instead, opt for waterproof materials to ensure longevity. Step-by-Step Guide: Building Your Shower Curb Constructing a shower curb might seem daunting at first, but it’s quite straightforward if you follow the right steps. Here's a simple guide: Prepare the Shower Curb: Start by gathering your bricks based on your flooring type. Then, cut the bricks into equal lengths, stacking them appropriately to maintain the right height for your shower door to function correctly. Install a Waterproof Pan Liner: This step is critical for preventing damage to your floor. Spread out the waterproof pan liner so it covers the entire shower area, not just the curb. A well-applied liner will ensure no water escapes to the bathroom floor. Secure the Curb Structure: After arranging the bricks and lining, secure everything in place with metal lath. Applying two or three layers will ensure you achieve the right stiffness required for support. Finish with Cement Mortar: Completing your curb with cement mortar not only enhances its solidity but also improves its waterproofing capabilities. Make sure to apply the mortar evenly and take your time for the best results. Common Misconceptions About DIY Shower Curbs Many novice DIY-ers believe that constructing a shower curb is overwhelmingly complex. However, by breaking the task down into basic steps and gathering the needed supplies, anyone can tackle this project. Embracing the challenge can empower individuals and foster a sense of accomplishment, leading to even more ambitious DIY home improvements down the line. Future Trends: Smart Shower Technology The evolution of smart home technology is making its way into bathroom renovations as well. Homeowners can now look at integrating smart sensors and monitoring systems alongside their shower adaptations for better water management, efficiency, and convenience. As you build your shower curb, consider how these advancements could be incorporated into your broader bathroom design plans. Actionable Insights for Homeowners Taking the first steps into DIY projects can be daunting, but creating your shower curb is not only a practical task but also an opportunity to enhance your home's value and personal satisfaction. By understanding the significance of this element in bathroom design, you gain insight into home maintenance that can lead to greater empowerment and independence. Are you ready to get started on your DIY project? Remember that taking action will not only improve your home but also provide you with the confidence to embark on future renovation projects. Happy building!

Terms of Service

Privacy Policy

Core Modal Title

Sorry, no results found

You Might Find These Articles Interesting

T
Please Check Your Email
We Will Be Following Up Shortly
*
*
*