Add Row
Add Element
cropper
update
Atlanta Home and Garden Insider
update
Add Element
  • Home
  • Categories
    • DIY Projects
    • Sustainable Practices
    • Design Trends
    • Landscaping
    • Lawn and Garden Care
  • Smart Home Tech
  • Interior Design Tips
  • Home Maintenance
October 13.2025
3 Minutes Read

Transform Your Property: Easy Fix for Broken Concrete Sidewalks

Easy fix for broken concrete sidewalks with leveling tools.

SEO Keyword: Easy Fix for Broken Concrete Sidewalks

If you're a homeowner looking to revitalize your outdoor space, you might want to consider addressing that broken concrete sidewalk that has been a safety concern. Homeowners often overlook concrete maintenance, but it plays a crucial role in curb appeal and overall safety. Fortunately, as explored in the video Fix Broken Concrete Sidewalks The Easy Way!, fixing your sidewalk can be a straightforward task.

In Fix Broken Concrete Sidewalks The Easy Way!, the discussion dives into the straightforward process of repairing sidewalk damage, exploring key insights that sparked deeper analysis on our end.

Understanding Common Sidewalk Issues

Cracks and uneven surfaces are some of the most common issues homeowners face with concrete sidewalks. Weather wear, tree roots, and general settling can lead to these problems. Not only do they detract from the aesthetic of your home, but they can also pose serious safety hazards for pedestrians. Understanding these issues is the first step towards effective repairs.

The Tools You Need for Concrete Repair

Before diving into repairs, it’s vital to gather the right tools. A basic toolkit for sidewalk repair includes:

  • Epoxy concrete repair kit: This is essential for filling gaps and cracks.
  • Putty knife: You'll need this to spread the epoxy smoothly.
  • Concrete resurfacer: If the surface is especially damaged, consider a resurfacing product.
  • Protective gear: Safety glasses and gloves should not be overlooked.

These tools not only simplify the repair process but also ensure that you achieve durable and high-quality results.

Step-by-Step Guide to Repairing Your Sidewalk

With the right tools and materials in hand, you can tackle sidewalk repairs efficiently. Here’s a step-by-step process:

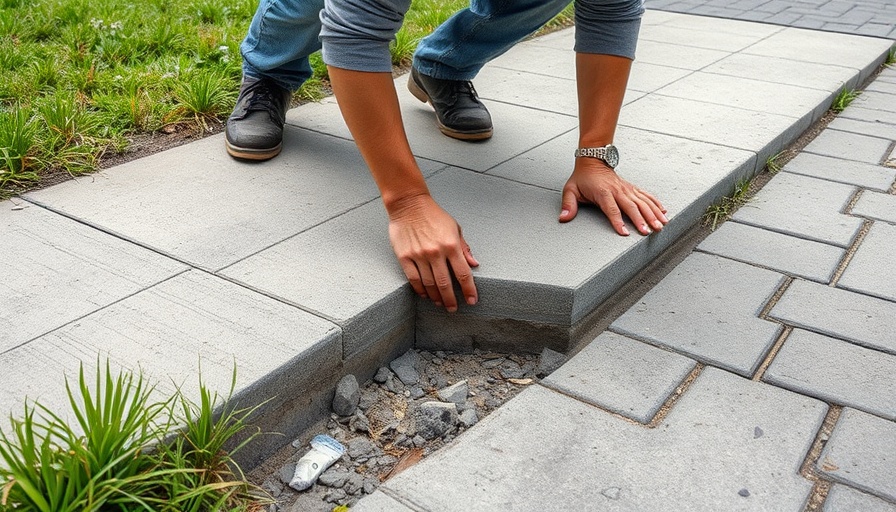
  1. Clean the Area: Remove any debris, dirt, or loose concrete around the cracks. This ensures the new material adheres properly.
  2. Apply the Epoxy: Follow the instructions on the epoxy kit to mix and apply it into the cracks. Use your putty knife to smooth the surface.
  3. Let It Cure: Allow the repair to cure for the recommended period. Proper curing is essential for long-term durability.
  4. Add Resurfacer if Needed: If your sidewalk is particularly uneven, apply a concrete resurfacer to create a smooth finish.
  5. ]

This straightforward method not only saves you money but also boosts the safety and appearance of your home.

Real-Life Success: A Homeowner’s Experience

Jane, a homeowner in her 50s, shared her experience with sidewalk repair. “It felt daunting at first,” she said, “but after watching a few DIY videos and setting aside a Saturday morning, it became quite enjoyable. I couldn't believe how much better it looked, and now I don’t worry about my grandchildren tripping on uneven surfaces.” Jane's story is a reminder that with a little patience and elbow grease, significant improvements can be made to a home's exterior.

Environmental Considerations in DIY Repairs

One important aspect that homeowners should keep in mind is sustainability. Opting for eco-friendly repair products minimizes environmental impact. Look for concrete fillers and resurfacing materials that are labeled as low-VOC (volatile organic compounds) and consider using recycled materials where possible.

The Economic Benefits of Doing It Yourself

Not only does DIY sidewalk repair save you money on labor costs, but it also enhances your home's value. According to the National Association of Realtors, making aesthetic improvements can yield an impressive return on investment—often between 70% to 90%. Plus, a well-maintained sidewalk enhances safety and accessibility, making your home more appealing to potential buyers.

Final Thoughts: Empower Yourself

As a homeowner, understanding how to undertake sidewalk repairs empowers you to enhance both the beauty and safety of your property. If you’re eager to get started on your own sidewalk repair project, the tips from the video Fix Broken Concrete Sidewalks The Easy Way! provide a great foundation. Remember, taking on these projects not only benefits your home but also fosters a sense of accomplishment—so roll up your sleeves and get to work!

Stay proactive about home maintenance. With the right knowledge and tools, you can transform your outdoor space considerably and keep your home safe.

Home Maintenance

2 Views

0 Comments

Write A Comment

*
*
Related Posts All Posts
02.06.2026

Shed Renovations: Why Drywall Is Out and Alternatives Are In

Update Revamping Shed Interiors: Why Drywall Might Be Outdated As homeowners seek efficient and durable solutions for their outdoor spaces, the traditional use of drywall in sheds is being re-evaluated. While drywall once seemed the go-to choice for its ease of installation and finish, it often succumbs to moisture and temperature fluctuations typical in shed environments. In this article, we explore compelling alternatives that are more suited for sustaining outdoor structures, all designed to enhance your shed's functionality and longevity.In the video 'Drywall Is Dead for Sheds—Here’s the Alternative,' we explore exciting materials that can replace drywall in shed renovations, prompting us to analyze these options further. Alternative Materials: What’s Better Than Drywall? One of the key alternatives to drywall is plywood or OSB (Oriented Strand Board). Both options provide a sturdy wall structure that is easier to maintain and more resistant to rot and mold. Additionally, they can be treated for added weather resilience. Another excellent alternative is the use of metal panels, which not only lend a modern aesthetic but also offer exceptional durability against the elements. Cost-Effective Solutions for Homeowners Switching to non-drywall options can save homeowners both time and money in the long run. Costs associated with drywall repairs and replacements can significantly add up, especially when dealing with moisture damage. Investing in materials like treated plywood or metal can therefore prove more financially viable, especially considering their extended lifespan. The DIY Factor: Easy Installation Tips For the DIY enthusiasts, these alternative materials are relatively easy to work with. Plywood sheets can be cut to size using standard tools and nailed or screwed into place without heavy machinery. Likewise, metal panels can be affixed without extensive training. Many homeowners taking on such projects find this simplicity appealing, allowing for a personal touch in their shed renovations. Future Trends in Outdoor Structures Looking ahead, the trend towards sustainable materials continues to grow. Innovations in composite materials that combine durability with eco-friendliness are emerging in the shed construction space. Utilizing modern design trends that favor minimalism and environmental consciousness, homeowners can enhance aesthetics while making responsible choices. Combining Functionality with Design As we pivot away from traditional drywall, there’s an opportunity to blend functionality with design. By opting for painted plywood, homeowners can achieve a rustic charm with a splash of color, transforming their sheds into multi-functional spaces. Whether used for storage, hobbies, or workshops, these new concepts can turn a shed into a beautiful extension of home life. Creating an Inviting Shed Space For many homeowners, a shed can be more than just a storage unit; it can be an oasis for relaxation or creativity. Thoughtful design—including quality materials that replace drywall—can enhance the overall atmosphere of your shed. So think about implementing cozy furnishings, lighting, and decor that align with your personal style. With the right approach, your shed can become a welcoming retreat.

01.16.2026

Unlock the Secrets to Your Shed Ceiling with This Easy Method

Update Transform Your Shed: An Unconventional Approach When it comes to constructing the perfect shed, workshop, or garage ceiling, many homeowners might not realize that there’s a uniquely simple method available that could elevate their DIY game dramatically. In the video titled "The Easiest Shed, Workshop, or Garage Ceiling You’ve Never Tried," the host introduces an innovative yet straightforward technique that simplifies the process, appealing particularly to individuals aged 40 to 65 who are eager to invest their time and resources into home improvement.In 'The Easiest Shed, Workshop, or Garage Ceiling You’ve Never Tried,' the discussion delves into innovative DIY ceiling techniques that inspire homeowners to maximize their shed potential. Why Shed Ceilings Matter for Homeowners The ceiling of your shed or workshop is more than just an overhead feature; it serves crucial roles in insulation and aesthetics. For homeowners, an effective ceiling can help regulate temperature, keeping your tools and equipment safe from harsh weather conditions and pests. Moreover, a well-designed ceiling can enhance light reflection, making your workspace feel larger and more inviting, which is especially beneficial for aging homeowners who may need ease of access and visibility. Crafting a Simple Yet Effective Ceiling The method shown in the video involves utilizing readily available materials and tools, making it accessible and great for DIY enthusiasts. One of the standout features of this approach is the ability to use a countersink drill bit, which allows for a clean, finished look while ensuring sturdiness. This tool not only simplifies the building process but also enhances the durability of the ceiling installation. For homeowners not entirely comfortable with home improvement projects, this technique shines as a manageable option. Community Insights: Connecting with Fellow DIYers The video also highlights the importance of community engagement among DIY enthusiasts. Joining the Everyday Shed DIY Community offers homeowners a platform to share their experiences, ask for advice, and gain inspiration from each other’s projects. For those aged 40 to 65, this social connection can provide both motivation and reassurance, as it allows individuals to learn from each other’s successes and mistakes. Looking Ahead: Future Trends in DIY Projects As homeowner interests evolve over time, it’s worth considering how trends in DIY projects will continue to change. There’s a growing focus on sustainability and the use of eco-friendly materials, as many individuals are seeking to minimize their environmental footprint while maintaining their homes. This shift can influence how one might approach projects like shed ceilings in the near future, emphasizing the importance of longevity and efficiency. Seizing the Opportunity: Making Decisions with Knowledge For homeowners tuning into these DIY resources, the main takeaway should be the empowerment of making informed decisions in their home improvement endeavors. Whether you’re looking to revamp a space for better organization, or simply wishing to create a more functional area, knowing the right methods and materials is paramount. Engaging in projects that reinforce one’s home can lead to a more fulfilling living environment and add substantial value to your property. Final Thoughts: Your Shed Awaits an Upgrade In conclusion, the insights shared in "The Easiest Shed, Workshop, or Garage Ceiling You’ve Never Tried" serve as a fantastic jumping-off point for homeowners ready to enhance their spaces with ease. These practical tips not only streamline the construction process but potentially open up new avenues for creativity and improvement in one’s home. So gather your materials, connect with the DIY community, and embark on a journey to transform not just your shed, but your entire approach to home maintenance.

01.10.2026

Mastering Your Walk-in Shower: DIY Building Tips for a Shower Base

Update Mastering Your Walk-in Shower: Essential Tips for Building the Perfect Base Building a shower base for a walk-in shower is an exciting DIY journey, particularly for homeowners who cherish their independence and enjoy home maintenance projects. The allure of a walk-in shower lies in its accessibility and the chic, spacious feel it lends to your bathroom. However, the installation process can feel daunting without clear guidance. In this article, we’ll break down the steps to construct a walk-in shower base and empower you to tackle this project with confidence. Understanding the Basics: Why Installation Matters Before diving into the installation, it’s important to understand that a well-built shower base not only enhances the functionality of your bathroom but also contributes to its overall aesthetic. An efficient shower base prevents water spillage, ensuring the safety of your bathroom while also setting the tone for relaxation. According to recent trends, many homeowners are opting for walk-in showers to elevate their bathrooms, further emphasizing the importance of correct installation. Step 1: Gathering Your Tools and Materials The first step in constructing a shower base is assembling all necessary tools and materials. This preparation is key to a smooth installation process. Essential tools include a shower arm, faucet, shower head, sloping shower tray, waterproof materials, waterproof adhesive, and specific tools like a circular saw, hammer, trowel, and tape measure. Having everything at your fingertips not only saves time but also enables you to complete the project without unnecessary interruptions. Step 2: Checking the Shower Floor’s Condition Before any installation begins, check the status of your existing shower floor. The floor should be flat and free from bumps to ensure the shower base fits snugly. An uneven base can lead to leaks and water pooling, creating further issues down the line. If you find any flaws, address these before proceeding. Step 3: Installing the Shower Tray Once the floor is prepared, apply an even layer of thin-set mortar to the subfloor using a trowel. It’s important to create a solid foundation for your shower tray. Make sure to press the shower tray down firmly into place until it’s secure. The ideal position will create the slope needed for proper water drainage. It should also feel solid underfoot. Ensuring Waterproofing: A Critical Step After installing the shower tray, it’s essential to implement adequate waterproofing to prevent water damage. This can be achieved by applying a liquid waterproofing membrane along the seams and edges of the shower base. This layer acts as a barrier, safeguarding your home against leaks and mold growth, which is especially crucial in humid environments. Embracing the DIY Spirit: Why You Should Consider This Project This DIY project is not just about enhancing your bathroom—it's also about embracing a sense of accomplishment. Many homeowners, especially those aged 40-65, find joy and empowerment in completing home renovations without professional assistance. It fosters self-sufficiency and can even serve as a bonding experience if you choose to involve family or friends. Final Touches: Adding Comfort and Safety In your efforts to create the perfect shower space, don’t overlook safety. Installing curbs around the shower area will help reduce slippage. Also, completing the look with elegant shower tiles not only enhances the design but offers added durability. Decorative touches can personalize your space, making it uniquely yours. Your Next Steps: Ready to Build Your Walk-in Shower Base? As you prepare to embark on this exciting journey towards a fully functional, stylish walk-in shower, remember that every step you take contributes to a larger goal of creating a beautiful, relaxing bathroom environment. If you’re inspired by this project, gather your supplies, invite a friend, and get started on your shower base today!

Terms of Service

Privacy Policy

Core Modal Title

Sorry, no results found

You Might Find These Articles Interesting

T
Please Check Your Email
We Will Be Following Up Shortly
*
*
*