Add Row
Add Element
cropper
update
Atlanta Home and Garden Insider
update
Add Element
  • Home
  • Categories
    • DIY Projects
    • Sustainable Practices
    • Design Trends
    • Landscaping
    • Lawn and Garden Care
  • Smart Home Tech
  • Interior Design Tips
  • Home Maintenance
August 13.2025
3 Minutes Read

The Ultimate Guide to Choosing Pet-Friendly Flooring for Dogs

Best flooring for dogs: black dog on cork floor beside a plant and basket.

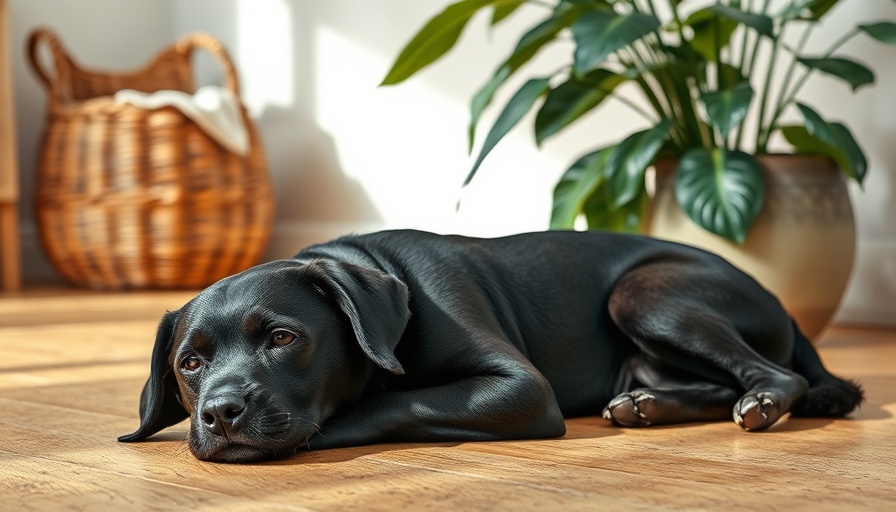
Choosing the Right Flooring: A Must for Pet Owners

As a pet owner, selecting the right flooring is crucial for maintaining both your home and the happiness of your furry friends. It's not just about aesthetics; it's about finding options that can withstand the inevitable messes, scratches, and stains that come with living with pets. When making your choice, consider factors like durability, maintenance, and comfort.

The Importance of Scratch Resistance

Dog owners know that even the most well-behaved pet can leave its mark on the floors, literally! Scratch-resistant flooring is a game-changer for maintaining a polished look in your home. Materials like vinyl and cork provide excellent resistance against scratches, making them popular choices among pet owners. This ensures that you won’t have to stress about the appearance of your floors every time your dog plays or runs through the house.

Water and Stain Resistance: What You Need to Know

No one wants to deal with the aftermath of a pet accident. That’s why looking for flooring that is resistant to water and stains is vital. Vinyl flooring, for example, is not only durable but also provides a waterproof barrier that can withstand spills and accidents. This kind of protection helps you maintain a cleaner home and saves you from potential costly repairs.

Low Maintenance Flooring Options

As a busy pet owner, you’ll appreciate flooring choices that require less upkeep. Easy-to-clean materials like laminate or vinyl can save you time and hassle in the long run. These surfaces can typically be wiped down without needing special cleaning solutions, making them practical for everyday life.

Comfort and Traction Matters

Comfort is key for your pets, too! Flooring with good traction prevents slips and slides, especially in older dogs who may have mobility issues. Cork flooring, for instance, provides a softer surface that cushions your pets’ joints and reduces the risk of accidents. It’s also non-toxic, ensuring a safe environment for your dogs to roam around freely.

Exploring Pet-Friendly Flooring Options

We have gathered some of the best flooring options that align with your pets’ needs while being stylish and durable. Let's take a look at:

  • Vinyl Flooring: Often considered the top choice for pet owners, it combines durability and affordability, making it a smart investment for families with pets.
  • Linoleum Flooring: This eco-friendly option is easy to clean and provides excellent durability. Its non-toxic properties ensure a safe environment for your pets, with the added benefit of not showing scratches easily.
  • Cork Flooring: Known for its antibacterial properties and softness underfoot, cork is a great choice for pets and reduces noise, which is perfect for those late-night zoomies!
  • Bamboo Flooring: This sustainable material offers natural aesthetic appeal and is harder than traditional wood, making it more resistant to scratches.

Future Trends in Pet-Friendly Flooring

Looking ahead, the demand for pet-friendly flooring options is growing. Companies are focusing on developing sustainable materials that are not only environmentally conscious but also resilient against scratches and stains. Innovations like textured vinyl and enhanced laminate finishes may soon become household staples, providing even more choices for pet owners.

Making a Decision You Can Feel Good About

Choosing the right flooring for your home doesn’t have to be overwhelming. By considering your dog’s behavior, the amount of traffic in your home, and your cleaning preferences, you can find the perfect flooring solution that meets both your budget and your lifestyle needs.

Don't forget, investing in the right flooring not only enhances your living space but also creates a safe and comfortable haven for your pets. Ready to revamp your home? Select a floor that complements your style and works wonderfully with your furry friends.

Home Maintenance

7 Views

0 Comments

Write A Comment

*
*
Related Posts All Posts
02.06.2026

Shed Renovations: Why Drywall Is Out and Alternatives Are In

Update Revamping Shed Interiors: Why Drywall Might Be Outdated As homeowners seek efficient and durable solutions for their outdoor spaces, the traditional use of drywall in sheds is being re-evaluated. While drywall once seemed the go-to choice for its ease of installation and finish, it often succumbs to moisture and temperature fluctuations typical in shed environments. In this article, we explore compelling alternatives that are more suited for sustaining outdoor structures, all designed to enhance your shed's functionality and longevity.In the video 'Drywall Is Dead for Sheds—Here’s the Alternative,' we explore exciting materials that can replace drywall in shed renovations, prompting us to analyze these options further. Alternative Materials: What’s Better Than Drywall? One of the key alternatives to drywall is plywood or OSB (Oriented Strand Board). Both options provide a sturdy wall structure that is easier to maintain and more resistant to rot and mold. Additionally, they can be treated for added weather resilience. Another excellent alternative is the use of metal panels, which not only lend a modern aesthetic but also offer exceptional durability against the elements. Cost-Effective Solutions for Homeowners Switching to non-drywall options can save homeowners both time and money in the long run. Costs associated with drywall repairs and replacements can significantly add up, especially when dealing with moisture damage. Investing in materials like treated plywood or metal can therefore prove more financially viable, especially considering their extended lifespan. The DIY Factor: Easy Installation Tips For the DIY enthusiasts, these alternative materials are relatively easy to work with. Plywood sheets can be cut to size using standard tools and nailed or screwed into place without heavy machinery. Likewise, metal panels can be affixed without extensive training. Many homeowners taking on such projects find this simplicity appealing, allowing for a personal touch in their shed renovations. Future Trends in Outdoor Structures Looking ahead, the trend towards sustainable materials continues to grow. Innovations in composite materials that combine durability with eco-friendliness are emerging in the shed construction space. Utilizing modern design trends that favor minimalism and environmental consciousness, homeowners can enhance aesthetics while making responsible choices. Combining Functionality with Design As we pivot away from traditional drywall, there’s an opportunity to blend functionality with design. By opting for painted plywood, homeowners can achieve a rustic charm with a splash of color, transforming their sheds into multi-functional spaces. Whether used for storage, hobbies, or workshops, these new concepts can turn a shed into a beautiful extension of home life. Creating an Inviting Shed Space For many homeowners, a shed can be more than just a storage unit; it can be an oasis for relaxation or creativity. Thoughtful design—including quality materials that replace drywall—can enhance the overall atmosphere of your shed. So think about implementing cozy furnishings, lighting, and decor that align with your personal style. With the right approach, your shed can become a welcoming retreat.

01.16.2026

Unlock the Secrets to Your Shed Ceiling with This Easy Method

Update Transform Your Shed: An Unconventional Approach When it comes to constructing the perfect shed, workshop, or garage ceiling, many homeowners might not realize that there’s a uniquely simple method available that could elevate their DIY game dramatically. In the video titled "The Easiest Shed, Workshop, or Garage Ceiling You’ve Never Tried," the host introduces an innovative yet straightforward technique that simplifies the process, appealing particularly to individuals aged 40 to 65 who are eager to invest their time and resources into home improvement.In 'The Easiest Shed, Workshop, or Garage Ceiling You’ve Never Tried,' the discussion delves into innovative DIY ceiling techniques that inspire homeowners to maximize their shed potential. Why Shed Ceilings Matter for Homeowners The ceiling of your shed or workshop is more than just an overhead feature; it serves crucial roles in insulation and aesthetics. For homeowners, an effective ceiling can help regulate temperature, keeping your tools and equipment safe from harsh weather conditions and pests. Moreover, a well-designed ceiling can enhance light reflection, making your workspace feel larger and more inviting, which is especially beneficial for aging homeowners who may need ease of access and visibility. Crafting a Simple Yet Effective Ceiling The method shown in the video involves utilizing readily available materials and tools, making it accessible and great for DIY enthusiasts. One of the standout features of this approach is the ability to use a countersink drill bit, which allows for a clean, finished look while ensuring sturdiness. This tool not only simplifies the building process but also enhances the durability of the ceiling installation. For homeowners not entirely comfortable with home improvement projects, this technique shines as a manageable option. Community Insights: Connecting with Fellow DIYers The video also highlights the importance of community engagement among DIY enthusiasts. Joining the Everyday Shed DIY Community offers homeowners a platform to share their experiences, ask for advice, and gain inspiration from each other’s projects. For those aged 40 to 65, this social connection can provide both motivation and reassurance, as it allows individuals to learn from each other’s successes and mistakes. Looking Ahead: Future Trends in DIY Projects As homeowner interests evolve over time, it’s worth considering how trends in DIY projects will continue to change. There’s a growing focus on sustainability and the use of eco-friendly materials, as many individuals are seeking to minimize their environmental footprint while maintaining their homes. This shift can influence how one might approach projects like shed ceilings in the near future, emphasizing the importance of longevity and efficiency. Seizing the Opportunity: Making Decisions with Knowledge For homeowners tuning into these DIY resources, the main takeaway should be the empowerment of making informed decisions in their home improvement endeavors. Whether you’re looking to revamp a space for better organization, or simply wishing to create a more functional area, knowing the right methods and materials is paramount. Engaging in projects that reinforce one’s home can lead to a more fulfilling living environment and add substantial value to your property. Final Thoughts: Your Shed Awaits an Upgrade In conclusion, the insights shared in "The Easiest Shed, Workshop, or Garage Ceiling You’ve Never Tried" serve as a fantastic jumping-off point for homeowners ready to enhance their spaces with ease. These practical tips not only streamline the construction process but potentially open up new avenues for creativity and improvement in one’s home. So gather your materials, connect with the DIY community, and embark on a journey to transform not just your shed, but your entire approach to home maintenance.

01.10.2026

Mastering Your Walk-in Shower: DIY Building Tips for a Shower Base

Update Mastering Your Walk-in Shower: Essential Tips for Building the Perfect Base Building a shower base for a walk-in shower is an exciting DIY journey, particularly for homeowners who cherish their independence and enjoy home maintenance projects. The allure of a walk-in shower lies in its accessibility and the chic, spacious feel it lends to your bathroom. However, the installation process can feel daunting without clear guidance. In this article, we’ll break down the steps to construct a walk-in shower base and empower you to tackle this project with confidence. Understanding the Basics: Why Installation Matters Before diving into the installation, it’s important to understand that a well-built shower base not only enhances the functionality of your bathroom but also contributes to its overall aesthetic. An efficient shower base prevents water spillage, ensuring the safety of your bathroom while also setting the tone for relaxation. According to recent trends, many homeowners are opting for walk-in showers to elevate their bathrooms, further emphasizing the importance of correct installation. Step 1: Gathering Your Tools and Materials The first step in constructing a shower base is assembling all necessary tools and materials. This preparation is key to a smooth installation process. Essential tools include a shower arm, faucet, shower head, sloping shower tray, waterproof materials, waterproof adhesive, and specific tools like a circular saw, hammer, trowel, and tape measure. Having everything at your fingertips not only saves time but also enables you to complete the project without unnecessary interruptions. Step 2: Checking the Shower Floor’s Condition Before any installation begins, check the status of your existing shower floor. The floor should be flat and free from bumps to ensure the shower base fits snugly. An uneven base can lead to leaks and water pooling, creating further issues down the line. If you find any flaws, address these before proceeding. Step 3: Installing the Shower Tray Once the floor is prepared, apply an even layer of thin-set mortar to the subfloor using a trowel. It’s important to create a solid foundation for your shower tray. Make sure to press the shower tray down firmly into place until it’s secure. The ideal position will create the slope needed for proper water drainage. It should also feel solid underfoot. Ensuring Waterproofing: A Critical Step After installing the shower tray, it’s essential to implement adequate waterproofing to prevent water damage. This can be achieved by applying a liquid waterproofing membrane along the seams and edges of the shower base. This layer acts as a barrier, safeguarding your home against leaks and mold growth, which is especially crucial in humid environments. Embracing the DIY Spirit: Why You Should Consider This Project This DIY project is not just about enhancing your bathroom—it's also about embracing a sense of accomplishment. Many homeowners, especially those aged 40-65, find joy and empowerment in completing home renovations without professional assistance. It fosters self-sufficiency and can even serve as a bonding experience if you choose to involve family or friends. Final Touches: Adding Comfort and Safety In your efforts to create the perfect shower space, don’t overlook safety. Installing curbs around the shower area will help reduce slippage. Also, completing the look with elegant shower tiles not only enhances the design but offers added durability. Decorative touches can personalize your space, making it uniquely yours. Your Next Steps: Ready to Build Your Walk-in Shower Base? As you prepare to embark on this exciting journey towards a fully functional, stylish walk-in shower, remember that every step you take contributes to a larger goal of creating a beautiful, relaxing bathroom environment. If you’re inspired by this project, gather your supplies, invite a friend, and get started on your shower base today!

Terms of Service

Privacy Policy

Core Modal Title

Sorry, no results found

You Might Find These Articles Interesting

T
Please Check Your Email
We Will Be Following Up Shortly
*
*
*