Add Row
Add Element
cropper
update
Atlanta Home Garden Insider
update
Add Element
  • Home
  • Categories
    • DIY Projects
    • Sustainable Practices
    • Design Trends
    • Landscaping
    • Lawn and Garden Care
  • Smart Home Tech
  • Interior Design Tips
  • Home Maintenance
August 18.2025
3 Minutes Read

Essential Tips on How to Properly Clean Ceramic Tile Floors

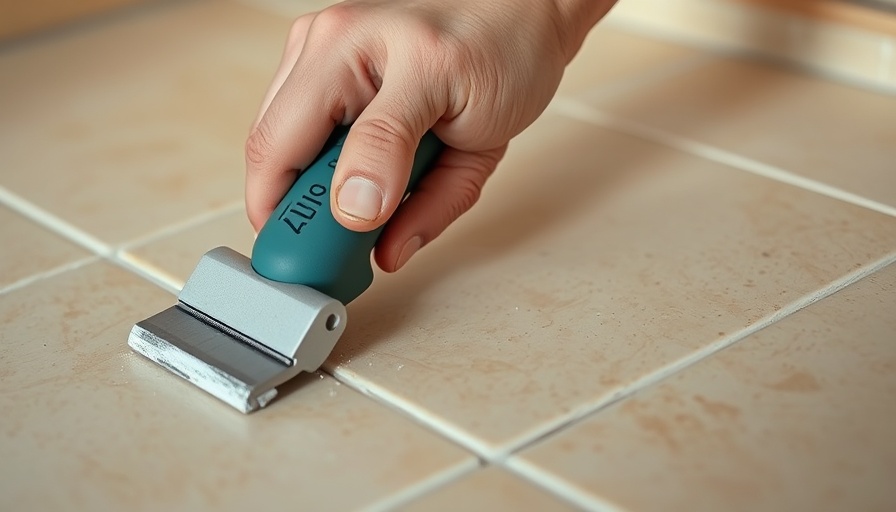
Professional cleaning technique for ceramic tile in action.

Understanding the Importance of Ceramic Tile Care

Ceramic tile floors are a beautiful and resilient choice for any home, valued not just for their aesthetics but also for their durability. As homeowners, maintaining these floors is essential to preserve their charm and longevity. When dirt particles, dust, and sand accumulate on ceramic tiles, they threaten to mar the surface and diminish the overall look of the home. This is especially evident in high-traffic areas like kitchens and bathrooms. Regular cleaning ensures that your tiles not only gleam but also last for years to come.

Essential Tools and Supplies for Effective Cleaning

Before diving into the cleaning process, it’s essential to gather the right tools to ensure effective maintenance. A soft broom or vacuum is crucial for day-to-day cleaning, while a steam mop will assist in deeper cleans. Here are the must-have supplies:

  • Soft broom or vacuum
  • Steam mop
  • Mild detergent and warm water
  • Baking soda
  • Hydrogen peroxide
  • Dishwashing soap
  • Microfiber cloths
  • Commercial tile cleaner (optional)
  • Vinegar solution

Step-by-Step Guide to Regular Cleaning

To keep ceramic tile floors looking their best, follow this straightforward routine:

  1. Sweep regularly: Sweep or vacuum 2-3 times each week to remove dirt and grit that could cause scratches.
  2. Mop weekly: Use a mixture of mild detergent and warm water for mopping to remove the tougher stains without damaging the tiles.
  3. Deep clean occasionally: Every couple of months, utilize a steam mop on your tiles to blast away stubborn dirt and revive their shiny finish.
  4. Safe products: Avoid oil-based cleaners and abrasive materials that ruin tile surfaces. Stick with gentle solutions like dish soap or baking soda mixes.

Deep Cleaning for Lasting Shine

While regular maintenance is excellent for everyday cleanliness, deep cleaning helps maintain the tiles' integrity. Steam mops are incredible tools that use heat and moisture to disinfect tiles while ensuring the surface remains unharmed. This option is not only affordable—averaging between $50-100—but also far less expensive than hiring professionals.

Shower and Bathroom Tile Care Tips

Bathroom tiles often receive more wear and tear due to humidity and soap residues. For cleaning shower tiles, consider the following tips:

  • Immediately after showering, use a squeegee to push excess water off the tiles.
  • For regular maintenance, use a vinegar and water solution to break down soap scum.
  • Apply a specialized cleaner for tougher grime buildup, ensuring it is safe for your specific tile type.

Maintaining the Kitchen’s Ceramic Tile Backsplash

Ceramic tiles aren’t confined to floors; they also enhance the aesthetics of kitchen backsplashes. Given their exposure to food splashes and stains, regular cleaning is essential. Use your chosen cleaning solution and a soft sponge to maintain their appearance:

  1. Prepare a 50/50 solution of vinegar and water.
  2. Spray the mixture onto the tiles and let it sit for several minutes.
  3. Wipe clean with a microfiber cloth for a sparkling finish.

Embracing Eco-Friendly Cleaning Solutions

As homeowners grow more aware of their environmental impact, utilizing eco-friendly cleaning agents like vinegar and baking soda can reduce chemical usage while ensuring clean surfaces. These alternatives are not only effective but also safe for your health and home.

Conclusion: Make Tile Maintenance a Habit

Regular care and appropriate cleaning strategies are the key to preserving the beauty of ceramic tiles in your home. By committing to these practices, you ensure that your floors and walls remain not just beautiful but durable over time. Emphasizing the importance of using safe cleaning methods will not only keep your tiles in pristine condition but also promote a healthier living environment.

Call to Action: Begin practicing these cleaning tips today, and watch your ceramic tiles transform! Share your experience and continue spreading awareness about maintaining your beautiful tile floors.

Home Maintenance

0 Views

0 Comments

Write A Comment

*
*
Related Posts All Posts
08.17.2025

Transform Your Space: Learn How to Regrout Tile Like a Pro

Update Why Regrouting Can Transform Your Tile FloorsAre your tile floors starting to look worn out and dated? You’re not alone! Many homeowners face the dilemma of maintaining their tile surfaces, especially when the grout starts to discolor or crack. Instead of opting for an expensive tile replacement, regrouting can breathe new life into your floors and refresh the space without breaking the bank. This DIY project not only enhances the visual appeal of your home but also aids in preserving the integrity of your tiles by preventing moisture from seeping beneath them.Gathering Your Tools and MaterialsBefore diving into the regrouting process, it’s essential to have the right tools on hand. Here’s a checklist of what you’ll need:Grout mixTile sealantOscillating toolClothTapeBucketTrowelKnifeCleanerToothbrushSpongeGrout floatTile finishing toolHaving these materials ready will streamline your regrouting process and allow you to work efficiently.8 Easy Steps to Regrout Your TilesNow that your materials are prepared, let’s walk through the straightforward steps to regrouting your tile floor:1. Clean the GroutStart by cleaning the existing grout lines to remove any dirt and fungus. A bleach solution or hydrogen peroxide works wonders. Apply the solution, scrub with a toothbrush, and rinse thoroughly.2. Remove Old GroutEquipped with your oscillating tool, carefully remove the old grout. Remember to be patient; this step takes time but is crucial for a successful regrout.3. Vacuum the AreaOnce the old grout is cleared, vacuum the surface meticulously to collect residual debris. Ensuring a clean surface is key to achieving a smooth application of the new grout.4. Apply Grout SealantUsing a grout sealant before applying new grout is vital. This step prevents any future mildew from developing in the moisture-prone areas.5. Mix and Apply New GroutFollowing the manufacturer’s instructions, mix the new grout. Then, using your grout float, apply it to the grout lines, ensuring even coverage.6. Smooth and ShapeAfter applying the grout, use a finishing tool to shape and smooth the lines. The aim is to keep every line consistent and aesthetically pleasing.7. Clean Excess GroutOnce applied, use a damp sponge to wipe away any excess grout from the tiles. This is a critical step to ensure that your tiles maintain their original shine and do not become stained.8. Allow to Set and SealFinally, let the grout set for at least 24 hours. After it's fully set, a final application of sealant will provide that extra layer of protection and enhance the durability of your grout work.Benefits of RegroutingRegrouting serves multiple purposes. Not only does it rejuvenate the look of your tiles, but it also protects your investment. Maintaining grout reduces the risk of water damage, prevents mold, and improves indoor air quality. For homeowners on a budget, the savings of regrouting are significant compared to the cost of replacing entire tiles or the flooring.Deciding to Regrout? Here are Some Tips!Before starting, assess your comfort level and skills. If you’re unsure, consider seeking help from a knowledgeable friend or family member, or check out tutorial videos online for guidance.DIY projects can be incredibly rewarding, allowing you to personalize your home while saving money. So grab your tools, roll up your sleeves, and get ready to transform your tile floors with regrouting!If you're feeling inspired, why not take the plunge and start your regrouting journey today? Create a clean, welcoming environment in your home!

08.16.2025

Choosing Underlayment for Laminate Flooring: Essential Tips for Homeowners

Update Choosing the Right Underlayment: Why It Matters As a homeowner, ensuring the aesthetic and structural integrity of your flooring is crucial. When opting for laminate flooring, which beautifully imitates the rich look of hardwood at a fraction of the cost, choosing the right underlayment is just as vital for achieving that polished finish. Underlayment acts as a protective barrier that elevates not just the comfort of your flooring but also its longevity. Understanding what underlayment suits your specific laminate and subfloor conditions can make a significant difference in your renovation project. What Exactly Is Flooring Underlayment? Flooring underlayment serves as a crucial intermediary between the subfloor and laminate flooring. Made from materials like cork, rubber, or foam, it comes in varying thicknesses, typically around 2mm to 3mm, balancing comfort and protection. Underlayment provides several benefits: Acts as a moisture barrier, protecting your laminate from water damage. Absorbs foot traffic noise, creating a quieter living environment. Helps level minor imperfections in the subfloor, ensuring a smoother laminate installation. This versatile product even enhances warmth, making your home feel cozier during colder months. Since laminate flooring is a floating floor, meaning it isn't glued directly to the subfloor, a high-quality underlayment is essential to support the structure. Key Factors in Selecting Underlayment Not all underlayments are created equal; they each come with unique features tailored to specific needs. Here are essential factors to consider when choosing yours: Thickness: Aim for a thickness of 2mm to 3mm. While a thicker underlayment can feel more comfortable, it's crucial to select one that fits your specific setup. Vapor Barrier: If your subfloor is concrete, opt for underlayment that contains a built-in vapor barrier to prevent moisture from seeping up into your laminate. Sound Absorption: For upper floors or areas prone to noise, choose products designed specifically to absorb sound and minimize footfall impact. R-Value: In colder areas, select underlayment with a higher R-value for better insulation and comfort underfoot. Material Type: Depending on preference and usage, you might choose cork for its natural antimicrobial properties, rubber for durability, or foam for cost-effectiveness. The Emotional Benefit of Quality Flooring Investing time in selecting the right underlayment doesn't just improve the physical quality of your home; it elevates your emotional well-being. A well-floored room can enhance your home's ambiance, making it more welcoming and comfortable. Your flooring significantly impacts everyday experiences—from hosting family gatherings to enjoying quiet moments alone. With the right underlayment, you not only enhance the life of your installation but create an environment that lifts your spirit. Common Misconceptions About Underlayment One prevailing myth is that underlayment is optional if your laminate comes with an attached layer. While this can work in some cases, using a separate, high-quality underlayment often yields better results. Another misconception is that thicker is always better. A competing balance of thickness and material type may serve your flooring needs more effectively than simply opting for the thickest available option. Practical Tips for Your Flooring Project To ensure a seamless installation, consider these practical tips: Prepare your subfloor clean and dry before installation. Stagger your underlayment seams to help with stability. Follow manufacturer guidelines on moisture and temperature levels before, during, and after installation. Before diving into your flooring project, take a moment to understand your specific needs. Such attention not only results in a beautiful product but also enhances the quality of life in your space. Take Action for a Beautiful Home Now that you've armed yourself with insights on choosing the right underlayment for your laminate flooring, it's time to make informed decisions that will transform your space. Invest wisely in your home, ensuring long-lasting comfort and appeal. Explore various underlayment options now, and take a step closer to achieving your dream floor!

08.16.2025

Mastering Your Home Renovation: How to Choose Underlayment for Laminate Flooring

Update Understanding the Importance of Underlayment for Laminate Flooring Choosing the right underlayment isn’t just about aesthetics; it’s a vital step in ensuring the longevity and comfort of your laminate flooring. Laminate, which mimics the look of hardwood, requires appropriate underlayment to handle the challenges it faces daily—from moisture management to sound absorption. Without proper underlayment, unlevel subfloors can lead to uneven surfaces, creating a less durable finish. Key Factors When Choosing Underlayment When picking underlayment for laminate flooring, there are several factors that you should consider: Thickness: Opt for underlayment that is generally between 2mm to 3mm thick. While some may believe that thicker underlayment is always better, it’s essential to find the right balance that matches your installation needs. Type of Subfloor: For concrete subfloors, ensure the underlayment has a vapor barrier to protect against moisture. This is particularly crucial in basements or kitchens where humidity levels can fluctuate. Sound Absorption: If you’re installing laminate on upper floors, consider a sound-absorbing underlayment to minimize noise disruption for both floors and neighbors. Insulation Value: If you live in a cold region, pick an underlayment with a higher R-value to provide additional warmth. Material Choice: Cork underlayment is a great choice for those looking for antibacterial properties, while foam or rubber may offer other benefits. Why Underlayment Matters Underlayment serves as the silent protector of your laminate flooring. It acts as a moisture barrier, shields against temperature changes, absorbs foot traffic noise, provides warmth, and helps conceal imperfections in the subfloor. By providing these benefits, underlayment allows laminate floors to 'float' comfortably, which prevents issues associated with glue-down flooring that can be challenging to repair. Common Misconceptions About Underlayment Many homeowners assume that all underlayment products are the same, leading to poor choices that may affect the durability of their flooring. In truth, underlayment varies greatly by brand and type. Quality should not be sacrificed for cost, as investing in high-grade underlayment can save homeowners money on potential repairs down the line. Actionable Tips for Selection When selecting your underlayment, take a few extra steps to ensure you’re making a wise investment: Research Brands: Look for reviews and recommendations for underlayment products. Trusted brands often provide specialized features that enhance performance. Consider Project Scope: For larger spaces, buying rolls tends to be more economical than individual sheets. Evaluate Your Environment: If your home experiences high humidity, prioritize moisture-resistant underlayments to prevent mold and mildew. Conclusion: Elevating Your Home with the Right Choices Choosing the right underlayment for your laminate flooring is a decision that influences not just the look of your floors but also their future performance and comfort. With various underlayment options available, it’s essential to match the product characteristics with the specific needs of your home. Remember, investing in quality underlayment will not only improve the installation but enhance the overall warmth and sound of your living space. Take the time to research and choose wisely, and your laminate flooring will reflect your thoughtful choices for years to come!

Terms of Service

Privacy Policy

Core Modal Title

Sorry, no results found

You Might Find These Articles Interesting

T
Please Check Your Email
We Will Be Following Up Shortly
*
*
*