Add Row
Add Element
cropper
update
Atlanta Home Garden Insider
update
Add Element
  • Home
  • Categories
    • DIY Projects
    • Sustainable Practices
    • Design Trends
    • Landscaping
    • Lawn and Garden Care
  • Smart Home Tech
  • Interior Design Tips
  • Home Maintenance
August 17.2025
3 Minutes Read

Transform Your Space: Learn How to Regrout Tile Like a Pro

Close-up of regrouting tile with grout remover tool.

Why Regrouting Can Transform Your Tile Floors

Are your tile floors starting to look worn out and dated? You’re not alone! Many homeowners face the dilemma of maintaining their tile surfaces, especially when the grout starts to discolor or crack. Instead of opting for an expensive tile replacement, regrouting can breathe new life into your floors and refresh the space without breaking the bank. This DIY project not only enhances the visual appeal of your home but also aids in preserving the integrity of your tiles by preventing moisture from seeping beneath them.

Gathering Your Tools and Materials

Before diving into the regrouting process, it’s essential to have the right tools on hand. Here’s a checklist of what you’ll need:

  • Grout mix
  • Tile sealant
  • Oscillating tool
  • Cloth
  • Tape
  • Bucket
  • Trowel
  • Knife
  • Cleaner
  • Toothbrush
  • Sponge
  • Grout float
  • Tile finishing tool

Having these materials ready will streamline your regrouting process and allow you to work efficiently.

8 Easy Steps to Regrout Your Tiles

Now that your materials are prepared, let’s walk through the straightforward steps to regrouting your tile floor:

1. Clean the Grout

Start by cleaning the existing grout lines to remove any dirt and fungus. A bleach solution or hydrogen peroxide works wonders. Apply the solution, scrub with a toothbrush, and rinse thoroughly.
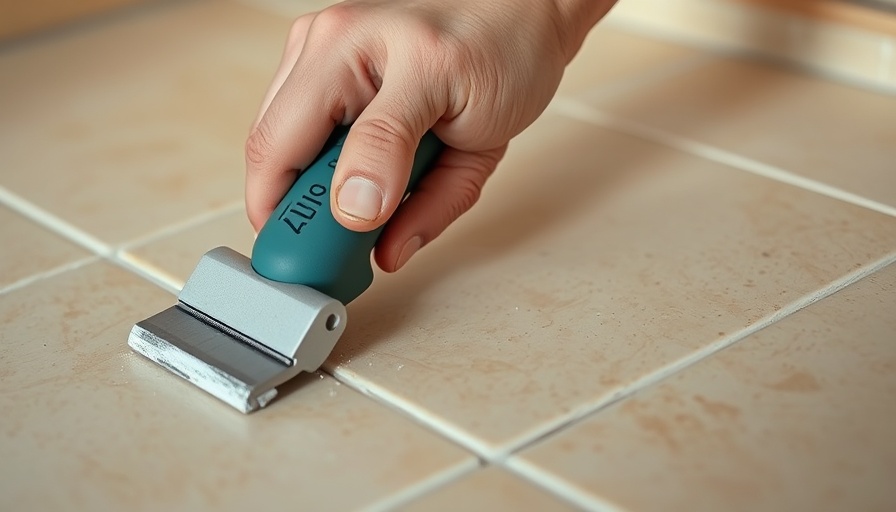
2. Remove Old Grout

Equipped with your oscillating tool, carefully remove the old grout. Remember to be patient; this step takes time but is crucial for a successful regrout.

3. Vacuum the Area

Once the old grout is cleared, vacuum the surface meticulously to collect residual debris. Ensuring a clean surface is key to achieving a smooth application of the new grout.

4. Apply Grout Sealant

Using a grout sealant before applying new grout is vital. This step prevents any future mildew from developing in the moisture-prone areas.

5. Mix and Apply New Grout

Following the manufacturer’s instructions, mix the new grout. Then, using your grout float, apply it to the grout lines, ensuring even coverage.

6. Smooth and Shape

After applying the grout, use a finishing tool to shape and smooth the lines. The aim is to keep every line consistent and aesthetically pleasing.

7. Clean Excess Grout

Once applied, use a damp sponge to wipe away any excess grout from the tiles. This is a critical step to ensure that your tiles maintain their original shine and do not become stained.

8. Allow to Set and Seal

Finally, let the grout set for at least 24 hours. After it's fully set, a final application of sealant will provide that extra layer of protection and enhance the durability of your grout work.

Benefits of Regrouting

Regrouting serves multiple purposes. Not only does it rejuvenate the look of your tiles, but it also protects your investment. Maintaining grout reduces the risk of water damage, prevents mold, and improves indoor air quality. For homeowners on a budget, the savings of regrouting are significant compared to the cost of replacing entire tiles or the flooring.

Deciding to Regrout? Here are Some Tips!

Before starting, assess your comfort level and skills. If you’re unsure, consider seeking help from a knowledgeable friend or family member, or check out tutorial videos online for guidance.

DIY projects can be incredibly rewarding, allowing you to personalize your home while saving money. So grab your tools, roll up your sleeves, and get ready to transform your tile floors with regrouting!

If you're feeling inspired, why not take the plunge and start your regrouting journey today? Create a clean, welcoming environment in your home!

Home Maintenance

2 Views

0 Comments

Write A Comment

*
*
Related Posts All Posts
09.30.2025

Machinery Meets Mobility: Exploring the Future of Power with EcoFlow

Update Understanding Range Anxiety in Electric Vehicles For years, electric vehicle (EV) owners have faced a common concern known as range anxiety—the fear of running out of power and being stranded. With advancements in battery technology and electric infrastructure, this anxiety is lessening. However, finding reliable alternatives when on the road remains critical for many drivers. Enter EcoFlow, a company presenting a modern solution for those seeking additional power: portable power stations.In 'Is This the Gas Can of the Future?', the discussion dives into portable power solutions for electric vehicles, exploring key insights that sparked deeper analysis on our end. Portable Power Stations: A New Approach to EV Charging EcoFlow’s Delta 3 series brings a fresh perspective on portable power solutions that resemble a modern-day gas can for EVs. With various models from Classic to Ultra Plus, these power stations can supplement your EV when you find yourself far away from a traditional charging station. They range in capacity, starting around one kilowatt-hour (kWh) and reaching up to three kWh for the most robust units. Understanding how much power each model can deliver is vital, as it directly impacts your ability to reach a charging point. Choosing the Right Unit for Your Needs When deciding which EcoFlow power station is the right fit for your journey, considering your energy consumption is crucial. The Delta 3 series is designed to meet various power needs. For instance, if a typical drive consumes 4 kWh, the classic models won’t do the trick. The Delta Max Plus becomes a smart choice when paired with an expansion battery, providing ample power for extended trips, even on overcast days. Practical Applications: Beyond Just EV Charging While these portable power stations shine in helping EV owners, they extend beyond that capability. Homeowners looking for backup power during outages can employ these systems efficiently. By inputting details about appliances and desired operational timeframes, consumers can easily calculate which EcoFlowDelta 3 model best aligns with their needs through an intuitive worksheet. This personalization ensures that you're not only prepared for a power outage but also comfortable knowing your essentials will remain powered. Maximizing Solar Power with EcoFlow A notable feature of the Delta Max Plus is its two solar inputs, allowing for continuous energy replenishment. This is especially useful for those keen on harnessing renewable energy sources. Even in the late afternoons, solar panels can still generate impressive wattage, extending the usability of the power station. Therefore, investing in supplemental solar panels can further enhance overall efficiency and capacity for both EV charging and home backup solutions. The Quiet Power Solution Quiet operation is a significant advantage of the Delta 3 series, with minimal sound generated even at high energy demands. This is particularly relevant for homeowners wanting reliable power without disruptive noise. The innovation makes these units suitable for both daily household tasks and critical backup scenarios, ensuring continuous operation whenever necessary. Innovative Features in the EcoFlow App The EcoFlow app enhances user experience, offering features such as priority outlet control and customizable state of charge settings. This not only allows you to manage energy distribution across your devices but also adds an element of sophistication to the way users interact with their power source. Empowered with this level of control, EV owners can strategically plan their energy usage efficiently. Conclusion: The Future of Power Solutions for Homeowners In an increasingly electrified world, understanding the capabilities of modern portable power stations is essential for homeowners and EV owners alike. EcoFlow's innovative Delta 3 series shows promise not only in combating range anxiety by acting as a modern gas can but also in addressing broader backup power needs for households. With their practical features and efficiency, these power stations are worth considering for anyone looking to ensure they’re ready for any power scenario. If you're exploring the world of portable power solutions, EcoFlow provides a valuable resource that could enhance energy independence for many homeowners. For detailed comparisons and to assist in selecting the right product for your needs, don't forget to utilize the spreadsheet available in the video description.

09.24.2025

Effective Strategies to Remove Mold from Your Carpet Safely

Update Understanding the Importance of Mold Removal When it comes to your home, maintaining a clean and healthy environment is essential, especially for your family’s well-being. Mold in your carpet can be more than just a nuisance—it's a significant health risk. Mold can affect people with allergies, respiratory conditions, and those who are immunocompromised. Understanding the dangers posed by mold not only urges homeowners to address the issue quickly but also empowers them to take preventive measures in their homes. Identifying Mold: Recognizing the Signs Before diving into the cleaning process, you'll want to ensure you're dealing with mold. This fungus often manifests as dark patches or fuzzy spots on your carpet. If you notice a persistent musty smell, this could indicate hidden mold growth deep within the fibers. Take a close look at your carpets, especially in areas where moisture is prevalent, like basements or around plumbing fixtures. Early detection can save you time, money, and health issues down the line. The Step-by-Step Process to Eliminate Mold Now that you're aware of the risks and signs of mold, let's explore effective strategies for eliminating it from your carpets. Here are some practical and proven steps: Gather Your Supplies: Equip yourself with gloves, a mask, a brush, baking soda, vinegar, and a vacuum cleaner. Ventilate the Area: Open windows and curtains to ensure proper air circulation. Inspect the Carpet: Check both the surface and underneath for visible mold spots. Scrub and Vacuum: Use a brush to scrub the affected areas and then vacuum to remove loose spores. Apply Baking Soda: Sprinkle baking soda over the area and let it sit overnight to absorb odors and moisture. Vinegar Treatment: Fill a spray bottle with vinegar, spray it on the mold, and scrub. Vinegar is effective at killing the mold. Blot and Dry: Use a wet towel to blot the area, removing residue, and allow it to dry completely. Preventing Future Mold Growth While you've successfully tackled the mold on your carpet, prevention is key to keeping it at bay. Regular vacuuming can help pick up moisture and prevent mold spores from settling. Additionally, using a dehumidifier in humid areas like basements can significantly lower the chances of future mold growth. Sealing leaks and ensuring proper ventilation throughout your home will also contribute to a healthier living environment. The Emotional Impact of a Clean Home Perhaps one of the most overlooked aspects of maintaining a mold-free environment is the emotional and psychological benefits it brings. Living in a clean, fresh-smelling home can enhance your mood and contribute to overall happiness. When your space is free of mold and allergens, you’ll feel more comfortable and at ease, which is invaluable in today’s fast-paced world. Conclusion: Take Action for a Healthier Home Removing mold from your carpet is not just a matter of aesthetics; it’s about protecting your health and creating a safe environment for your family. By following the cleaning tips outlined and committing to regular maintenance, you can ensure your home remains a haven for your loved ones. Now is the perfect time to take action; don’t let mold compromise your health. Start your mold-removal journey today and embrace a healthier living space!

09.19.2025

Discover These Proven Tips to Remove Hard Water Stains in Toilet

Update Say Goodbye to Hard Water Stains: Your Go-To Guide As a homeowner, those stubborn hard water stains in your toilet can be more than just an eyesore—they can also be a symptom of ongoing plumbing issues. Hard water, containing high levels of minerals like calcium and magnesium, often leads to unsightly deposits not only in toilets but also on fixtures and floors. But fear not! With a few proven methods, you can restore your bathroom to its pristine condition. Understanding Hard Water and Its Impact Hard water isn't just a problem for your toilet; it affects all plumbing fixtures, creating mineral buildup that can harbor bacteria and contribute to unpleasant odors. Not only does this buildup detract from the clean, sanitary appearance of your home, but it can also damage surfaces if left unchecked. Knowing how to tackle these stains can help maintain your home's value and ensure a healthy living environment. Six Effective Tips to Banish Hard Water Stains Here are six effective methods to combat those hard water stains: 1. Cleaning with White Vinegar: White vinegar is an inexpensive and natural way to tackle hard water stains. Simply pour it around the toilet bowl, scrub with a toilet brush, and for stubborn stains, a pumice stone works wonders when paired with more vinegar. 2. Baking Soda Magic: Create a cleaning cocktail with a cup of baking soda and vinegar. Mix them in the toilet bowl, let it fizz for a few minutes, and scrub away residue effortlessly. 3. Borax and Essential Oils: For a delightful cleaning experience, mix borax, white vinegar, and a few drops of lemon and lavender oil. This not only removes stains but also leaves a fresh scent. 4. Coca-Cola as a Secret Weapon: Believe it or not, that sweet, fizzy drink can help! Pour a can of Coca-Cola into the toilet, let it sit for an hour, and then flush for a clean bowl. 5. Steel Wool and WD-40: For tough deposits, steel wool combined with a bit of WD-40 can do the trick. However, use sparingly, as steel wool can scratch surfaces if applied too vigorously. 6. Call in the Pros: If all else fails, don't hesitate to call a professional cleaner who specializes in hard water stain removal. Why These Remedies Work The effectiveness of these solutions lies in their chemical properties. Acids like vinegar and citric acid found in lemon oil break down mineral deposits, making them easier to scrub away. Meanwhile, borax acts as a mild abrasive and a pH adjuster. Each method is simple, safe, and importantly, eco-friendly! Making Cleaning a Sustainable Habit Incorporating these cleaning tips into your regular home maintenance routine can enhance not only the appearance of your bathroom but also its hygiene. Conscious decisions, like opting for natural cleaning products, contribute to a healthier home environment for your family. Plus, taking care of your plumbing can significantly reduce future repair costs. Actionable Insights for Homeowners Now that you are equipped with essential knowledge and practical tips, it’s time to put them into action! Schedule regular cleanings and consider preventive measures, such as water softeners, which can stop hard water stains before they start. Ready to transform your toilet and enhance your cleaning practices? Embrace these tips and share your success stories. Let's make our homes clean and beautiful together!

Terms of Service

Privacy Policy

Core Modal Title

Sorry, no results found

You Might Find These Articles Interesting

T
Please Check Your Email
We Will Be Following Up Shortly
*
*
*