Add Row
Add Element
cropper
update
Atlanta Home and Garden Insider
update
Add Element
  • Home
  • Categories
    • DIY Projects
    • Sustainable Practices
    • Design Trends
    • Landscaping
    • Lawn and Garden Care
  • Smart Home Tech
  • Interior Design Tips
  • Home Maintenance
August 05.2025
3 Minutes Read

Discover the Right Way to Mop Your Floor for Sparkling Clean Results

String mop and red bucket for how to mop a floor guide.

The Essential Guide to Proper Floor Mopping

Do you feel like your floors look dirtier after completing what should be a cleansing task? That can happen easily if you're overlooking some crucial steps. Learning how to properly mop your floors not only enhances their appearance but also extends their lifespan. Let’s dive into the effective ways to mop your floor correctly.

Why Sweeping is Essential Before Mopping

Before you even think about grabbing a mop, give your floors a thorough sweep or vacuum. It might seem like a trivial step, but it’s crucial to remove dust, dirt, and debris. Without this step, you risk spreading these particles around rather than effectively cleaning them up. By starting with a clean slate, you will notice a significant difference in the results.

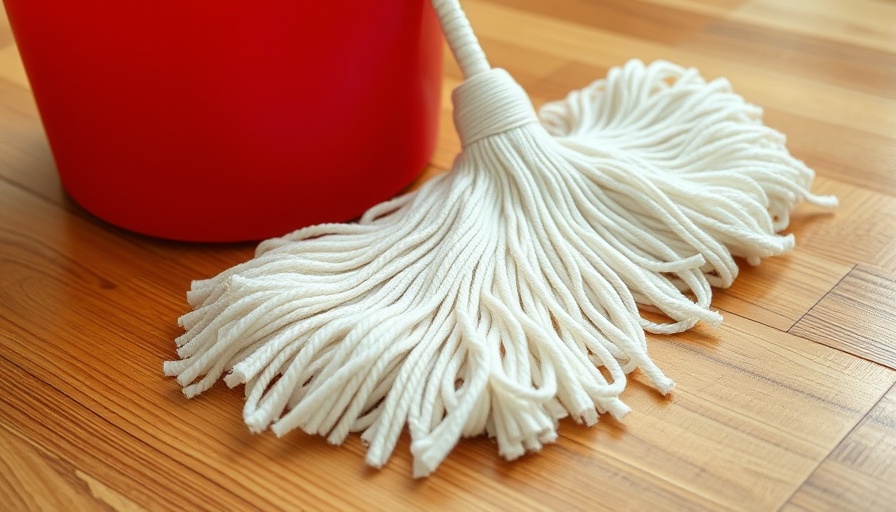
Two Bucket System: The Secret to Clean Floors

One common mistake homeowners make is not using two buckets while mopping. Fill one bucket with your chosen cleaning solution and keep the other with clean water. When mopping, dip your mop into the cleaning solution, wring it out thoroughly, and use the clean water bucket to rinse it. This method prevents dirt from being redeposited on the floor, ensuring a truly clean surface.

Choosing the Right Cleaners for Different Floor Types

The type of flooring you have greatly affects which cleaning products should be used. Here are tailored recommendations:

  • Hardwood Floors: Use a pH-neutral soap, avoiding harsh chemicals that can strip the finish. A slightly wet mop is key.
  • Laminate Floors: Similar to hardwood, keep the mop slightly damp, and be quick to blot spills to avoid damage.
  • Vinyl Floors: An effective cleaning solution is a vinegar and water mix that sanitizes without leaving a sticky residue.
  • Stone Tiles: Stick to mild, pH-neutral cleaners, as harsh chemicals can discolor and damage the surface.
  • Ceramic Tiles: Again, vinegar works wonders by cutting through residues while being safe for your family and pets.

Steps to Achieve a Pristine Floor

  1. Clear the Room: Stripping the area of furniture and obstacles is essential to ensure thorough cleaning.
  2. Start Sweeping: This sets the groundwork for effective mopping.
  3. Mop Technique: Begin at the farthest corner of the room and work your way backwards to avoid stepping into your newly cleaned area.
  4. Rinse Regularly: Continuously rinse your mop to keep it clean and effective.
  5. Air Dry: After use, let your mop air dry completely to avoid mildew buildup.

What Happens When You Cut Corners?

Many homeowners assume that more soap equals cleaner floors. This misconception can lead to sticky residues that attract dirt more easily. Additionally, using an unclean mop will only push grime around, leaving floors looking worse than before. Understanding the correct way to mop not only improves your aesthetic but also creates a healthier home environment.

Embracing Sustainable Practices in Cleaning

Are you looking to incorporate eco-friendly cleaning habits into your routine? Consider natural solutions such as baking soda and vinegar for their effective and non-toxic properties. This not only benefits the environment but also safeguards your family’s health.

Understanding how to properly mop your floors ensures they remain clean and pristine while extending their life. By employing the right techniques and cleaning products specific to your flooring, you create a healthier environment in your home.

To further foster a cleaner living space, examine your cleaning habits—perhaps it's time to rethink your cleaning routine. Remember, investing a bit of time now ensures a cleaner, healthier home for years to come!

Home Maintenance

6 Views

0 Comments

Write A Comment

*
*
Related Posts All Posts
01.16.2026

Unlock the Secrets to Your Shed Ceiling with This Easy Method

Update Transform Your Shed: An Unconventional Approach When it comes to constructing the perfect shed, workshop, or garage ceiling, many homeowners might not realize that there’s a uniquely simple method available that could elevate their DIY game dramatically. In the video titled "The Easiest Shed, Workshop, or Garage Ceiling You’ve Never Tried," the host introduces an innovative yet straightforward technique that simplifies the process, appealing particularly to individuals aged 40 to 65 who are eager to invest their time and resources into home improvement.In 'The Easiest Shed, Workshop, or Garage Ceiling You’ve Never Tried,' the discussion delves into innovative DIY ceiling techniques that inspire homeowners to maximize their shed potential. Why Shed Ceilings Matter for Homeowners The ceiling of your shed or workshop is more than just an overhead feature; it serves crucial roles in insulation and aesthetics. For homeowners, an effective ceiling can help regulate temperature, keeping your tools and equipment safe from harsh weather conditions and pests. Moreover, a well-designed ceiling can enhance light reflection, making your workspace feel larger and more inviting, which is especially beneficial for aging homeowners who may need ease of access and visibility. Crafting a Simple Yet Effective Ceiling The method shown in the video involves utilizing readily available materials and tools, making it accessible and great for DIY enthusiasts. One of the standout features of this approach is the ability to use a countersink drill bit, which allows for a clean, finished look while ensuring sturdiness. This tool not only simplifies the building process but also enhances the durability of the ceiling installation. For homeowners not entirely comfortable with home improvement projects, this technique shines as a manageable option. Community Insights: Connecting with Fellow DIYers The video also highlights the importance of community engagement among DIY enthusiasts. Joining the Everyday Shed DIY Community offers homeowners a platform to share their experiences, ask for advice, and gain inspiration from each other’s projects. For those aged 40 to 65, this social connection can provide both motivation and reassurance, as it allows individuals to learn from each other’s successes and mistakes. Looking Ahead: Future Trends in DIY Projects As homeowner interests evolve over time, it’s worth considering how trends in DIY projects will continue to change. There’s a growing focus on sustainability and the use of eco-friendly materials, as many individuals are seeking to minimize their environmental footprint while maintaining their homes. This shift can influence how one might approach projects like shed ceilings in the near future, emphasizing the importance of longevity and efficiency. Seizing the Opportunity: Making Decisions with Knowledge For homeowners tuning into these DIY resources, the main takeaway should be the empowerment of making informed decisions in their home improvement endeavors. Whether you’re looking to revamp a space for better organization, or simply wishing to create a more functional area, knowing the right methods and materials is paramount. Engaging in projects that reinforce one’s home can lead to a more fulfilling living environment and add substantial value to your property. Final Thoughts: Your Shed Awaits an Upgrade In conclusion, the insights shared in "The Easiest Shed, Workshop, or Garage Ceiling You’ve Never Tried" serve as a fantastic jumping-off point for homeowners ready to enhance their spaces with ease. These practical tips not only streamline the construction process but potentially open up new avenues for creativity and improvement in one’s home. So gather your materials, connect with the DIY community, and embark on a journey to transform not just your shed, but your entire approach to home maintenance.

01.10.2026

Mastering Your Walk-in Shower: DIY Building Tips for a Shower Base

Update Mastering Your Walk-in Shower: Essential Tips for Building the Perfect Base Building a shower base for a walk-in shower is an exciting DIY journey, particularly for homeowners who cherish their independence and enjoy home maintenance projects. The allure of a walk-in shower lies in its accessibility and the chic, spacious feel it lends to your bathroom. However, the installation process can feel daunting without clear guidance. In this article, we’ll break down the steps to construct a walk-in shower base and empower you to tackle this project with confidence. Understanding the Basics: Why Installation Matters Before diving into the installation, it’s important to understand that a well-built shower base not only enhances the functionality of your bathroom but also contributes to its overall aesthetic. An efficient shower base prevents water spillage, ensuring the safety of your bathroom while also setting the tone for relaxation. According to recent trends, many homeowners are opting for walk-in showers to elevate their bathrooms, further emphasizing the importance of correct installation. Step 1: Gathering Your Tools and Materials The first step in constructing a shower base is assembling all necessary tools and materials. This preparation is key to a smooth installation process. Essential tools include a shower arm, faucet, shower head, sloping shower tray, waterproof materials, waterproof adhesive, and specific tools like a circular saw, hammer, trowel, and tape measure. Having everything at your fingertips not only saves time but also enables you to complete the project without unnecessary interruptions. Step 2: Checking the Shower Floor’s Condition Before any installation begins, check the status of your existing shower floor. The floor should be flat and free from bumps to ensure the shower base fits snugly. An uneven base can lead to leaks and water pooling, creating further issues down the line. If you find any flaws, address these before proceeding. Step 3: Installing the Shower Tray Once the floor is prepared, apply an even layer of thin-set mortar to the subfloor using a trowel. It’s important to create a solid foundation for your shower tray. Make sure to press the shower tray down firmly into place until it’s secure. The ideal position will create the slope needed for proper water drainage. It should also feel solid underfoot. Ensuring Waterproofing: A Critical Step After installing the shower tray, it’s essential to implement adequate waterproofing to prevent water damage. This can be achieved by applying a liquid waterproofing membrane along the seams and edges of the shower base. This layer acts as a barrier, safeguarding your home against leaks and mold growth, which is especially crucial in humid environments. Embracing the DIY Spirit: Why You Should Consider This Project This DIY project is not just about enhancing your bathroom—it's also about embracing a sense of accomplishment. Many homeowners, especially those aged 40-65, find joy and empowerment in completing home renovations without professional assistance. It fosters self-sufficiency and can even serve as a bonding experience if you choose to involve family or friends. Final Touches: Adding Comfort and Safety In your efforts to create the perfect shower space, don’t overlook safety. Installing curbs around the shower area will help reduce slippage. Also, completing the look with elegant shower tiles not only enhances the design but offers added durability. Decorative touches can personalize your space, making it uniquely yours. Your Next Steps: Ready to Build Your Walk-in Shower Base? As you prepare to embark on this exciting journey towards a fully functional, stylish walk-in shower, remember that every step you take contributes to a larger goal of creating a beautiful, relaxing bathroom environment. If you’re inspired by this project, gather your supplies, invite a friend, and get started on your shower base today!

12.21.2025

Is Upgrading Your Shed Ceiling Insulation Worth the Cost? Discover the Savings!

Update SEO Keyword: Shed Ceiling Insulation Upgrades Is enhancing your shed’s ceiling insulation truly a wise investment? In the quest for energy efficiency, homeowners are increasingly turning toward insulation upgrades to lower heating costs. By exploring the financial implications and real-world energy data, we can discern if it makes sense to boost insulation levels from R-10 to R-25 in sheds.In the video Unbelievable Shed Ceiling Insulation Upgrade! (Before and After Heating Costs), the discussion dives into the real-world data on insulation upgrades, exploring key insights that sparked deeper analysis on our end. The Importance of Insulation in Home Maintenance Insulation plays a crucial role in maintaining comfortable temperatures in any space, including a shed. Particularly for homeowners who wish to utilize their shed year-round, upgrading insulation can significantly impact overall energy efficiency. Recently, the move to increase shed insulation from R-10 to R-25 has garnered attention due to its implications for heating bills and comfort. Analyzing Real-World Energy Data The video titled Unbelievable Shed Ceiling Insulation Upgrade! (Before and After Heating Costs) delves into the practical side of insulation investments, presenting daily kilowatt-hour usages and heating costs before and after the upgrade. Homeowners can see firsthand how such upgrades directly correlate with reduced energy expenses over time. Future Insights: Weather-Resilient Structures As climate concerns mount, resilient structures equipped with efficient insulation will become increasingly important. Future forecasts suggest that homeowners who invest in robust insulation can expect not only lower bills but also improved property values and a less environmental footprint. The long-term advantages of upgrading insulation, particularly in response to erratic weather patterns, make it a pertinent consideration for today’s homeowners. Debunking Myths About Insulation Costs Many homeowners fear that the initial investment for enhanced insulation is too high. However, it’s essential to calculate the long-term savings associated with reduced energy consumption. When looking at projected utility cost reductions, these upgrades may pay for themselves faster than anticipated. Moreover, quality insulation materials, like RockWool, are available in various price ranges, catering to budgets while providing exceptional thermal resistance. Practical Insights to Enhance Shed Use The decision to upgrade insulation should be informed and strategic. Here are practical tips for homeowners contemplating such a project: Assess current insulation conditions—check for air leaks or inadequate coverage. Calculate potential heating cost savings with your local utility provider. Consider DIY solutions vs. hiring professionals based on your comfort level and expertise. Explore various insulation products like RockWool, known for excellent thermal performance and soundproofing. Implementing these strategies can significantly enhance your shed's functionality and economy. Taking Action: Why Upgrade? Evaluating your shed's insulation is not only a smart home maintenance task; it's also an opportunity to invest in your property's value and your own comfort. Upgrading to R-25 insulation might seem like a preliminary expense, but with rising energy prices, the argument for improved insulation becomes compelling. The savings on your heating bill may be well worth the upfront costs. Whether you’re seeking to create a more comfortable workspace or simply aiming to lower your energy bills, enhancing your shed's insulation can make a real difference. Interested in embarking on this upgrade? Now's the time to explore options, analyze costs, and make an informed decision to enhance your property’s functionality and comfort!

Terms of Service

Privacy Policy

Core Modal Title

Sorry, no results found

You Might Find These Articles Interesting

T
Please Check Your Email
We Will Be Following Up Shortly
*
*
*