


Transform Your Entryway with a Modern Hall Tree
Have you ever walked into a home and instantly felt welcomed? That initial impression often starts at the entryway, where a well-designed hall tree can set the tone for the rest of the home. This article will guide you through building a stylish, functional hall tree that offers both storage and aesthetic appeal, elevating your entryway experience.
Essentials for Your Hall Tree Project
The first step in your DIY project is to gather the right materials. Based on various sources, including plans from Family Handyman and Kreg Tool, you can use quality plywood and solid wood. Look for walnut for its rich color and durability. Depending on your design, you might need tools like a circular saw, miter saw, and a pocket hole jig to ensure precise cuts and sturdy assemblies.
A suggested materials list includes:
- 3/4" plywood for the body
- Wood screws and brad nails
- Coat hooks for functionality
- Paint or stain to match your home decor
Design Flexibility: Customize to Your Taste!
One of the most appealing aspects of building your own hall tree is the ability to customize it to fit your style and space. Whether you're drawn to a rustic farmhouse design or a sleek modern look, the plans can be adapted. For instance, you can include open cubbies, drawers, or decorative trim details to align with your personal taste.
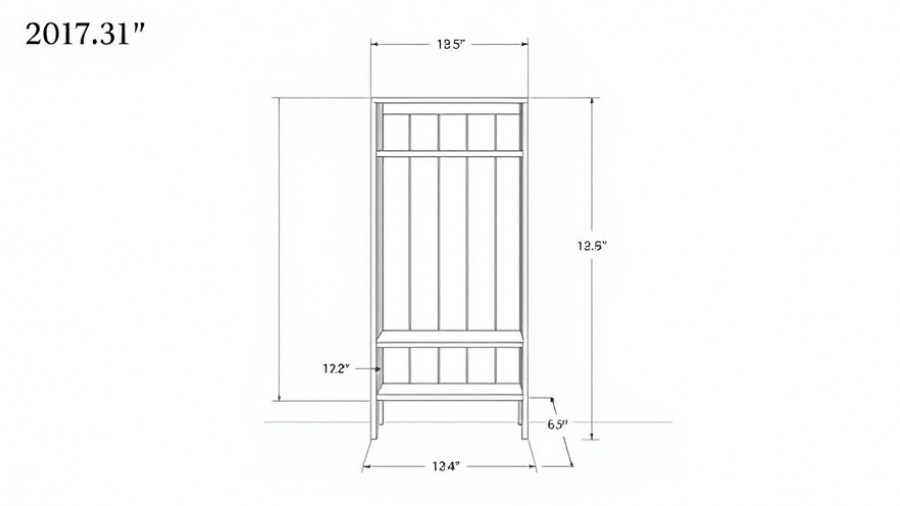
Consider also the size of your entryway. The dimensions of your hall tree can be adjusted based on the space available, ensuring it serves its purpose without overwhelming your entryway.
Step-by-Step Process: Building Your Hall Tree
The construction process for a hall tree generally involves these foundational steps:
- Cutting the plywood: Start by cutting the panels to size, adhering to the provided plans to ensure everything fits together correctly. Utilize techniques like pocket holes for clean and hidden joinery.
- Assembly: Begin with the main structure—assembling the seat and tall cabinets. Secure each piece with wood glue and screws to create a sturdy frame.
- Finishing touches: Once assembled, sand down any rough edges and apply your chosen finish. A wipe-on polyurethane can offer a protective and aesthetically pleasing layer to your wood.
Practical Tips for a Successful Build
As you embark on your hall tree project, keep these practical tips in mind to streamline the process:
- Finish before assembly: While some builders prefer to finish each piece before assembling, others find it beneficial to complete assembly before the final finish to avoid application issues. Choose what fits your workflow best!
- Secure it properly: Given the height and structure of a hall tree, ensuring it is adequately secured to the wall is critical to prevent tipping.
- Utilize modern tools: Incorporate tools like a Kreg pocket-hole jig to secure connections that are not only strong but also hidden, giving your build a clean look.
The Last Word: Make Your Entryway Shine!
A modern hall tree can transform your entryway into a functional and stylish space where you can drop off your belongings and welcome guests. By following the steps outlined above and adding your personal touches, you’ll create a piece that is not only useful but also resonates with your home’s aesthetic. Start your project today and enjoy the benefits of a beautifully organized entryway!
If this excites you, informative content on home renovations and DIY projects awaits your discovery! Click below to learn more about related projects done by enthusiastic homeowners just like you!


Write A Comment