Add Row
Add Element
cropper
update
Atlanta Home Garden Insider
update
Add Element
  • Home
  • Categories
    • DIY Projects
    • Sustainable Practices
    • Design Trends
    • Landscaping
    • Lawn and Garden Care
  • Smart Home Tech
  • Interior Design Tips
  • Home Maintenance
August 06.2025
3 Minutes Read

Unlock the Secrets to Small Appliance Storage: Transform Your Kitchen Organization!

Sleek small appliances on marble countertop for kitchen storage ideas.

Reclaim Your Kitchen Space with Smart Appliance Storage Solutions

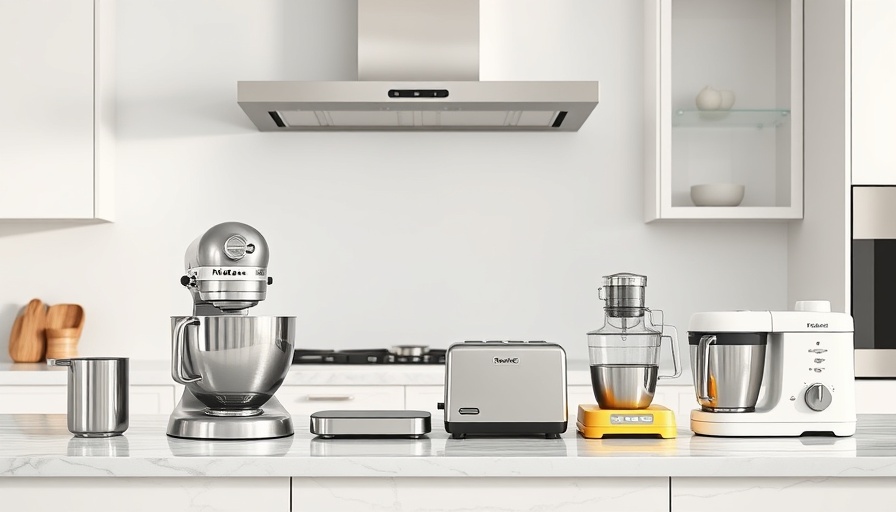
In today’s modern kitchen, small appliances like toasters, blenders, and coffee makers are essential for making everyday meals easier and more enjoyable. However, they often contribute to clutter if not stored properly. For homeowners striving for a serene and organized cooking space, effective storage solutions are key. Whether you have a spacious kitchen or a compact area, we’ve compiled a list of simple yet revolutionary storage ideas that will help you maximize your space while ensuring that your most-used gadgets remain easily accessible.

1. Appliance Garages: The Best of Both Worlds

One of the sleekest solutions for keeping appliances tucked away is the appliance garage. This clever cabinetry allows you to conceal your appliances with pocket, flip-up, or roll-up doors while still keeping them within reach. Experts emphasize the necessity of situating electrical outlets inside these garages. This way, homeowners don’t have to relocate gadgets to plug them in, providing ease of use and a tidy appearance.

2. Specify Your Cabinet Space: No Renovation Needed

Not every kitchen can afford an appliance garage, but that doesn't mean you can't achieve a clean look. Designating a lower cabinet as an appliance zone is an intelligent solution for homeowners without extra space. By keeping your small appliances organized in one designated area, you reduce clutter and simplify your cooking environment. This practical tip minimizes the need for renovations and can lead to a more streamlined evening meal preparation.

3. Choose Mobility with a Kitchen Cart

If cabinet space is a constraint, consider investing in a kitchen cart. These versatile units can hold various appliances, serving dishes, and even some kitchen essentials. The ability to roll the cart to different locations ensures that you can move items as needed, allowing for flexibility without disrupting your kitchen’s flow. Perfect for renters and those who want a little extra storage, kitchen carts combine functionality with style.

4. Accessorize: Find a Home for Small Parts

Smaller appliances often come with numerous accessories that can easily get lost. To remedy this, use labeled bins within your cabinets to keep all attachments organized. Utilizing acrylic bins allows you to maximize cabinet depth, eliminate wasted space, and enhance your kitchen’s organization. Plus, being able to see at a glance where everything is helps streamline the cooking process.

5. Hidden Doors: A Chic Finish to Clutter

For those who prioritize aesthetics, incorporating hidden doors can elevate your kitchen’s design while maintaining functionality. Such designs create a cohesive look by allowing for a seamless integration of appliance storage into the overall kitchen decor. When you’re ready to whip up a meal, simply reveal your appliances with a discreet door, keeping your countertop impeccably clean.

6. Under-Counter Solutions: Use All Available Space

Don’t overlook the potential of under-counter cabinets and drawers! These often-underutilized sections can be transformed into valuable storage for lesser-used appliances like mixers and juice extractors. Custom pull-out shelves make these appliances easy to access while keeping your countertop open for culinary creativity.

7. Vertical Storage: Maximize Your Space with Racks

Vertical stands and racks are ideal for appliances that need minimal hands-on time, such as coffee machines or toaster ovens. By using vertical space wisely, homeowners can keep their kitchens stylishly organized without sacrificing convenience.

8. Create a Charging Station: Reduce Clutter and Melt Stress

Lastly, consider designating a specific area for charging appliances like blenders or electric kettles. A charging station can be as simple as an outlet with dedicated space to keep cords out of sight. This not only keeps countertops clean but also reduces stress, knowing that everything is contained in one place.

Conclusion: Take Action to Revamp Your Kitchen

As a homeowner, embracing these small appliance storage ideas can significantly enhance your kitchen experience. Once you implement these strategies, cooking will become not only more enjoyable but also less chaotic. So, whether you’re an avid chef or occasionally make your morning coffee, organizing your space is a worthy investment. Don't hesitate any longer; start decluttering today and transform your kitchen into the organized oasis you’ve always envisioned.

DIY Projects

2 Views

0 Comments

Write A Comment

*
*
Related Posts All Posts
09.21.2025

Crafting Your Cozy Autumn Retreat: Simple Fall Decorating Ideas

Update Embrace Autumn: Simple Fall Decorating Ideas to Transform Your Home Fall is a time for harvest and warmth, even if the weather may not initially reflect the changing season. For homeowners looking for a charming way to welcome autumn, subtle touches can create an inviting atmosphere without overwhelming decor. Veteran home decorators know that a few well-placed items can evoke the spirit of the season, and as shared in a lovely blog post on simple fall decorating ideas, less is often more. The Power of Natural Elements Incorporating natural elements into your fall decor is a superb way to celebrate the season. The author shares her abundant use of limelight hydrangeas, which not only dry beautifully but also provide a stunning pop of color that harmonizes with the warm hues of autumn. This minimalist approach highlights the beauty of nature while requiring minimal effort. Consider using plants and flowers that resonate with the changing landscape, allowing their natural beauty to shine in your home. Elevating Spaces with Thoughtful Accents Decorating isn't just about filling a space; it's about creating an experience. The simple integration of a faux pumpkin on a coffee table or a vibrant canvas print adds warmth and emotional resonance. One blog example emphasizes using decorative items one already owns, like a pottery vase or vintage plates, to create an inviting and curated look. There's beauty in simplicity, and repurposing treasured items can imbue your home with warmth and sentimentality, thereby enhancing your connection to the space around you. Creating Centerpieces That Spark Conversations Table settingsduring the fall can set the tone for gatherings with family and friends. The post highlights how using pieces like Royal Stafford English bird plates adds elegance and charm to any dining experience. By focusing on a color palette that reflects the season, one can craft a beautiful table that feels approachable yet sophisticated. Consider pairing simple items like pinecones and acorns with understated decor like wrapped raffia vases. These elements can elevate your table from ordinary to extraordinary, sparking conversations and making dining experiences memorable. Finding Joy in the Little Things Perhaps the greatest takeaway from the article is the joy found in simplicity. Embracing small, meaningful decorations, such as those lovely white faux pumpkins and pinecones, can bring a sense of comfort and warmth. It reminds us that fall decorating doesn’t need to be extravagant; instead, it can be a heartfelt reflection of personal style and heritage. Simple items can evoke nostalgia or fond memories intertwined with our homes—inviting that warmth right into our living spaces. Call to Action: Create Your Fall Sanctuary With fall upon us, take this opportunity to celebrate the beauty of the season in your home! Whether it’s repurposing cherished items or introducing a few natural elements, the goal is to make your space feel like a cozy sanctuary. Don’t hesitate to embrace your creativity and share your unique style!

09.23.2025

Transform Your Home with Penny Flooring: Is It Right for You?

Update Why Pennies are More Than Just Change If you’ve ever considered alternative flooring options, perhaps you’ve come across the intriguing trend of tiling with pennies. While traditional tiles can cost a fortune, the idea of using discarded currency has captured the attention of DIY enthusiasts. Wealthy homeowners are looking for unique designs that not only save costs but also tell a story, and the charm of pennies may just be the conversation starter you need. Unleashing Your Creativity with Pennies The beauty of tiling your floor with pennies lies in the personal touch it lends to your home. Scott McGillivray, a well-known renovation expert, recently endorsed this distinctive flooring method on his show, explaining the creative process behind it. By placing the gleaming coins in patterns and sealing them with resin, homeowners can create visually rich designs that are entirely one-of-a-kind. This is a fantastic way to showcase creativity! The Eco-Friendly Aspect of Penny Flooring In addition to being cost-effective, penny flooring can be considered a sustainable choice. Reusing pennies, which might have otherwise been tossed aside, declutters your space and gives a second life to materials. This fits perfectly with a growing trend among homeowners who prioritize sustainability. With rising awareness of environmental concerns, utilizing existing resources instead of purchasing new materials resonates with many homeowners, especially those seeking to lessen their ecological footprint. Step-by-Step Guide to Penny Tiling Are you intrigued by the idea of transforming your floors with pennies? Here’s a brief overview of how to get started: Gather Your Materials: You’ll need at least 144 pennies per square foot, adhesive, and a protective resin. Prepare the Surface: Ensure that your floor is clean and smooth because improper preparation could lead to an uneven surface. Arrange Your Pennies: Before applying adhesive, lay out the pennies on the floor to visualize the design you want. Adhere the Coins: Apply a strong adhesive and press the pennies into place firmly. Seal the Floor: After the adhesive has dried, pour resin over the top to seal and protect your stunning work. This DIY project may involve some labor, but the satisfaction of completing it makes it worthwhile. Besides, it’s an engaging activity that families can do together! Potential Risks and Considerations While penny flooring is undoubtedly unique and eye-catching, it isn't without its challenges. First, the labor-intensive nature of laying pennies means you're committing time and effort to the project. Moreover, as with any DIY task, there's the risk of injury during installation, particularly when working with adhesives and resin. It’s wise to take necessary precautions and perhaps even consult with a professional if you have any doubts about your abilities. Exploring Other Unique Flooring Options If you’re drawn to innovative home renovations, consider looking into other quirky flooring trends. Each flooring material offers a distinctive aesthetic that can complement your personal style. For instance, reclaimed wood offers a rustic charm, while polished concrete lends a contemporary edge. The key is to find a solution that aligns with your vision and budget. Final Thoughts: Embrace The Trend or Stay Traditional? The question remains: are you ready to take the plunge into penny flooring? It’s a fantastic way to create an engaging space that reflects your personal style while staying budget-friendly. However, if you lean towards traditional aesthetics, exploring other flooring options might be more your speed. Whatever you choose, remember that your home is a canvas waiting for your unique touch! As you embark on your journey of home improvement, consider experimenting with penny flooring. It’s a chance to unleash your creativity and perhaps even to bond with your family through the DIY process. Because in the end, your home should be a reflection of you.

09.20.2025

Decoding Beeping Sounds: What Your Car is Trying To Tell You

Update Understanding Your Car's Beeps: A Roadmap for Drivers When your car communicates through beeps and chimes, it’s essential to understand what those signals mean. Whether it’s a simple alert to fasten your seatbelt or a more complex warning from advanced driver-assistance systems (ADAS), every sound has a purpose. As Duane “Doc” Watson, a technical trainer at Bosch Mobility Aftermarket, points out, knowing how to respond to your car's alerts can prevent serious accidents. The Language of Your Vehicle: Common Beeps Explained Modern vehicles rely on an array of auditory signals to keep drivers safe. From basic noises that indicate an open door or headlights left on, to the more sophisticated beeps of ADAS warning you about imminent collisions, understanding these sounds can significantly reduce the risk of accidents. For instance, many cars will emit a specific beep if you're getting too close to an object while parking, whereas another sound may alert you if you're drifting out of your lane. These safety measures are not just conveniences; they serve a critical function in preventing driver errors, which are often the cause of traffic accidents. Why Listening to Your Car Can Be a Gamechanger According to personal injury attorney Joshua Branch, ignoring vehicular warnings can lead to devastating consequences. While advanced safety systems aim to minimize human error, they are only effective if drivers remain vigilant. Furthermore, over-depending on ADAS can lead to carelessness on the road. Chris “Moose” Pyle, a master-certified technician, emphasizes, "Drive as you should with your hands, eyes, mirrors, and mind," reminding us that technology should serve as a helpful tool, not a crutch. Exploring Advanced Driver Assistance Systems (ADAS) ADAS features like Forward Collision Warning and Automatic Emergency Braking enhance vehicular safety significantly. These systems use radar and cameras to assess your distance from other vehicles and can alert you with both visual signals and beeping noises if you're closing in too quickly. However, it’s important to note that false alarms can occur, particularly in busy or construction-laden areas, leading some frustrated drivers to disable them altogether. Understanding the full capabilities—and limitations—of these systems can help drivers maximize their benefits while reducing frustration. Have You Experienced Beeping Alerts Recently? While the advanced technology in modern vehicles is meant to keep you safe, these signals also act as reminders to maintain your vehicle. Beeping alerts paired with dashboard lights could indicate issues like low tire pressure, a weak battery, or engine problems. Regular maintenance checks can prevent these alerts from becoming serious issues. Key Takeaway: Stay Alert, Stay Safe Understanding the beeping sounds your car makes not only enhances your driving experience but can also save lives. As vehicles become increasingly equipped with smart technologies, it's crucial for drivers—especially those between the ages of 40-65—to familiarize themselves with how these systems work. By engaging with your car's alerts, practicing safe driving habits, and regularly maintaining your vehicle, you pave the way for a safer journey on the road. Join the Conversation: What’s Your Vehicle Trying to Tell You? Have you had any experiences where your car's alerts helped you avoid trouble? Share your story in the comments! Being proactive about understanding these signals can make all the difference in maintaining your safety.

Terms of Service

Privacy Policy

Core Modal Title

Sorry, no results found

You Might Find These Articles Interesting

T
Please Check Your Email
We Will Be Following Up Shortly
*
*
*