Add Row
Add Element
cropper
update
Atlanta Home and Garden Insider
update
Add Element
  • Home
  • Categories
    • DIY Projects
    • Sustainable Practices
    • Design Trends
    • Landscaping
    • Lawn and Garden Care
  • Smart Home Tech
  • Interior Design Tips
  • Home Maintenance
October 17.2025
3 Minutes Read

Transform Your Home: Effective Techniques to Remove Grout from Tile

Close-up of hands removing grout from tile with a scraper.

Revitalize Your Tiles: A Guide to Effective Grout Removal

Many homeowners often face the challenge of cleaning the stubborn grime that settles between their tiles. This persistent issue not only impacts the aesthetic of your floors but can also lead to misunderstandings about what methods will truly restore them. Fortunately, removing grout is easier than you may think! With just a little patience and the right tools, you can bring back the shine to your tiles without breaking the bank. Here’s how you can accomplish this task safely and effectively!

Why You Might Need to Remove Grout

Over time, grout can accumulate dirt that becomes exceedingly tough to clean, or it might simply lose its charm and start to discolor. Whether the color no longer complements your tiles or the grout has cracked and requires replacement, understanding when and why to remove grout is crucial. Simply cleaning isn’t always enough, especially if the condition is severely compromised.

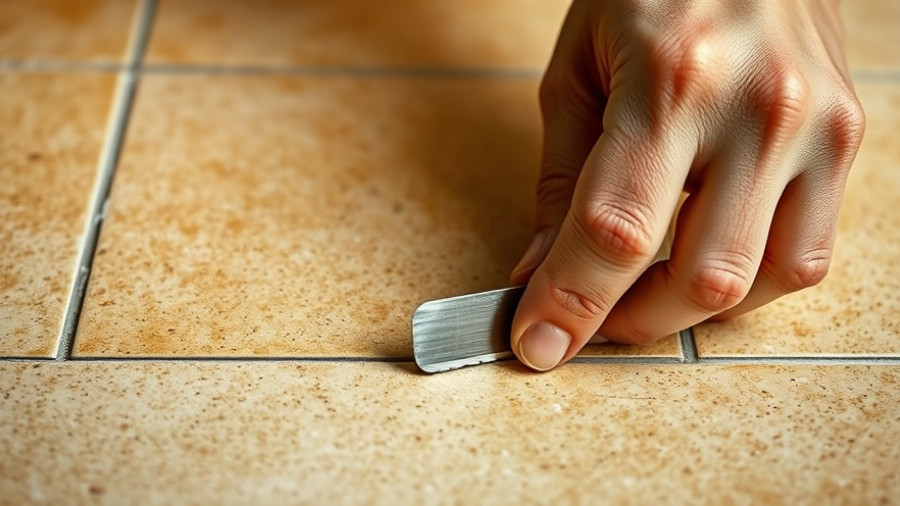
Essential Tools for Grout Removal

Before diving into the methods, you'll want to ensure you have the right materials on hand:

  • Safety goggles
  • Oscillating tool or a manual grout saw
  • Utility knife
  • Vacuum for debris
  • Bucket for mixing solutions
  • Rubbing pads
  • Common household ingredients like vinegar and sugar

Having these materials prepared will make the process much easier.

Method 1: Using an Oscillating Tool

If you’re comfortable using power tools, an oscillating tool can be your best friend for grout removal. Equip it with a specialized grout removal blade and follow these steps:

  • Put on your safety goggles before starting.
  • Work slowly along the grout line. It’s best to hold the tool vertically for vertical seams and horizontally for horizontal seams.
  • Patience is key; the oscillating tool is designed to do the hard work for you.

This method helps prevent damage to the tiles, allowing for a smooth removal process!

Method 2: DIY Sugar Solution

If power tools are not your style, a simple solution using sugar and water may just do the trick! Sugar’s abrasive nature allows it to help loosen up the grout. Here’s how:

  • Mix a gallon of hot water with one cup of sugar in a bucket.
  • Pour the mixture over the grout and leave it to soak overnight.
  • In the morning, use a piece of wood to scrape off the softened grout without scratching your tiles.

It’s an effective and low-cost solution that’s safe for your tiles!

Method 3: Harness the Power of Vinegar

If the sugar solution doesn’t yield results, vinegar can be a strong ally against stubborn grout. Here’s the approach:

  • Mix equal parts vinegar and water in your bucket.
  • Apply the solution to your grout and let it sit for a couple of minutes to soften.
  • Follow up with a toothbrush or scouring pad to scrub the grout free.

Just remember to test a small hidden area first, as vinegar can affect certain types of tile finishes!

Method 4: Wood and Water Technique

This method involves using a simple, non-abrasive tool—in this case, wood:

  • Moisten the grout with water to soften it.
  • Use a piece of wood, such as oak, to gently push against the grout. The wood won’t scratch your tiles like hard metal might.

Once the large chunks are removed, finish it up with a damp pad. This straightforward approach is both gentle and effective!

When to Seek Professional Help

While many grout removal tasks can be tackled as a DIY project, some situations call for a professional touch. If your grout is structurally compromised, missing entirely, or you’re unsure how to proceed with delicate or hard-to-reach areas—calling in the experts may save you time and frustration.

Conclusion: Breathe New Life into Your Tiles

Removing grout may seem daunting at first, but with these methods, you can take steps toward refreshing your tiled surfaces. Whether going down the DIY route or calling in professionals when needed, knowing all your options empowers you to maintain the charm in your home.

Are you ready to tackle your grout situation? Grab your tools, and let’s make those tiles shine again!

Home Maintenance

2 Views

0 Comments

Write A Comment

*
*
Please complete the captcha to submit your comment.
Related Posts All Posts
03.09.2026

Transform Your Bedroom with Stylish Duvet Covers for a Fresh Look

Update Why Duvet Covers Are Key to Bedroom Transformation A well-thought-out duvet cover serves as the heart of your bedroom's aesthetic. It can dramatically change the atmosphere and inject your personal style without needing to overhaul the entire room. By simply swapping out your duvet cover, you can refresh your entire space, creating an inviting sanctuary where you can unwind and recharge. From colors to textures, duvet covers offer the versatility to adapt spaces to match seasonal changes or evolving personal tastes. The Art of Color Selection The colors you choose for your duvet cover can enhance the overall mood of your bedroom. Light and neutral colors like white, cream, and soft gray can create a serene environment, making your bedroom feel brighter and more spacious—perfect for creating tranquility. On the other hand, bold colors like navy, forest green, or deep terracotta can add character and warmth. Layering diverse tones and patterns can give the space a modern update while maintaining a cohesive design. Fabric Matters: Comfort Meets Style The fabric of your duvet cover is as crucial as its aesthetic appeal. Cotton remains a popular choice for its breathability, durability, and easy maintenance. Linen, with its rustic charm, adds a relaxed vibe to the room and softens with each wash, further enhancing its appeal. These fabric choices directly influence comfort, sleep quality, and temperature regulation—important factors to consider for crafting a restful haven. Layering Techniques for a Designer Finish Once you've chosen the right duvet cover, layering becomes the finishing touch that transforms your bed into a work of art. Start with coordinating sheets and add decorative pillows, shams, and throws to introduce texture and depth. This layered approach not only gives a polished look but also allows for easy updates—if you grow tired of a specific throw or pillow, swapping it out is far simpler and more economical than replacing the duvet cover. Creating a Cohesive Look with Accessories A duvet cover does not exist in isolation; it sets off your bedroom decor much like an anchor in a well-crafted design. Consider how curtains, rugs, and wall art can harmonize with your chosen bedding to create a unified aesthetic. Unique accessories—think vases, candles, or framed personal photos—can also enhance your space's personality. By carefully selecting pieces that complement your duvet cover, you can create an atmosphere that feels both luxurious and inviting. Embracing Seasonal Swaps One of the joys of using duvet covers is their ability to adapt to seasons. As spring emerges, consider light linens in soft hues; during the winter months, rich textures and darker tones can create a cozier atmosphere. This practice not only allows for aesthetic freshness but also enhances comfort in your sleep environment throughout the year. Conclusion: Small Changes, Big Impact Refreshing your bedroom need not be an overwhelming endeavor. Updating your duvet cover is a simple yet effective way to add personality and comfort to your space. With countless styles and colors available, you can be assured that there’s an option that fits your unique style perfectly. So, dive into the world of duvet covers, and give your bedroom the revitalization it deserves!

02.26.2026

Hidden Electrical Code Violations in Your Shed: What Homeowners Must Know

Update Understanding Electrical Code Violations: Why They Matter As homeowners, we often think about the aesthetic aspects of our properties, from well-kept lawns to stylish interior designs. However, underlying every well-maintained home are the unseen elements that ensure our safety—like electrical systems. In venues often overlooked, such as sheds, issues can arise that lead to code violations. These violations not only compromise safety but can also lead to significant financial repercussions if not addressed promptly.In 'Hidden Electrical Code Violation in Your Shed — Fix It Before It's Too Late', the discussion dives into crucial safety measures regarding shed inspections, exploring key insights that sparked a deeper analysis on our end. Common Electrical Violations Found in Sheds When examining sheds and other outbuildings, homeowners should familiarize themselves with common electrical issues that could violate codes. These might include: Improper use of extension cords as permanent wiring. Lack of GFCI (Ground Fault Circuit Interrupter) protection in damp areas. Wiring that is not rated for outdoor use, leading to deterioration and potential fires. Identifying and rectifying these issues before they escalate is critical. The dangers posed are not merely theoretical; they can result in electrical fires and serious injuries. How to Identify Violations While some violations require the expertise of a licensed electrician to resolve, homeowners can take certain proactive steps to ensure compliance: Regularly inspect outlets and wiring, looking for frayed cords or discoloration around outlet covers. Consider using a multimeter to test sockets for proper voltage levels. Consult the National Electrical Code (NEC) guidelines or local building codes that outline safety requirements. Maintaining vigilance in these areas can save you from hefty fines during property inspections or worse, from the dangers posed by faulty electrical systems. Future Insights: The Rise of Smart Sheds With the advancement of smart technology, many homeowners are now turning their sheds into tech-savvy spaces equipped with features such as smart lighting and climate control. However, this evolution comes with the need for updated electrical designs. Installing smart systems can result in a compliance need, as improper installations may unintentionally create code violations. Experts predict that as more homeowners invest in smart technology, the awareness of electrical codes related to these advancements will become increasingly important. DIY Solutions Versus Professional Help Many homeowners are eager to embrace DIY fixes, but some electrical tasks are best left to professionals. Understanding what you can tackle on your own, versus when to call in an expert, can save you time and potential costly mistakes: DIY: Replacing light fixtures and switches, repairing minor wiring issues. Call a Professional: Installing new circuits, fixing outdated systems, upgrading your power supply. Striking the right balance can maintain the functionality of your outdoor spaces—like your shed—while ensuring safety and compliance. Conclusion: The Importance of Vigilance Ensuring your shed is up to code with electrical standards is crucial for your safety and peace of mind. Regular inspections, coupled with ongoing education about electrical systems, can empower homeowners to avoid violations. If you suspect that there might be issues in your shed or elsewhere in your home, don’t hesitate to contact an electrician. Being proactive can protect you from future hazards and ensure that your recreational spaces remain safe and enjoyable.

02.06.2026

Shed Renovations: Why Drywall Is Out and Alternatives Are In

Update Revamping Shed Interiors: Why Drywall Might Be Outdated As homeowners seek efficient and durable solutions for their outdoor spaces, the traditional use of drywall in sheds is being re-evaluated. While drywall once seemed the go-to choice for its ease of installation and finish, it often succumbs to moisture and temperature fluctuations typical in shed environments. In this article, we explore compelling alternatives that are more suited for sustaining outdoor structures, all designed to enhance your shed's functionality and longevity.In the video 'Drywall Is Dead for Sheds—Here’s the Alternative,' we explore exciting materials that can replace drywall in shed renovations, prompting us to analyze these options further. Alternative Materials: What’s Better Than Drywall? One of the key alternatives to drywall is plywood or OSB (Oriented Strand Board). Both options provide a sturdy wall structure that is easier to maintain and more resistant to rot and mold. Additionally, they can be treated for added weather resilience. Another excellent alternative is the use of metal panels, which not only lend a modern aesthetic but also offer exceptional durability against the elements. Cost-Effective Solutions for Homeowners Switching to non-drywall options can save homeowners both time and money in the long run. Costs associated with drywall repairs and replacements can significantly add up, especially when dealing with moisture damage. Investing in materials like treated plywood or metal can therefore prove more financially viable, especially considering their extended lifespan. The DIY Factor: Easy Installation Tips For the DIY enthusiasts, these alternative materials are relatively easy to work with. Plywood sheets can be cut to size using standard tools and nailed or screwed into place without heavy machinery. Likewise, metal panels can be affixed without extensive training. Many homeowners taking on such projects find this simplicity appealing, allowing for a personal touch in their shed renovations. Future Trends in Outdoor Structures Looking ahead, the trend towards sustainable materials continues to grow. Innovations in composite materials that combine durability with eco-friendliness are emerging in the shed construction space. Utilizing modern design trends that favor minimalism and environmental consciousness, homeowners can enhance aesthetics while making responsible choices. Combining Functionality with Design As we pivot away from traditional drywall, there’s an opportunity to blend functionality with design. By opting for painted plywood, homeowners can achieve a rustic charm with a splash of color, transforming their sheds into multi-functional spaces. Whether used for storage, hobbies, or workshops, these new concepts can turn a shed into a beautiful extension of home life. Creating an Inviting Shed Space For many homeowners, a shed can be more than just a storage unit; it can be an oasis for relaxation or creativity. Thoughtful design—including quality materials that replace drywall—can enhance the overall atmosphere of your shed. So think about implementing cozy furnishings, lighting, and decor that align with your personal style. With the right approach, your shed can become a welcoming retreat.

Terms of Service

Privacy Policy

Core Modal Title

Sorry, no results found

You Might Find These Articles Interesting

T
Please Check Your Email
We Will Be Following Up Shortly
*
*
*