 Add Row
  Add
Add 

Easily Replace Your Smoke Detector in Simple Steps
Home safety is a top priority for every homeowner, and ensuring that your smoke and carbon monoxide detectors are functioning properly is crucial. From time to time, these devices may require replacement, especially when they've reached the end of their service life. Today, we delve into a practical guide on how you can effortlessly swap out a hardwired smoke or smoke/CO detector, transforming a potentially daunting task into a manageable DIY project.
In Replacing a Failed Hard-Wired Smoke or Smoke/CO Detector | Fast Easy DIY, the discussion dives into effective strategies for home safety, exploring key insights that sparked deeper analysis on our end.
Understanding the Importance of Smoke Detectors
Every year, thousands of homes are affected by fires and carbon monoxide leaks. These silent threats can turn deadly within minutes if not detected in time. Research shows that working smoke detectors cut the risk of dying in a fire in half. Thus, understanding how to maintain and replace these critical devices is essential for every homeowner, particularly those within the 40 to 50 age demographic, where family safety is likely a top concern.
Assessing Your Current Detectors
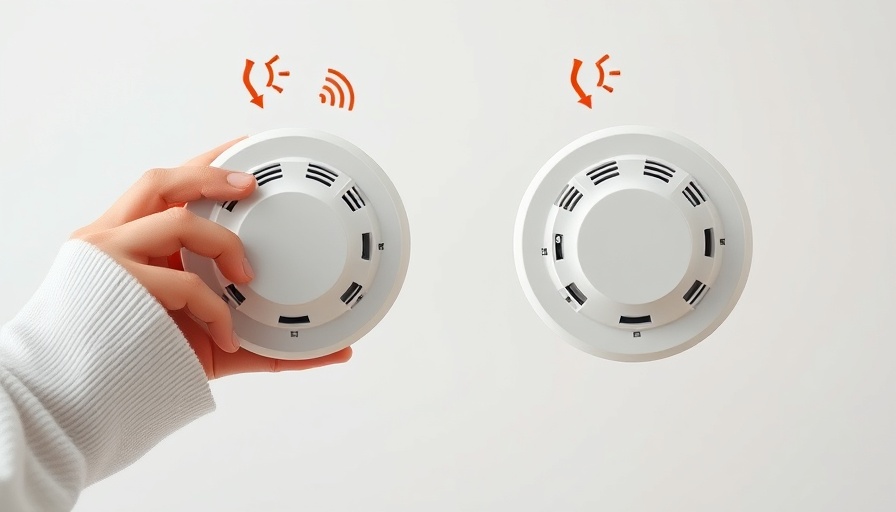
Before jumping into the replacement process, it's vital to assess whether your current smoke detector is functioning or if it’s time for a change. Test your detector by pressing the test button, and look for any unusual chirping sounds, which may indicate low battery or unit failure. Remember, many smoke detectors have a service life of approximately 10 years, as indicated on the unit itself. Understanding these key points can save you time and effort before committing to a replacement.
Gathering Necessary Tools and Materials
To facilitate a smooth replacement process, gather all necessary tools beforehand. Required tools include a non-contact voltage tester to ensure safety while working with electrical wires, a screwdriver, and possibly a new adapter harness or lever nuts, depending on the compatibility of your new unit with the existing hardware. Having a checklist of these supplies will streamline your project and minimize interruptions.
Step-by-Step Replacement Process
Now that you're ready, let’s walk through the replacement process.
1. Remove The Old Detector: Use the non-contact voltage tester to confirm there’s no power running to the unit before carefully removing it from the base plate. This usually involves pulling a tab down and rotating it counter-clockwise.
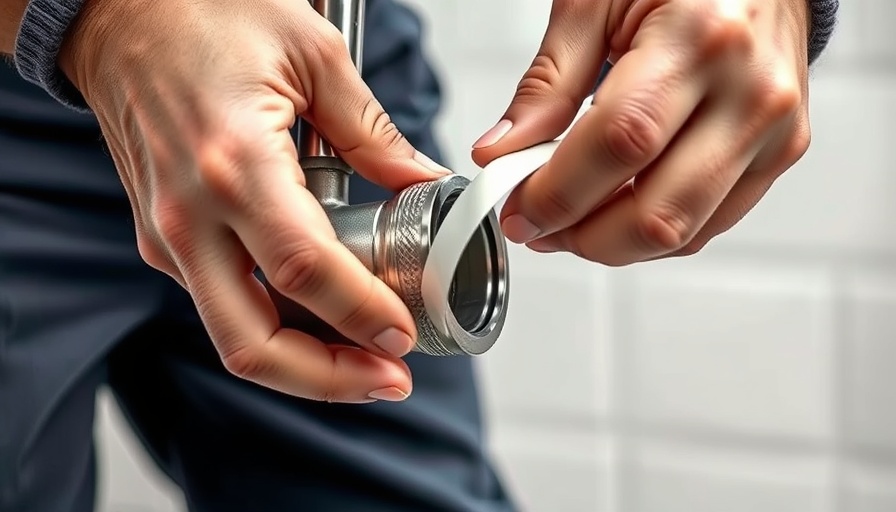
2. Prepare The New Unit: When purchasing a new detector, consistency in brand can often simplify the installation. However, if the connectors do not match, consider using an adapter harness for easy installation without needing to rewire. For a more secure connection, lever nuts are highly recommended over traditional wire nuts.
3. Install The New Detector: If the new unit fits the existing plate, simply attach it and secure with screws. If it's not a direct fit, follow the adapter instructions to reconnect the wires. Following this, restore power and test the new smoke detector to ensure it is functioning correctly.
Maintenance Checklist for Safety
As highlighted in the installation video, having a maintenance checklist can serve as a helpful reminder for periodic checks. A simple visual cue, like placing the checklist on your refrigerator, can aid in tracking monthly and seasonal maintenance tasks for your home. Remember to press the test button on your detectors regularly as part of your routine.
Final Thoughts: Empowering Homeowners
Replacing a smoke or smoke/CO detector isn’t just a DIY project; it’s a step towards securing your home and family. Understanding the process and knowing when to initiate replacement can empower homeowners to take charge of their safety. If you've ever felt overwhelmed at the thought of electrical DIY tasks, remember that resources and community support are available to guide you through the process.
So, if you're ready to enhance your home's safety, consider taking action today! For more video tutorials and resources on home maintenance such as this, don't forget to check out the links provided in the video description. Stay safe, and happy home-keeping!
Write A Comment