Add Row
Add Element
cropper
update
Atlanta Home Garden Insider
update
Add Element
  • Home
  • Categories
    • DIY Projects
    • Sustainable Practices
    • Design Trends
    • Landscaping
    • Lawn and Garden Care
  • Smart Home Tech
  • Interior Design Tips
  • Home Maintenance
July 30.2025
3 Minutes Read

Transform Your Home's Space: A Complete Guide to Metal Shelving

Sleek black metal shelving unit in a modern minimalist room.

Maximizing Your Space: The DIY Revolution

Are you looking to breathe new life into your home while maximizing every inch of space? For many homeowners, particularly those in the 40 to 65 age range, finding practical and aesthetically pleasing solutions is essential. One such solution is metal shelving, which can transform how your living area looks and functions.

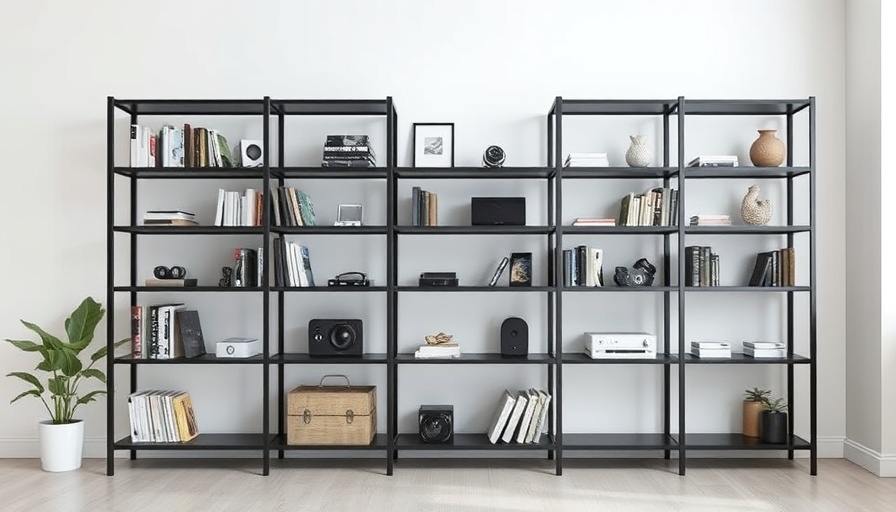
Metal shelves add a modern touch to any room while providing robust storage capacity. Ideal for those looking to declutter, these versatile units can accommodate everything from heavy tools in the garage to plants and decor in your living areas. With the right approach, installing them can be a rewarding DIY project.

Why Metal Shelves Stand Out

The appeal of metal shelves lies in their numerous benefits:

  • Durability: Constructed from materials like steel, metal shelves boast exceptional longevity. Unlike wood, they don't warp or rot, making them perfect for damp basements or hot garages.
  • Load Capacity: Their sturdy design allows them to support heavier items than plastic or wooden shelves—ideal for all your storage needs.
  • Versatility: Available in a variety of styles and finishes, metal shelves can complement both industrial and modern home decor.
  • Easy Maintenance: Simple to clean and resistant to pests, maintaining metal shelves is hassle-free—just a damp cloth is often sufficient!

Preparing for Your DIY Adventure

Ready to dive into installing metal shelves? Start by selecting the right kind of shelving based on your storage needs and space availability. Here’s how to go about it:

  • Choosing the Right Shelving: Determine the size and the weight capacity—different shelves serve different purposes. Heavy-duty shelves might suit your garage, while lighter, decorative models could be perfect for your living room.
  • Gathering Your Tools: Assemble the essentials before you get started. You’ll need a power drill, a level, a measuring tape, screws, and safety goggles. If your shelves come with brackets, a stud finder will be necessary.

Step-By-Step Installation Process

  1. Marking Your Location: Use your measuring tape to find the perfect height for your shelves. Mark spots for your brackets using pencil.
  2. Drilling the Holes: Carefully drill into the wall at your marked points. Ensure that you keep the drill straight to avoid uneven shelves.
  3. Attaching the Brackets: Secure the brackets with screws, using the level to ensure they’re perfectly vertical.
  4. Placing the Shelves: After securing the brackets, place the metal shelves on top. Ensure they are stable before adding any items.

Common Challenges and How to Overcome Them

While installing metal shelves is generally straightforward, homeowners might face common challenges. For instance, aligning the brackets can be tricky. A helpful tip is to use painter's tape on the wall to visualize where each bracket will go before drilling holes. Additionally, some surfaces might not easily accommodate wall anchors; it’s vital to use appropriate anchors for your wall type.

Think Beyond Storage: Aesthetics and Functionality

Once your metal shelves are up, think about how you can style them. Decorative items can bring personality to your shelves, making them functional and lively. Incorporating plants, art, or books not only enhances visual interest but can also contribute to your home’s ambiance.

Transforming your living space doesn't have to be overwhelming. With metal shelving and a bit of creativity, you can efficiently utilize your home’s potential while enjoying the satisfaction of a job well done.

Take Action Today!

Why wait to upgrade your home’s storage capabilities? By embracing this DIY project, you can maximize your space, enjoy the benefits of a tidy environment, and add personality to your home decor. Get started today, and discover how metal shelves can change your living space!

Home Maintenance

0 Views

0 Comments

Write A Comment

*
*
Related Posts All Posts
07.31.2025

Diagnosing and Repairing Your Shower Diverter Like a Professional

Update What is a Shower Diverter and Why is it Important? Before diving into the repair process, it's crucial to understand what a shower diverter is and its role in your bathroom. A shower diverter directs the flow of water either to your bathtub faucet or your showerhead. It can take on various forms, including a pull-up knob located on the tub spout or a separate lever between the hot and cold taps. Knowing your diverter type can significantly affect the way you approach repairs and maintenance. Identifying the Problem: Signs Your Diverter is Broken Homeowners often face confusion when water continues to flow from both the tub faucet and showerhead. This is a classic indication that your diverter is malfunctioning. Typically, this issue stems from a rubber stopper inside the diverter that fails to create a reliable seal, allowing water to escape through both outlets. Understanding this can save you time and frustration during your repair journey. Types of Shower Diverters: Which Do You Have? It's essential to identify the specific type of diverter installed in your bathroom. Here are the three main types to look out for: 3-Valve Diverter: Primarily found in two-tap faucet systems. 2-Valve Diverter: Best suited for single-dial temperature adjusters. Tee or Single-Valve Diverter: This common style requires pulling up to redirect water to the showerhead. Gathering Your Tools for the Fix Before starting your repair project, ensure you gather all the necessary tools: Vinegar Plastic bag Rubber band Cooking spray Paper towels Screwdriver Plier Sandpaper Baking soda New shower spout or valve gate (if needed) Step-by-Step Guide: Fixing Your Diverter with Ease Now, let’s get to the core of our task: fixing the shower diverter. Here’s a straightforward method that you can follow: Cleaning the Spout: Begin by addressing build-up. Submerge the spout in a mixture of water and vinegar, sealed in a plastic bag. Leave it for 3 to 4 days to allow the vinegar to work its magic. This method is not only effective but also non-toxic, making it safe for your home. Using Cooking Spray: For diverters that feel stiff due to hardening, a quick spray of cooking oil can loosen the mechanism. Avoid harsher chemicals, as they can lead to corrosion. Common Misconceptions about Shower Diverters Many assume that complex plumbing issues necessitate a plumber’s expertise. However, common problems like a faulty diverter can often be resolved with a DIY approach. Not only does this save you money, but it also empowers you as a homeowner to take charge of your home maintenance. Looking Ahead: Keeping Your Diverter in Top Condition Once you've fixed the diverter, consider preventive measures like regular cleaning to avoid future issues. This upkeep can include cleaning with vinegar periodically and checking for leaks annually to ensure optimal performance. Take Action: DIY Home Repair Awaits! Don't let a malfunctioning shower diverter disrupt your home’s comfort. Armed with the right knowledge and tools, you can fix it like a pro! Consider sharing this article with friends or neighbors who might face similar challenges. Together, we can make home maintenance a breeze!

07.29.2025

Choosing the Right Features for Your Kitchen Remodel: A Homeowner's Guide

Update The Heart of Your Home: Why a Kitchen Remodel Matters A kitchen remodel is far more than just a cosmetic upgrade; it represents a significant investment in the usability, aesthetics, and value of one of the most utilized spaces in any home. From families gathering over dinner to friends sharing stories over coffee, the kitchen is often the scene of cherished memories. As such, taking the time to thoughtfully select the right features is essential for crafting a space that enhances both your daily routines and overall lifestyle. Define Your Style: What’s Your Kitchen Vision? Before diving into the specifics of countertops and cabinets, it's crucial to define your style. Are you drawn to the timeless elegance of a classic kitchen, the sleek lines of modern design, or the charm of a rustic aesthetic? Each style has its own distinct identity and requires different selections that will resonate with your personal taste. Timeless looks often lean into traditional elements like shaker cabinets and farmhouse sinks, utilizing a neutral color palette that allows for flexible decor changes over time. For those craving boldness, a minimalist yet edgy design featuring stainless steel finishes, statement countertops, and geometric shapes can make a true impact. Exploring other styles, such as coastal, industrial, or rustic, can also enrich your options. Coastal kitchens offer breezy designs with light colors, while industrial styles bring unique character through exposed materials. All these options cater to different lifestyles, preferences, and practical needs. Key Features That Elevate Your Kitchen Once you're clear on the style, it's time to delve into essential features that will govern the functionality of your kitchen. From countertops and appliances to cabinetry and flooring choices, each element plays a significant role. Not only must they be attractive, but they should also be durable and easy to maintain, as the kitchen is exposed to a fair amount of wear and tear. For instance, choosing countertops made from resilient materials like quartz or granite can withstand daily use while still looking stunning. Flooring should balance style with practicality—look for beautiful finishes that are also easy to clean. When considering appliances, it's vital to align selections with your cooking habits. Energy-efficient appliances not only help save on utility costs but also contribute positively to your health and environmental footprint. Thoughtful cabinet designs that maximize storage without compromising accessibility can also streamline your cooking and cleaning processes. Trends and Innovations: Smart Features for a Modern Kitchen As technology continues to evolve, integrating smart features can elevate your kitchen's functionality. Imagine controlling your cooking appliances via smartphone or getting reminders from your refrigerator on stock levels! This level of convenience not only enhances your cooking experience but also aligns with the increasing desire for sustainable living and efficiency in home design. Incorporating features like energy-efficient lighting, smart thermostats, and touchless faucets can minimize water waste while heightening usability. These innovations transform your kitchen into a space that works harder for you, blending practicality with modern living. Making Informed Decisions for Longevity As you embark on this remodel journey, remember that the decisions you make now will influence your kitchen for years to come. By prioritizing durable materials and thoughtful design, you'll create a space that not only meets your immediate needs but also stands the test of time. The goal is to achieve a harmonious balance between aesthetic appeal, functionality, and sustainability. Take Action: Start Your Kitchen Remodel Today! Your kitchen remodel holds the potential to transform your home and everyday life significantly. By following the steps outlined here, you'll be well-equipped to make choices that will enhance both your culinary experience and your home's value. Ready to dive in? Begin crafting your dream kitchen today!

07.29.2025

How to Properly Clean Engineered Hardwood Floors and Keep Them Shining

Update Unlocking the Secret to Maintaining Your Engineered Hardwood Floors As a homeowner, investing in engineered hardwood floors can significantly enhance the elegance of your space. However, this beautiful flooring requires specific care to ensure its longevity. Are you concerned about keeping your floors dazzling and well-maintained? Worry no more! This comprehensive guide will walk you through the best practices for cleaning engineered hardwood while protecting its stunning finish. Daily Dust Control: Keep Debris at Bay Regular maintenance starts with a simple yet effective habit: sweeping. Make it a practice to sweep your floors daily to remove loose dust, dirt, and hair. If your home sees a lot of foot traffic, this shouldn't be overlooked. For those busy households with kids or pets, investing in a lightweight vacuum without a rotating bristle bar can streamline the process while preventing scratches. Incorporating Mopping into Your Routine Mopping is an essential component of your cleaning ritual. The frequency of mopping depends on foot traffic; high-traffic areas benefit from weekly mopping while low-traffic areas can be mopped once a month. Remember, it’s crucial to use a damp mop instead of a wet one. Too much moisture can damage the integrity of engineered flooring. Choose a high-quality engineered wood floor cleaner to maintain that shine and prevent dullness. The Importance of Regular Deep Cleaning Even with daily sweeping and weekly mopping, regular deep cleaning is necessary to remove contaminants and restore the beauty of your floors. At least once every six months—or whenever you notice a buildup of grime—consider deep cleaning your floors. This might involve using specialized wood floor cleaners and a damp cloth to wipe away the dirt that regular cleaning may miss. Dealing with Scratches: A Quick Response is Key Engineered hardwoods are more resistant to wear and tear than traditional wood, but they aren't invincible. Scratches can occur, especially in high-traffic areas. Addressing these scratches promptly is essential. Use a wood floor repair kit to fix minor scratches quickly, and avoid letting them linger. A little proactive care can prevent costly repairs down the line. Choose the Right Tools: Essential Cleaning Supplies Before you dive into your cleaning routine, gather the right supplies. Essential tools for this task include: Vacuum cleaner with soft brush attachment Damp mop Cleaning detergent specifically designed for engineered hardwood White vinegar for natural disinfection Damp cloth for polishing spots Having these at your fingertips combines efficiency and thoroughness in your cleaning process. What Your Floors Say About Your Home Clean floors reflect not just hygiene but pride in your home. A tidy environment can significantly impact the mood and atmosphere of your space. It creates a welcoming vibe for guests and fosters a sense of comfort for your family. Moreover, maintaining your engineered hardwood can enhance its lifespan, ensuring that your investment continues to pay off. Future-Proofing Your Floors: Investing in Quality As you maintain your engineered hardwood floors, consider the materials you choose for cleaning. Opt for eco-friendly cleaners that won't damage your flooring or release harmful chemicals into your home. Sustainable practices can contribute to a healthier indoor environment while preserving the beauty of your home. The benefits extend beyond aesthetics—cleaning wisely protects your floors from extensive wear. In conclusion, taking the extra steps to properly care for your engineered hardwood floors not only enhances their appearance but prolongs their life. Utilize the right cleaning methods and tools, and don’t hesitate to tackle any scratches or grime as they appear. Your investment is worth the effort! To learn more about effective home maintenance tips, be sure to explore additional resources.

Terms of Service

Privacy Policy

Core Modal Title

Sorry, no results found

You Might Find These Articles Interesting

T
Please Check Your Email
We Will Be Following Up Shortly
*
*
*