Add Row
Add Element
cropper
update
Atlanta Home Garden Insider
update
Add Element
  • Home
  • Categories
    • DIY Projects
    • Sustainable Practices
    • Design Trends
    • Landscaping
    • Lawn and Garden Care
  • Smart Home Tech
  • Interior Design Tips
  • Home Maintenance
August 01.2025
3 Minutes Read

Tired of Your Water Heater Pilot Light Going Out? Solve It Now!

Close-up of water heater pilot light knob being adjusted.

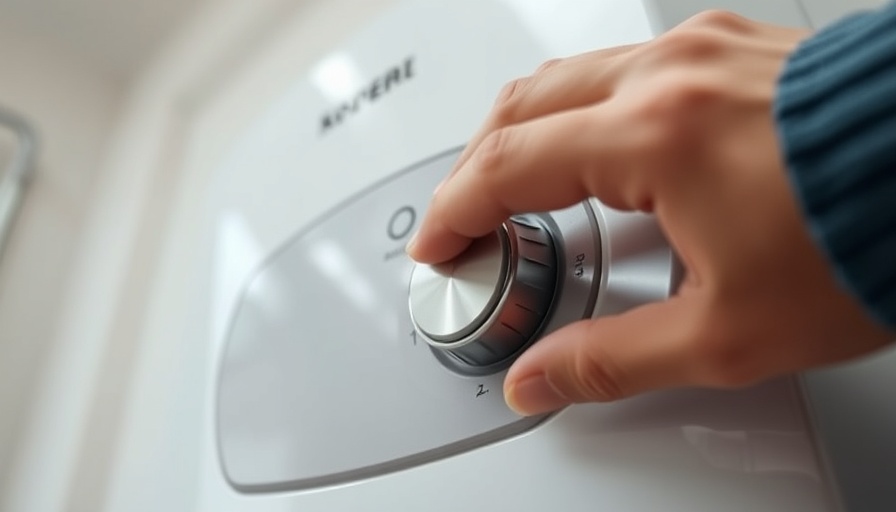
Understanding Your Water Heater's Pilot Light

The pilot light is the unsung hero of your water heater, ensuring that hot water is available whenever you need it. For homeowners, dealing with a stubborn pilot light can be a frustrating ordeal, especially during winter months when warm water is essential. If you’ve found yourself repeatedly relighting your water heater’s pilot light, it’s crucial to understand what may be causing this issue and how you can remedy it without calling a professional.

Why Does the Pilot Light Go Out?

Understanding why a water heater pilot light won’t stay lit is the first step towards solving the issue. Below are several common culprits that can contribute to pilot light issues, along with practical DIY solutions.

1. Thermocouple Troubles

One primary reason for a pilot light going out is a malfunctioning thermocouple. The thermocouple is a safety device that senses whether the pilot light is on and prevents the gas valve from opening if it is not. If your pilot light goes out frequently after you have relit it, inspect the thermocouple. While replacing it generally requires professional advice, cleaning it with sandpaper can often solve minor issues. Always ensure the gas supply is turned off before performing any maintenance.

2. Air Supply Shortage

Another common issue is insufficient combustible air. Water heaters require a steady flow of air to maintain the pilot flame. Check the surrounding area for debris or lint blocking vents, and ensure your heater is installed in a sufficiently ventilated area to promote efficient combustion.

3. Clean the Pilot Tube

A clogged pilot tube can also disrupt the pilot flame. This narrow tube channels gas to the pilot light, and if it’s filled with dust or debris, it can lead to a weak flame that flickers out. Using a slender needle to carefully clear any blockage can effectively restore your system's functionality.

4. Inspect the Main Control Valve

While less common, issues with the main control valve can cause pilot light problems. This valve is responsible for regulating gas pressure and flow to the heater. If you have checked other components and the problem persists, it may signal a malfunctioning valve that requires professional replacement.

5. Beware of Wiring Issues

Electrical wiring problems can also contribute to pilot light issues—particularly in appliances that rely on electric ignition systems. If your heater has wiring connections that are loose or damaged, a technician should examine them to prevent further issues.

Taking Proactive Steps

Regular maintenance can go a long way. Homeowners should schedule inspections at least once a year to check for any potential issues that could compromise their water heater’s efficiency. Simple actions like regularly cleaning around your water heater can preempt many pilot light problems.

Empowering Your DIY Skills

Fixing pilot light issues can often be tackled with a bit of knowledge, courage, and DIY effort. Understanding the components and common issues allows homeowners to feel empowered and more in control of their home maintenance. Connecting with your water heater system not only saves time and money but also enhances your overall home wellness.

You don't have to suffer the inconvenience of a cold shower again! Armed with this information, take action today: clean, inspect, and maintain your water heater's components regularly. For further information about how to maintain a healthy home environment, consider exploring resources on other essential home maintenance topics.

Home Maintenance

0 Views

0 Comments

Write A Comment

*
*
Related Posts All Posts
08.02.2025

Custom vs Standard Window Well Covers: Which Is Right For You?

Update Understanding Window Well Covers: A Homeowner's Guide Protecting your basement from water damage, pests, and accidents is crucial for any homeowner. That's where window well covers come into play. When it comes to choosing the right cover, you may find yourself torn between standard and custom options. Let’s explore the differences, so you can make an informed decision that fits your needs. Standard Window Well Covers: The Quick and Easy Solution Standard covers are akin to finding a ready-made outfit; they're easy to get, budget-friendly, and generally fit common window well sizes—like rectangular or semicircle models. Available in materials such as polycarbonate or metal, these covers often suit typical homes well. Advantages of Standard Covers Budget-Friendly: Standard covers are cost-effective and easily found in home improvement stores. Quick Installation: Simply measure your window well, select the correct size, and you’re good to go! Good for Common Wells: If your window well sizes are standard, these covers will provide adequate protection. Best for: Homeowners with standard window wells. DIY enthusiasts looking for a fast installation. Those aiming to save on costs. Custom Window Well Covers: Tailored for Perfection On the other end of the spectrum, custom covers are like tailored suits; they offer a precise fit specifically designed for your window wells, accommodating any unique shapes or slopes. This often results in superior protection and aesthetics. Benefits of Custom Covers Perfect Fit: Designed to fit the exact dimensions, ensuring no gaps that might allow water or debris to enter. Enhanced Protection: Custom covers excel at keeping out rain, snow, dirt, and wildlife. Stronger Materials: Many custom options can handle heavier loads, making them highly durable. Stylish Choices: Customization provides various options for material and color, allowing for better integration into your home’s aesthetics. Best for: Homes with uniquely shaped wells. Areas with extreme weather conditions. Families with young children or pets needing added safety. Making the Choice: Custom vs Standard Choosing between a standard and custom window well cover ultimately depends on your specific situation. Consider: Shape and Size: Is your window well unusual? A custom cover may be the answer. Weather Challenges: Frequent storms or heavy snow? A snug fit from a custom cover may offer peace of mind. Budget: If you’re aiming for savings and your windows are standard-sized, go with a standard cover. Real-Life Experiences: What Other Homeowners Are Saying In speaking with various homeowners, it's clear that experiences with window well covers vary widely based on personal preferences and individual circumstances. For instance, Jane from Ohio, who installed standard covers, found them sufficient until a heavy storm proved otherwise. Ultimately, she decided to invest in custom covers more suited to bedrock-like window wells. Meanwhile, Mark from Michigan succeeded with standard covers and avoids heavier structures around his home's foundation. Personal experiences such as these underscore the importance of weighing your options. Conclusion: Protecting What Matters Most Your window well covers can greatly affect the safety, efficiency, and aesthetic appeal of your home. Whether opting for a budget-friendly standard model or investing in a custom design tailored to your unique needs, what matters is that you choose the solution that best protects your home. Explore your options, consider your priorities, and don't hesitate to ask for professional advice when needed. After all, a well-chosen window well cover not only protects your home but enhances it. Ready to safeguard your home? Connect with us today to explore the best window well cover options tailored for your home!

07.31.2025

Diagnosing and Repairing Your Shower Diverter Like a Professional

Update What is a Shower Diverter and Why is it Important? Before diving into the repair process, it's crucial to understand what a shower diverter is and its role in your bathroom. A shower diverter directs the flow of water either to your bathtub faucet or your showerhead. It can take on various forms, including a pull-up knob located on the tub spout or a separate lever between the hot and cold taps. Knowing your diverter type can significantly affect the way you approach repairs and maintenance. Identifying the Problem: Signs Your Diverter is Broken Homeowners often face confusion when water continues to flow from both the tub faucet and showerhead. This is a classic indication that your diverter is malfunctioning. Typically, this issue stems from a rubber stopper inside the diverter that fails to create a reliable seal, allowing water to escape through both outlets. Understanding this can save you time and frustration during your repair journey. Types of Shower Diverters: Which Do You Have? It's essential to identify the specific type of diverter installed in your bathroom. Here are the three main types to look out for: 3-Valve Diverter: Primarily found in two-tap faucet systems. 2-Valve Diverter: Best suited for single-dial temperature adjusters. Tee or Single-Valve Diverter: This common style requires pulling up to redirect water to the showerhead. Gathering Your Tools for the Fix Before starting your repair project, ensure you gather all the necessary tools: Vinegar Plastic bag Rubber band Cooking spray Paper towels Screwdriver Plier Sandpaper Baking soda New shower spout or valve gate (if needed) Step-by-Step Guide: Fixing Your Diverter with Ease Now, let’s get to the core of our task: fixing the shower diverter. Here’s a straightforward method that you can follow: Cleaning the Spout: Begin by addressing build-up. Submerge the spout in a mixture of water and vinegar, sealed in a plastic bag. Leave it for 3 to 4 days to allow the vinegar to work its magic. This method is not only effective but also non-toxic, making it safe for your home. Using Cooking Spray: For diverters that feel stiff due to hardening, a quick spray of cooking oil can loosen the mechanism. Avoid harsher chemicals, as they can lead to corrosion. Common Misconceptions about Shower Diverters Many assume that complex plumbing issues necessitate a plumber’s expertise. However, common problems like a faulty diverter can often be resolved with a DIY approach. Not only does this save you money, but it also empowers you as a homeowner to take charge of your home maintenance. Looking Ahead: Keeping Your Diverter in Top Condition Once you've fixed the diverter, consider preventive measures like regular cleaning to avoid future issues. This upkeep can include cleaning with vinegar periodically and checking for leaks annually to ensure optimal performance. Take Action: DIY Home Repair Awaits! Don't let a malfunctioning shower diverter disrupt your home’s comfort. Armed with the right knowledge and tools, you can fix it like a pro! Consider sharing this article with friends or neighbors who might face similar challenges. Together, we can make home maintenance a breeze!

07.30.2025

Transform Your Home's Space: A Complete Guide to Metal Shelving

Update Maximizing Your Space: The DIY Revolution Are you looking to breathe new life into your home while maximizing every inch of space? For many homeowners, particularly those in the 40 to 65 age range, finding practical and aesthetically pleasing solutions is essential. One such solution is metal shelving, which can transform how your living area looks and functions. Metal shelves add a modern touch to any room while providing robust storage capacity. Ideal for those looking to declutter, these versatile units can accommodate everything from heavy tools in the garage to plants and decor in your living areas. With the right approach, installing them can be a rewarding DIY project. Why Metal Shelves Stand Out The appeal of metal shelves lies in their numerous benefits: Durability: Constructed from materials like steel, metal shelves boast exceptional longevity. Unlike wood, they don't warp or rot, making them perfect for damp basements or hot garages. Load Capacity: Their sturdy design allows them to support heavier items than plastic or wooden shelves—ideal for all your storage needs. Versatility: Available in a variety of styles and finishes, metal shelves can complement both industrial and modern home decor. Easy Maintenance: Simple to clean and resistant to pests, maintaining metal shelves is hassle-free—just a damp cloth is often sufficient! Preparing for Your DIY Adventure Ready to dive into installing metal shelves? Start by selecting the right kind of shelving based on your storage needs and space availability. Here’s how to go about it: Choosing the Right Shelving: Determine the size and the weight capacity—different shelves serve different purposes. Heavy-duty shelves might suit your garage, while lighter, decorative models could be perfect for your living room. Gathering Your Tools: Assemble the essentials before you get started. You’ll need a power drill, a level, a measuring tape, screws, and safety goggles. If your shelves come with brackets, a stud finder will be necessary. Step-By-Step Installation Process Marking Your Location: Use your measuring tape to find the perfect height for your shelves. Mark spots for your brackets using pencil. Drilling the Holes: Carefully drill into the wall at your marked points. Ensure that you keep the drill straight to avoid uneven shelves. Attaching the Brackets: Secure the brackets with screws, using the level to ensure they’re perfectly vertical. Placing the Shelves: After securing the brackets, place the metal shelves on top. Ensure they are stable before adding any items. Common Challenges and How to Overcome Them While installing metal shelves is generally straightforward, homeowners might face common challenges. For instance, aligning the brackets can be tricky. A helpful tip is to use painter's tape on the wall to visualize where each bracket will go before drilling holes. Additionally, some surfaces might not easily accommodate wall anchors; it’s vital to use appropriate anchors for your wall type. Think Beyond Storage: Aesthetics and Functionality Once your metal shelves are up, think about how you can style them. Decorative items can bring personality to your shelves, making them functional and lively. Incorporating plants, art, or books not only enhances visual interest but can also contribute to your home’s ambiance. Transforming your living space doesn't have to be overwhelming. With metal shelving and a bit of creativity, you can efficiently utilize your home’s potential while enjoying the satisfaction of a job well done. Take Action Today! Why wait to upgrade your home’s storage capabilities? By embracing this DIY project, you can maximize your space, enjoy the benefits of a tidy environment, and add personality to your home decor. Get started today, and discover how metal shelves can change your living space!

Terms of Service

Privacy Policy

Core Modal Title

Sorry, no results found

You Might Find These Articles Interesting

T
Please Check Your Email
We Will Be Following Up Shortly
*
*
*