Add Row
Add Element
cropper
update
Atlanta Home Garden Insider
update
Add Element
  • Home
  • Categories
    • DIY Projects
    • Sustainable Practices
    • Design Trends
    • Landscaping
    • Lawn and Garden Care
  • Smart Home Tech
  • Interior Design Tips
  • Home Maintenance
August 26.2025
3 Minutes Read

Easy Step-by-Step Guide on How to Remove a Screen from a Window

Man removing a screen from a window, outdoor setting

Mastering Window Screen Removal: An Essential DIY Skill

Have you ever dealt with a broken window screen? Whether it’s for maintenance or simply updating your home’s aesthetic, knowing how to properly remove a screen from a window is essential for any homeowner. Screens not only keep out bugs but also help in ventilation, making them integral to our homes. This guide walks you through a simple process for removing window screens safely, ensuring you understand the different types of screens and windows you may encounter.

Understanding Your Window Types: A Key to Removal

Before you start the removal process, it’s crucial to identify the type of window you have. Windows can differ in their design and operation, which affects screen removal methods:

  • Interior Screens: Installed from the inside, these screens are typically easier to access. Ensure you fully open the window before attempting removal.
  • Exterior Screens: Installed on the outside, these may require additional care to avoid damage. Familiarize yourself with any latches or clips that might be present.

Styles of Windows and Their Unique Features

Knowing the window style is equally as important:

  • Single-Hung Windows: These allow ventilation from one section and are the easiest to handle.
  • Double-Hung Windows: Most common in homes, these windows can open from both the top and bottom, adding flexibility.
  • Casement Windows: Hinged on the side and opened with a crank, these have specific methods for screen removal.
  • Sliding Windows: Often used in modern designs, these glide open horizontally and generally have one or two sliding screens.

A Step-by-Step Guide to Removing Your Window Screen

Follow these straightforward steps to remove the screen from your window:

  1. Start by fully opening the window from both sides.
  2. Locate the tabs or pins securing the screen, typically found at the corners or sides.
  3. Carefully pull out these tabs while supporting the screen with your other hand.
  4. Rotate the screen towards the middle and lift it clear of the frame.
  5. Keep any pins or latches in a safe place for future installation.
  6. Set the screen aside in a safe location.

Why Proper Removal Matters

Proper screen removal not only preserves the integrity of your screens but also extends their life and enhances your ability to keep your home comfortable. Ignoring the correct methods can result in bent frames or broken screens, leading to additional costs and hassle in repairs.

Future Considerations: Maintenance Tips for Screens

Once your screen is removed, consider the following maintenance tips to keep your windows in optimal condition:

  • Regular Cleaning: Clean your screens with a gentle soap and water solution to keep them free of dust and grime.
  • Inspections: Regularly inspect for tears or damage to catch problems early.
  • Replacement Scheduling: If screens are frayed or no longer fit snugly, it may be time to replace them, ensuring continued bug protection.

Next Steps: Ready for the Project?

Now that you’re equipped with the knowledge of how to remove a screen from a window, why not put this skill to use? Whether you're replacing an old screen or maintaining your current ones, this DIY project can refresh your living space and enhance functionality. Plus, it’s a satisfying task that you can tackle confidently!

Embrace the joy of home maintenance and keep your living environment comfortable and bug-free!

Home Maintenance

0 Views

0 Comments

Write A Comment

*
*
Related Posts All Posts
08.26.2025

Stress-Free Tips to Create an Amazing Yard for Your Home

Update Transform Your Yard Without the Stress Looking out at a lackluster yard can dampen anyone's mood. Yet, what if I told you that enhancing your outdoor space doesn’t have to be an overwhelming task? With just a few simple adjustments, you can create a beautiful yard that becomes a delightful escape from the everyday hustle. Here are some stress-free tips to get started! The Power of the Perfect Lawn The grass is often the first thing people notice when they stroll through your yard. A well-maintained lawn can transform the entire appearance of your outdoor space. Regular mowing is essential, often just once a week, during the growing season. This not only keeps your grass looking crisp but also provides a clean slate for the rest of your landscaping efforts. Investing in tools like a self-propelled lawn mower can make this task considerably easier, saving you from the physical strain of heavy machinery. Remember, when mowing, avoid cutting the grass too short to ensure your lawn remains lush and green. Creating defined edges along the sidewalks and flower beds lends a polished look, automatically elevating your yard's overall appeal. Time to Water Smart! Watering your lawn might seem simple, yet timing is crucial. The optimal choice is early morning when the sun’s warmth is still low. This strategy allows your grass to absorb moisture efficiently without wasting water to evaporation or risking mold growth from over-saturation. Instead of daily light sprays, aim to water deeply a couple of times a week. This practice encourages strong roots and reduces the overall amount of water needed, saving you money and effort in the long run. Simplifying Shrubs and Flowers Your yard doesn't require a full-blown garden to make a statement. Focusing on a few select plants, especially low-maintenance native species, can provide the right balance of color and life without demanding too much attention. Regularly trimming overgrown bushes adds to the neatness and creates a more welcoming entry. Flowering plants can be strategically placed at the edges of your yard or near the front door to boost curb appeal. The addition of mulch around your plants not only enhances the visual element but also conserves water and suppresses weeds. It’s a simple solution that offers multiple benefits. Declutter for a Fresh Look Cleaning up clutter is key to achieving that coveted polished appearance. Toys, garden tools, or any random items lying around can make even the most manicured yard look unkempt. Take a few moments to tidy up, putting everything in its place or even designating specific storage options for outdoor items. A simple clean-up can significantly elevate the aesthetics of your outdoor space. Why These Changes Matter Investing time in your yard goes beyond aesthetics; it promotes mental well-being. Your outdoor space can serve as an inviting area for relaxation, entertainment, and social interactions. Improved curb appeal not only enhances your home’s value but also enriches your lifestyle. Welcome the tranquility that comes with an organized, appealing outdoor area. Invitation to Beautify Your Yard Now is the perfect time to step outside and breathe new life into your yard without unnecessary stress. Just start small and allow these simple enhancements to gradually transform your outdoor living space into a personal oasis. Your yard is your haven, and it deserves to shine without the headache of overwhelming upkeep. Start implementing these practical tips today, and enjoy the immediate benefits of a beautiful, welcoming yard. Ready to create your dream outdoor space?

08.20.2025

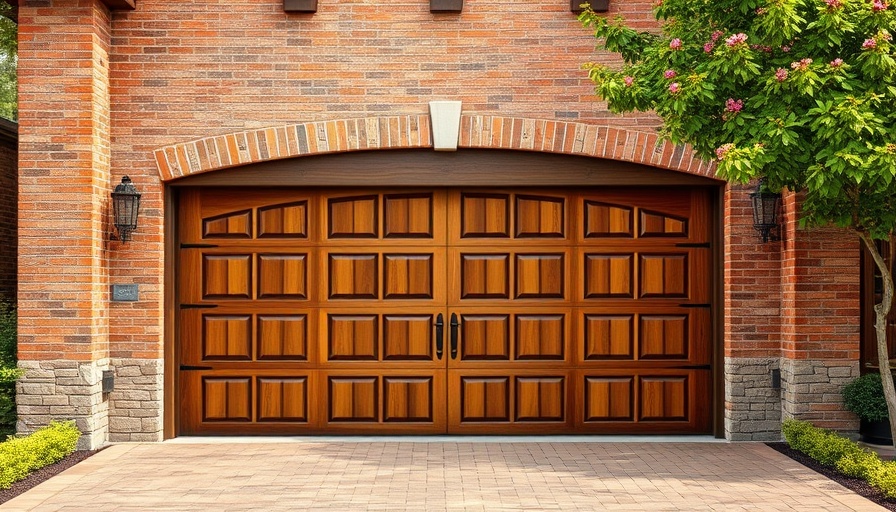
Troubleshooting Garage Door Problems: Essential Tips for Homeowners

Update Understanding Common Garage Door Problems and Their Solutions It's a hassle when you find your garage door stuck halfway or refusing to open. A garage door is one of those household items that we often take for granted until something goes wrong. If you’ve been wrestling with noisy rollers or frustrating remotes, you're not alone! Many homeowners experience these typical garage door issues, especially as wear and tear set in over the years. Let’s dive into some common problems and expert troubleshooting tips that will help you get your garage door running smoothly again. Is Your Garage Door Opener Remote Not Responding? Picture this: you press the remote, and nothing happens. It’s one of the most common frustrations. This could be due to several reasons such as a dead battery or damaged buttons on the keypad. Sometimes, the wall-mounted keypad circuit might lose connectivity. Before you call a repair person, try testing your remote in different locations to confirm the signal is being obstructed. For a simple fix, changing the battery may restore functionality. If that doesn’t work, check the wiring and look for disconnections. Often, these minor problems are easy to resolve and don’t require professional help! Why is Your Garage Door Making Unpleasant Noises? Are the sounds coming from your garage door driving you crazy? From squeaks and rattles to loud bangs, various noises indicate different issues. Grinding noises often suggest that it's time for some lubrication. Regularly applying the proper lubricant can help your garage door run quietly and efficiently. If you hear popping or rattling, it might be time to check the condition of your rollers and torsion spring. These components can wear out, causing annoying sounds and inefficiency. Fortunately, replacing or repairing these parts usually solves the problem. Transmitter Troubles: Why Isn't Your Garage Door Opening? Your garage door's transmitter plays a pivotal role in its operation. If you're having trouble opening or closing the door, the issue might lie with its electrical circuits. If you’ve tested the remote and it still doesn’t work, consult the user manual for troubleshooting steps. Sometimes, all it takes is a little adjustment or a reset to get everything back on track. Checking all sensors and ensuring there’s no obstruction is always a wise step. More Common Garage Door Problems Aside from the issues discussed, there are other common problems you may face: Misaligned Tracks: If the door feels heavy or moves jerkily, inspect the tracks. Realigning them can often resolve the issue. Worn Weather Strip: If you notice drafts or moisture seeping in, replacing the weather strip can significantly enhance insulation and prevent further damage. Garage Door Will Not Close: If the door stops before it hits the ground, there may be an obstacle, or the sensor itself might be dirty. Investing in Solutions: The Benefits of Regular Maintenance By addressing these common garage door issues proactively, you can save time and money in the long run. Regular maintenance checks can spot potential problems before they escalate into costly repairs. Investing in your garage door not only enhances its lifespan but also improves the overall security and efficiency of your home. What's the Future of Garage Door Technology? As technology evolves, so do garage doors! Today, smart garage door systems enhance convenience and security. Consider exploring options that connect to your smartphone for remote monitoring and control. Investing in such technologies ensures you're ahead, keeping your home secure while simplifying your daily routines. Conclusion: Take Charge of Your Garage Door Maintenance Caring for your garage door doesn’t have to be a daunting task. With some knowledge and the right tools, you can troubleshoot common issues and maintain the functionality of your garage door. Remember, regular checks and the quick application of basic maintenance can go a long way. So, roll up your sleeves and get started on keeping one of your home's most essential features in tip-top shape! Ready to learn more about maintaining your home? Check out our tips and techniques for sustainable practices that will make your living space more efficient and enjoyable!

08.19.2025

Smart Tips for Buying a Shed Kit: What You Need to Know

Update Understanding Your Shed Purpose When considering a shed kit, the first question to reflect on is its intended purpose. Are you looking to store gardening equipment, plan a hobby workspace, or merely declutter your garage? For instance, if you envision a vibrant workshop, you’ll want it to accommodate ventilation, natural lighting, and electrical outlets; while a simple storage solution might not require such considerations. The clarity in purpose not only shapes your decision on size and layout but also ensures you won’t find yourself needing a second shed down the line. Navigating Shed Kit Budgets Wisely Budgeting for a shed kit can be a tricky endeavor. Prices may seem straightforward, but factors like material quality, customization options, and delivery charges can significantly alter your total expenditure. When evaluating prices, ensure you know what’s included: does the kit come with flooring, locks, or essential roofing components? Often, going for the lowest price can be misleading if you later discover additional costs. Investing a bit more initially can lead to long-term savings and fewer hassles due to well-constructed materials. Size Matters: Optimize Your Space Choosing the right size becomes pivotal in the quest for the ideal shed. While you might think "bigger is better," consider how much space you genuinely need. Start with measuring your yard and explore your layout options. Factor in pathways for access, local building regulations, and climate conditions—how will your shed perform in drainage and shade? Interestingly, many homeowners find that a well-planned smaller structure holds all the essentials effectively without compromising convenience. Permits: Don’t Overlook Local Regulations Venturing into DIY projects without checking local building codes can be an oversight that leads to costly penalties. While some may believe small sheds don’t require permits, regulations can vary widely based on location. It’s crucial to connect with your local council to confirm if your shed falls within permissible limits. This proactive approach not only keeps your project on track but mitigates potential disputes with neighbors and compliance issues. Future-Proofing Your Shed Investment Consider how your needs might evolve over time. Younger homeowners often purchase sheds with busy lifestyles in mind, but planning for future changes is key. Will your storage needs increase? Do you foresee wanting a dedicated space for hobbies or crafts in the years ahead? A shed serves as more than just a tool repository; it can become a cherished area of personal expression. Therefore, take the idea of flexibility into account—opt for adaptable designs that can grow with your needs. Sustainable Choices: Eco-Friendly Shed Options As an increasing number of homeowners shift toward sustainable living, consider the environmental impact of your choice. Many manufacturers now offer shed kits designed from recycled or sustainable materials. These options not only reduce your carbon footprint but often ensure durability. Selecting a shed that embraces environmentally-friendly practices can contribute positively to the planet while enhancing your home’s aesthetic appeal. Conclusion: Don’t Rush Into Your Decision Purchasing a shed kit may appear simple at first glance, but taking the time to evaluate your needs, space, budget, and regulatory requirements can lead to a satisfying investment. Before you commit, list these factors, weigh the options, and consider future needs. Your shed should not only serve your immediate requirements but also stand the test of time, evolving with you and your lifestyle. With knowledge and planning in hand, embark on your shed project ready for success! Dive deeper into available options and explore designs that resonate with you—for a shed that fits seamlessly into your home life. Your well-organized and stylish storage solution awaits!

Terms of Service

Privacy Policy

Core Modal Title

Sorry, no results found

You Might Find These Articles Interesting

T
Please Check Your Email
We Will Be Following Up Shortly
*
*
*