Add Row
Add Element
cropper
update
Atlanta Home Garden Insider
update
Add Element
  • Home
  • Categories
    • DIY Projects
    • Sustainable Practices
    • Design Trends
    • Landscaping
    • Lawn and Garden Care
  • Smart Home Tech
  • Interior Design Tips
  • Home Maintenance
August 01.2025
3 Minutes Read

Custom vs Standard Window Well Covers: Which Is Right For You?

Clear window well cover on gravel illustrating custom protection.

Understanding Window Well Covers: A Homeowner's Guide

Protecting your basement from water damage, pests, and accidents is crucial for any homeowner. That's where window well covers come into play. When it comes to choosing the right cover, you may find yourself torn between standard and custom options. Let’s explore the differences, so you can make an informed decision that fits your needs.

Standard Window Well Covers: The Quick and Easy Solution

Standard covers are akin to finding a ready-made outfit; they're easy to get, budget-friendly, and generally fit common window well sizes—like rectangular or semicircle models. Available in materials such as polycarbonate or metal, these covers often suit typical homes well.

Advantages of Standard Covers

  • Budget-Friendly: Standard covers are cost-effective and easily found in home improvement stores.
  • Quick Installation: Simply measure your window well, select the correct size, and you’re good to go!
  • Good for Common Wells: If your window well sizes are standard, these covers will provide adequate protection.

Best for:

  • Homeowners with standard window wells.
  • DIY enthusiasts looking for a fast installation.
  • Those aiming to save on costs.

Custom Window Well Covers: Tailored for Perfection

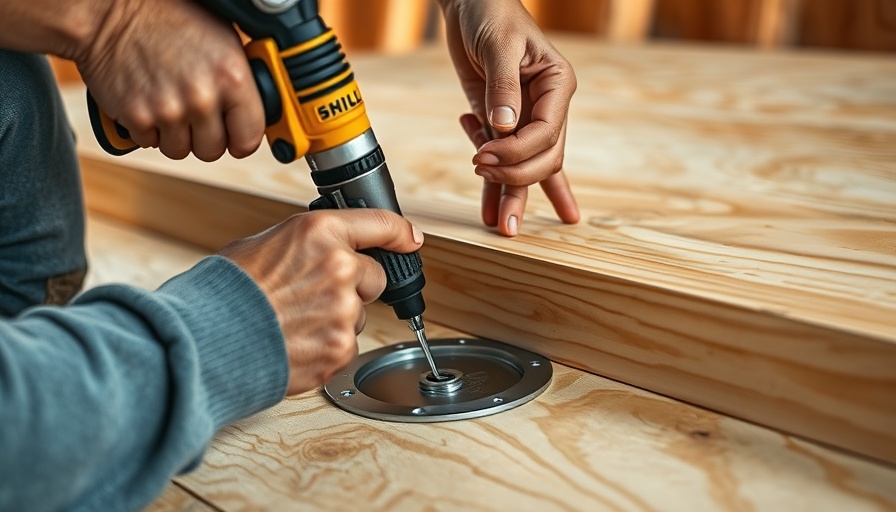
On the other end of the spectrum, custom covers are like tailored suits; they offer a precise fit specifically designed for your window wells, accommodating any unique shapes or slopes. This often results in superior protection and aesthetics.

Benefits of Custom Covers

  • Perfect Fit: Designed to fit the exact dimensions, ensuring no gaps that might allow water or debris to enter.
  • Enhanced Protection: Custom covers excel at keeping out rain, snow, dirt, and wildlife.
  • Stronger Materials: Many custom options can handle heavier loads, making them highly durable.
  • Stylish Choices: Customization provides various options for material and color, allowing for better integration into your home’s aesthetics.

Best for:

  • Homes with uniquely shaped wells.
  • Areas with extreme weather conditions.
  • Families with young children or pets needing added safety.

Making the Choice: Custom vs Standard

Choosing between a standard and custom window well cover ultimately depends on your specific situation. Consider:

  • Shape and Size: Is your window well unusual? A custom cover may be the answer.
  • Weather Challenges: Frequent storms or heavy snow? A snug fit from a custom cover may offer peace of mind.
  • Budget: If you’re aiming for savings and your windows are standard-sized, go with a standard cover.

Real-Life Experiences: What Other Homeowners Are Saying

In speaking with various homeowners, it's clear that experiences with window well covers vary widely based on personal preferences and individual circumstances. For instance, Jane from Ohio, who installed standard covers, found them sufficient until a heavy storm proved otherwise. Ultimately, she decided to invest in custom covers more suited to bedrock-like window wells. Meanwhile, Mark from Michigan succeeded with standard covers and avoids heavier structures around his home's foundation. Personal experiences such as these underscore the importance of weighing your options.

Conclusion: Protecting What Matters Most

Your window well covers can greatly affect the safety, efficiency, and aesthetic appeal of your home. Whether opting for a budget-friendly standard model or investing in a custom design tailored to your unique needs, what matters is that you choose the solution that best protects your home. Explore your options, consider your priorities, and don't hesitate to ask for professional advice when needed. After all, a well-chosen window well cover not only protects your home but enhances it.

Ready to safeguard your home? Connect with us today to explore the best window well cover options tailored for your home!

Home Maintenance

0 Views

0 Comments

Write A Comment

*
*
Related Posts All Posts
08.02.2025

How to Build a Shower Curb for Dry Bathrooms: A Beginner's Guide

Update Why Building a Shower Curb is Essential for Homeowners For many homeowners, a shower curb is more than just a construction element—it’s crucial for maintaining a dry and safe bathroom environment. An improperly installed shower curb can lead to persistent water pooling on bathroom floors, creating slips and falls that can be hazardous, especially for older adults. Thus, understanding how to build a shower curb is an invaluable skill that promotes both functionality and safety in the home. Gathering Your Tools for Success Before diving into this DIY project, ensure you have all necessary tools and materials at hand. This includes: Non-corrosive screws Waterproof pan liner Gloves Liner glue Cement mortar Lath Portland cement Flat trowel A sturdy knife With these essentials, you can confidently tackle the task of constructing a durable shower curb. Understanding Material Choices The type of flooring in your bathroom is a key factor in determining the materials you will use for your shower curb. If your bathroom has wooden floors, for example, wooden bricks will suffice. Conversely, if your bathroom is outfitted with laminate flooring, utilize laminate bricks as they are suitable for your environment. When working on a concrete floor, remember that using lumber is inadvisable since it can absorb water. Instead, opt for waterproof materials to ensure longevity. Step-by-Step Guide: Building Your Shower Curb Constructing a shower curb might seem daunting at first, but it’s quite straightforward if you follow the right steps. Here's a simple guide: Prepare the Shower Curb: Start by gathering your bricks based on your flooring type. Then, cut the bricks into equal lengths, stacking them appropriately to maintain the right height for your shower door to function correctly. Install a Waterproof Pan Liner: This step is critical for preventing damage to your floor. Spread out the waterproof pan liner so it covers the entire shower area, not just the curb. A well-applied liner will ensure no water escapes to the bathroom floor. Secure the Curb Structure: After arranging the bricks and lining, secure everything in place with metal lath. Applying two or three layers will ensure you achieve the right stiffness required for support. Finish with Cement Mortar: Completing your curb with cement mortar not only enhances its solidity but also improves its waterproofing capabilities. Make sure to apply the mortar evenly and take your time for the best results. Common Misconceptions About DIY Shower Curbs Many novice DIY-ers believe that constructing a shower curb is overwhelmingly complex. However, by breaking the task down into basic steps and gathering the needed supplies, anyone can tackle this project. Embracing the challenge can empower individuals and foster a sense of accomplishment, leading to even more ambitious DIY home improvements down the line. Future Trends: Smart Shower Technology The evolution of smart home technology is making its way into bathroom renovations as well. Homeowners can now look at integrating smart sensors and monitoring systems alongside their shower adaptations for better water management, efficiency, and convenience. As you build your shower curb, consider how these advancements could be incorporated into your broader bathroom design plans. Actionable Insights for Homeowners Taking the first steps into DIY projects can be daunting, but creating your shower curb is not only a practical task but also an opportunity to enhance your home's value and personal satisfaction. By understanding the significance of this element in bathroom design, you gain insight into home maintenance that can lead to greater empowerment and independence. Are you ready to get started on your DIY project? Remember that taking action will not only improve your home but also provide you with the confidence to embark on future renovation projects. Happy building!

08.01.2025

Tired of Your Water Heater Pilot Light Going Out? Solve It Now!

Update Understanding Your Water Heater's Pilot Light The pilot light is the unsung hero of your water heater, ensuring that hot water is available whenever you need it. For homeowners, dealing with a stubborn pilot light can be a frustrating ordeal, especially during winter months when warm water is essential. If you’ve found yourself repeatedly relighting your water heater’s pilot light, it’s crucial to understand what may be causing this issue and how you can remedy it without calling a professional. Why Does the Pilot Light Go Out? Understanding why a water heater pilot light won’t stay lit is the first step towards solving the issue. Below are several common culprits that can contribute to pilot light issues, along with practical DIY solutions. 1. Thermocouple Troubles One primary reason for a pilot light going out is a malfunctioning thermocouple. The thermocouple is a safety device that senses whether the pilot light is on and prevents the gas valve from opening if it is not. If your pilot light goes out frequently after you have relit it, inspect the thermocouple. While replacing it generally requires professional advice, cleaning it with sandpaper can often solve minor issues. Always ensure the gas supply is turned off before performing any maintenance. 2. Air Supply Shortage Another common issue is insufficient combustible air. Water heaters require a steady flow of air to maintain the pilot flame. Check the surrounding area for debris or lint blocking vents, and ensure your heater is installed in a sufficiently ventilated area to promote efficient combustion. 3. Clean the Pilot Tube A clogged pilot tube can also disrupt the pilot flame. This narrow tube channels gas to the pilot light, and if it’s filled with dust or debris, it can lead to a weak flame that flickers out. Using a slender needle to carefully clear any blockage can effectively restore your system's functionality. 4. Inspect the Main Control Valve While less common, issues with the main control valve can cause pilot light problems. This valve is responsible for regulating gas pressure and flow to the heater. If you have checked other components and the problem persists, it may signal a malfunctioning valve that requires professional replacement. 5. Beware of Wiring Issues Electrical wiring problems can also contribute to pilot light issues—particularly in appliances that rely on electric ignition systems. If your heater has wiring connections that are loose or damaged, a technician should examine them to prevent further issues. Taking Proactive Steps Regular maintenance can go a long way. Homeowners should schedule inspections at least once a year to check for any potential issues that could compromise their water heater’s efficiency. Simple actions like regularly cleaning around your water heater can preempt many pilot light problems. Empowering Your DIY Skills Fixing pilot light issues can often be tackled with a bit of knowledge, courage, and DIY effort. Understanding the components and common issues allows homeowners to feel empowered and more in control of their home maintenance. Connecting with your water heater system not only saves time and money but also enhances your overall home wellness. You don't have to suffer the inconvenience of a cold shower again! Armed with this information, take action today: clean, inspect, and maintain your water heater's components regularly. For further information about how to maintain a healthy home environment, consider exploring resources on other essential home maintenance topics.

07.31.2025

Diagnosing and Repairing Your Shower Diverter Like a Professional

Update What is a Shower Diverter and Why is it Important? Before diving into the repair process, it's crucial to understand what a shower diverter is and its role in your bathroom. A shower diverter directs the flow of water either to your bathtub faucet or your showerhead. It can take on various forms, including a pull-up knob located on the tub spout or a separate lever between the hot and cold taps. Knowing your diverter type can significantly affect the way you approach repairs and maintenance. Identifying the Problem: Signs Your Diverter is Broken Homeowners often face confusion when water continues to flow from both the tub faucet and showerhead. This is a classic indication that your diverter is malfunctioning. Typically, this issue stems from a rubber stopper inside the diverter that fails to create a reliable seal, allowing water to escape through both outlets. Understanding this can save you time and frustration during your repair journey. Types of Shower Diverters: Which Do You Have? It's essential to identify the specific type of diverter installed in your bathroom. Here are the three main types to look out for: 3-Valve Diverter: Primarily found in two-tap faucet systems. 2-Valve Diverter: Best suited for single-dial temperature adjusters. Tee or Single-Valve Diverter: This common style requires pulling up to redirect water to the showerhead. Gathering Your Tools for the Fix Before starting your repair project, ensure you gather all the necessary tools: Vinegar Plastic bag Rubber band Cooking spray Paper towels Screwdriver Plier Sandpaper Baking soda New shower spout or valve gate (if needed) Step-by-Step Guide: Fixing Your Diverter with Ease Now, let’s get to the core of our task: fixing the shower diverter. Here’s a straightforward method that you can follow: Cleaning the Spout: Begin by addressing build-up. Submerge the spout in a mixture of water and vinegar, sealed in a plastic bag. Leave it for 3 to 4 days to allow the vinegar to work its magic. This method is not only effective but also non-toxic, making it safe for your home. Using Cooking Spray: For diverters that feel stiff due to hardening, a quick spray of cooking oil can loosen the mechanism. Avoid harsher chemicals, as they can lead to corrosion. Common Misconceptions about Shower Diverters Many assume that complex plumbing issues necessitate a plumber’s expertise. However, common problems like a faulty diverter can often be resolved with a DIY approach. Not only does this save you money, but it also empowers you as a homeowner to take charge of your home maintenance. Looking Ahead: Keeping Your Diverter in Top Condition Once you've fixed the diverter, consider preventive measures like regular cleaning to avoid future issues. This upkeep can include cleaning with vinegar periodically and checking for leaks annually to ensure optimal performance. Take Action: DIY Home Repair Awaits! Don't let a malfunctioning shower diverter disrupt your home’s comfort. Armed with the right knowledge and tools, you can fix it like a pro! Consider sharing this article with friends or neighbors who might face similar challenges. Together, we can make home maintenance a breeze!

Terms of Service

Privacy Policy

Core Modal Title

Sorry, no results found

You Might Find These Articles Interesting

T
Please Check Your Email
We Will Be Following Up Shortly
*
*
*