Add Row
Add Element
cropper
update
Atlanta Home Garden Insider
update
Add Element
  • Home
  • Categories
    • DIY Projects
    • Sustainable Practices
    • Design Trends
    • Landscaping
    • Lawn and Garden Care
  • Smart Home Tech
  • Interior Design Tips
  • Home Maintenance
August 11.2025
3 Minutes Read

Choose the Right Kitchen Cabinet Height for Optimal Functionality

Contemporary kitchen cabinets showing height from floor.

Understanding the Importance of Kitchen Cabinet Height

As any homeowner will tell you, the importance of proper kitchen cabinet height cannot be overstated. Not only does this detail enhance the aesthetic appeal of a kitchen, but it also affects its functionality. A well-designed kitchen promotes ease of movement and accessibility, making cooking and cleaning tasks much more enjoyable. With the right cabinet height, you can transform your kitchen into a stylish and efficient workspace. But finding the perfect height for your kitchen cabinets can be tricky, especially when considering personal preferences and specific kitchen layouts.

Standard Measurements: Finding the Right Fit

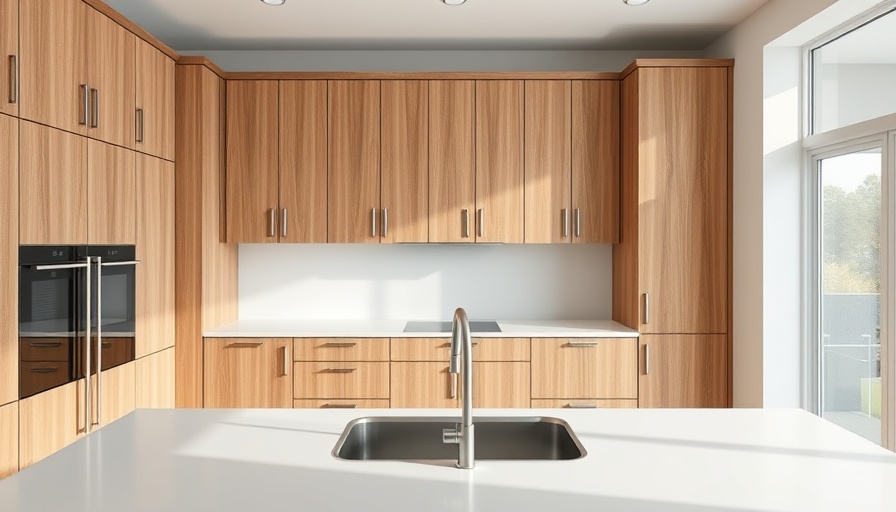
The commonly accepted standard kitchen cabinet height is about 54 inches from the floor to the bottom edge of the upper cabinets. This height typically accommodates an ideal distance for comfortable usage. However, you'll need to customize this measurement based on several factors, such as ceiling height and your unique cooking needs. The general rule includes:

  • 54 inches for wall cabinets above the floor
  • 18 inches between the countertop and wall cabinets
  • 24 inches above the stove to ensure safe cooking

For those with ceilings higher than 9 feet, opting for taller cabinets — often up to 42 inches — can provide that seamless look, especially if you incorporate crown molding that connects the cabinets to the ceiling. This not only maximizes storage but also creates a polished, luxurious feel.

Key Factors That Influence Cabinet Height

When deciding on the height of your kitchen cabinets, consider the following key factors that might influence your choice:

Base Cabinet Height

It’s essential to acknowledge that the base of cabinets varies across kitchen styles. The taller your base cabinets, the higher your upper cabinets should be to maintain balance and visual appeal. This ensures that your kitchen doesn’t feel cramped or cluttered.

Countertop Thickness

Different materials have varying thicknesses, from laminate to quartz, affecting the distance between your countertop and upper cabinets. Always leave at least a half-inch gap between the bottom of the upper cabinets and the countertops to avoid any ongoing inconvenience during cooking tasks.

Stove Safety Distance

Fire safety is paramount in kitchen design. Maintaining the proper distance between your cabinets and cooking appliances like stoves is critical in preventing accidents. Consider ensuring at least 24 inches of space above a stove for safe clearance.

Backsplash Height Considerations

Homeowners often choose backsplashes that complement their cabinet design. The height of your backsplash can affect the perceived height of your cabinets. A common standard is to install the backsplash 18 inches above the countertop, aligning with the height of your cabinets for an integrated look.

Future Trends in Kitchen Cabinet Design

As homeowners become savvier about modern designs, we are witnessing trends leaning towards adjustable cabinets, which allow for greater flexibility in kitchen layouts. This trend seeks to address diverse user needs and preferences, promoting an inclusive environment that works for all family members, regardless of their height or seating needs.

Actionable Tips for Your Kitchen Remodel

Before rushing to buy new cabinets, consider these actionable insights:

  • Evaluate your existing kitchen layout and measure the space carefully.
  • Consider ergonomics and how the cabinet heights will serve your cooking style.
  • Engage with a professional designer if your remodel involves significant alterations.

Conclusion: Assess and Adapt

In essence, the elevation of your kitchen cabinets significantly impacts both functionality and design. Take the time to assess your unique cooking habits and home aesthetics before making a decision. If you’re ready to elevate your kitchen game, explore ways to adapt your space creatively. Don’t hesitate to reach out for professional help when needed; your dream kitchen may just be a remodel away!

Home Maintenance

0 Views

0 Comments

Write A Comment

*
*
Related Posts All Posts
08.09.2025

SPC vs WPC Flooring: The Ultimate Guide to Choosing Your Ideal Flooring

Update Understanding SPC vs WPC Flooring: Which is Right for Your Home? When it comes to upgrading your flooring, homeowners are often caught in the crossfire of choices. Among the most popular options in the vinyl flooring market are SPC (Stone Plastic Composite) and WPC (Wood Plastic Composite). Both types are renowned for being water-resistant but cater to different needs and preferences. This article will help you understand the subtle yet significant differences between these two stylish alternatives to hardwood and tile flooring. A Deep Dive into the Layers: How These Floors Are Constructed To appreciate the distinctions between SPC and WPC, it’s essential to understand their construction. SPC flooring consists of four main layers: 1. **Backing Layer**: This foundation offers durability and often comes with an attached underlayment for added comfort. 2. **SPC Core**: Rain, spills, and moisture are no match for its solid, water-resistant core, which prevents swelling and creasing. 3. **Printed Vinyl Layer**: This layer gives SPC flooring its beautiful aesthetic, resembling stone or wood. 4. **Wear Layer**: This is like a hard armor for your floor, protecting it against everyday wear and tear. Longer-lasting wear layers are preferable for heavy-use areas. WPC, while similar, has its unique flair and construction: 1. **Backing Layer**: Like SPC, WPC starts with a foundational layer, often padded for comfort. 2. **WPC Core**: More flexible yet still water-resistant, the WPC core brings comfort underfoot, which is particularly valued in cozy home environments. 3. **Printed Vinyl Layer**: The printed surface also resembles wood or stone, providing a rich aesthetic. 4. **Wear Layer**: Just like SPC, WPC has a protective layer that combats wear and tear, ensuring longevity. Feature-wise Comparison: Cost, Comfort, and Uses Cost: Generally, WPC flooring comes with a heftier price tag, attributed to its comprehensive comfort features. Conversely, SPC is often more budget-friendly without sacrificing quality, making it appealing for home renovations on a budget. Feel: The SPC is more rigid, which can feel cold and hard underfoot. In contrast, WPC offers a more flexible and warm feel, a desirable trait in winter months. Usage: WPC is particularly well-suited for indoor spaces where comfort is key, such as bedrooms or living rooms, while SPC can be a solid choice for areas that encounter more moisture, like bathrooms and kitchens. Why Does This Matter? Making the Right Choice Choosing between SPC and WPC flooring can significantly affect your home’s aesthetic and functional life. For families or individuals who prioritize comfort, particularly in colder climates, WPC may be the clear winner. However, for those focused on durability and budget, SPC could be the smarter investment. What Every Homeowner Should Know While both SPC and WPC flooring offer advantages, understanding their strengths in the context of your home is crucial. This knowledge can empower homeowners to make decisions that enhance not just the look of their living space but also its comfort, usability, and value. In the ever-evolving world of flooring, being armed with the right information enables homeowners to elevate their spaces effectively. Whichever option you choose, both SPC and WPC flooring have something unique to offer. Take Action Now! Are you ready to transform your home’s flooring? Consider your lifestyle, budget, and comfort preferences. Explore your options further—visit a local flooring expert or browse online resources to dive deeper into SPC and WPC choices today!

08.08.2025

Transform Your Tiny Kitchen with These Small Kitchen Paint Colors for a Spacious Feel

Update How to Choose the Best Paint Colors for Small Kitchens Are you dreaming of a spacious kitchen only to find that your reality is a small, cramped space? Thankfully, the right paint color can create the illusion of more room, making your kitchen feel larger and more inviting. Here’s a round-up of some fantastic small kitchen paint colors that can elevate your culinary space without the need for a renovation. Bright Colors for Expansive Illusions One of the biggest misconceptions about small kitchens is that you should stick to light colors to make them appear larger. In fact, sometimes deeper hues can add depth and character that actually enhance the perception of space. Rich jewel tones, such as deep greens or blues, can even make your kitchen feel cozier yet more open, especially when paired with clever lighting. The Power of White and Off-White White paint is a staple for a reason—it reflects light effectively, widening the look of any room. However, an all-white kitchen can sometimes come off as cold or sterile. Instead, consider opting for a soft off-white or cream. This will add warmth while still achieving that expansive feel, especially when combined with wooden accents or earthy design elements. Combining off-white walls with natural wood or muted gray cabinetry can create an airy environment full of life and warmth. Sunshine Yellow: A Boost of Happiness Nothing brings sunshine into a space quite like shades of yellow. A bright, sunny yellow can transform a small kitchen into a cheerful haven. This color tends to bounce light around beautifully, which can amplify the room's dimensions. For a more subdued palette, consider muted or pastel yellows that maintain the uplift of color without overwhelming the space. Green to Connect with Nature Green is renowned for its soothing qualities and connection to nature. From soft mint tones to rich emeralds, green hues can create a refreshing atmosphere in the kitchen. This color works especially well with natural wood finishes and botanical accents, adding layers and depth that help visually expand the area. Not to mention, it makes your kitchen feel connected and open to the outside world. Dare to Go Dark While lighter colors are often recommended for small spaces, bold dark shades can also create striking contrasts that make a room feel larger than it is. A dark navy blue or deep forest green, when used thoughtfully, can anchor the space and provide a dramatic twist. Balance these deeper colors with plenty of lighting or contrasting white trim to keep the space from feeling too enclosed. Bold Accents: Bring in Color with Style If you are hesitant to completely commit to a bold wall color, consider painting just one accent wall in a vivid hue. A bold coral or deep teal can serve as an eye-catching focal point while the remaining walls are painted in complementary shades—like soft whites or grays. This technique draws the eye and strategically frames the space, enhancing the feeling of roominess. Color Combinations and Patterns to Consider The right color combination can maximize your small kitchen's potential. Mixing cool and warm tones, such as pairing a soft blue with a muted yellow, can create a harmonious balance. Additionally, using bright cabinet colors with neutral walls adds dimension and style, visually lifting and enlarging your space. Vertical stripes can also give the illusion of height, making ceilings appear taller. The Last Word on Color Choices for Your Kitchen Choosing the right paint color for your small kitchen doesn’t have to be daunting. With a little thought and creativity, you can transform any compact cooking space into a bright, welcoming hub that looks bigger and feels like home. Whether you go for bold statements or soft serenity, let your paint palette reflect your personality and lifestyle. This summer, consider revamping your kitchen with these tips. Should you want to explore more options or find unique color combinations, be sure to consult your local home improvement store for samples and inspiration. A little change can go a long way in transforming your space into the cooking haven you always desired.

08.07.2025

How to Unclog a Bathtub Drain Without Chemicals: A Guide for Homeowners

Update Unlocking Solutions: DIY Techniques for Clogged Bathtub Drains Every homeowner has faced the frustration of a clogged bathtub drain, often accompanied by the frustration of standing water and unpleasing aromas. Yet, armed with simple tools and easy-to-follow techniques, you can tackle this home maintenance challenge without resorting to harsh chemicals. Not only does this promote a healthier living environment, but it also helps save money on costly plumbing services for minor clogs. Understanding the Problem: Causes of Clogs The journey to a clean bathtub drain begins with an understanding of what causes these pesky clogs. Hair, soap scum, and mineral buildup create a sticky mess that can severely impede water flow. Over time, these materials accumulate, necessitating intervention. By routinely checking and maintaining your drain, you can prevent severe blockages and maintain optimal water flow. Tools You’ll Need for the Job Before delving into the process, gather the essential tools required to effectively unclog your bathtub drain: 4-in-1 screwdriver Utility knife Needle-nose plier Heavy wire for bending into a hook These items will help you tackle most clogs with ease and efficiency. Step-By-Step Instructions to Unclog Your Bathtub Here are four easy DIY approaches you can take to successfully unclog your bathtub drain: 1. Flushing the Drain with Boiling Water This natural method is often the simplest and most effective. Boil a kettle of water and pour it slowly down the drain. The heat helps dissolve soap scum and grease that may have built up over time. 2. The Power of Baking Soda and Vinegar Combine half a cup of baking soda and a half cup of vinegar to form a powerful cleaning solution. Pour this mixture down the drain and let it sit for at least 30 minutes to allow chemical reactions to break down blockages effectively, followed by a hot water flush to push debris along. 3. Manual Removal of Blockages If chemical-free methods don’t do the trick, it may be time to venture into the depths of your drain. Unscrew the drop stopper with a screwdriver and remove any visible debris using pliers or a hook made from heavy wire. This hands-on approach ensures you can tackle the stubborn clumps blocking your drain. 4. Ensuring Regular Maintenance Prevent clogs before they start by routinely cleansing your drain with monthly treatments of boiling water or baking soda and vinegar. These proactive measures will help maintain clear pathways for your plumbing system, saving you from larger renovations down the line. Why Going Chemical-Free Matters Using commercial drain cleaners may provide a quick fix, but these products can be harsh on your plumbing and detrimental to the environment. Embracing eco-friendly approaches not only fosters a cleaner home but also complements sustainable living practices. By opting for natural solutions, you're investing in your health and the planet. Call to Action: Take Charge of Your Home Maintenance! Now that you're equipped with effective methods for unclogging your bathtub drain, it's time to take charge of your home maintenance. Dive into these DIY strategies and experience the satisfaction of unblocking your drain naturally and sustainably. If you’re inspired to learn more about maintaining your home efficiently, stay tuned for practical tips and insights from articles like this!

Terms of Service

Privacy Policy

Core Modal Title

Sorry, no results found

You Might Find These Articles Interesting

T
Please Check Your Email
We Will Be Following Up Shortly
*
*
*