Add Row
Add Element
cropper
update
Atlanta Home Garden Insider
update
Add Element
  • Home
  • Categories
    • DIY Projects
    • Sustainable Practices
    • Design Trends
    • Landscaping
    • Lawn and Garden Care
  • Smart Home Tech
  • Interior Design Tips
  • Home Maintenance
August 06.2025
3 Minutes Read

Expert Ways to Safely Clean a Silk Rug at Home

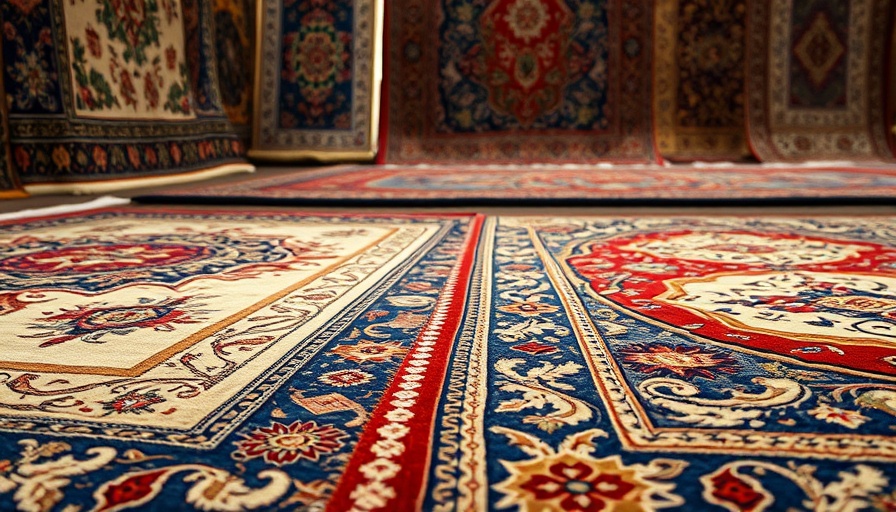
Intricate silk rugs with detailed patterns in colorful display.

Unlock the Secrets to Safely Clean Your Silk Rug

Silk rugs are often cherished for their beauty and elegance, becoming focal points in our homes. But what happens when these luxurious pieces gather dust, stains, or spills? Cleaning a silk rug may seem daunting, but with the right techniques and ingredients, it can be done safely and effectively. Let’s explore the best methods and hacks to ensure your silk rug retains its luster for years to come.

Understanding the Delicacy of Silk

Silk is a delicate fabric that requires gentle care. Unlike more robust materials, silk can easily be damaged by harsh chemicals or aggressive cleaning techniques. Therefore, understanding its fragility is essential before diving into cleaning methods. Traditional soaps and cleaning agents can strip the natural oils from the fibers, resulting in a dull appearance. By opting for natural cleaning solutions, like baking soda and vinegar, you can maintain the integrity of your silk rug while still achieving that fresh, clean look.

Your Essential Silk Rug Cleaning Kit

Before beginning the cleaning process, gather these simple but effective tools:

  • Baking soda
  • White vinegar
  • Soft broom
  • High-quality vacuum cleaner
  • Clean, dry cloths
  • Club soda (optional for tough stains)

Having these items on hand will prepare you to tackle any spills or stains that might occur.

Step-by-Step Cleaning Guide for Your Silk Rug

Let’s break down the process to ensure your rug gets the care it needs:

  1. Gentle Brooming: Start with a soft broom to clear dust and debris from the surface. Gentle is key here; harsh brushing can cause damage to the delicate fibers.
  2. Vacuuming: A vacuum cleaner specifically designed for soft rugs is your best friend. Vacuum carefully to capture hidden dirt without disturbing the rug's fiber. Avoid using any steam or heavy-duty vacuum cleaners as these can harm silk.
  3. Baking Soda Treatment: If there are stubborn stains, sprinkle baking soda over the affected area and let it sit for about 15 minutes. This natural deodorizer works wonders on many spills.
  4. The Vinegar Solution: Prepare a simple solution using equal parts of water and white vinegar. Dampen a cloth with this mixture and gently dab at the stains. Vinegar not only cleans but also helps to lift stubborn spots.
  5. Dry Cleaning: After applying your cleaning solutions, use a clean, dry cloth to pick up any remaining debris or moisture. The goal here is to eliminate any dampness to prevent the risk of mildew or other complications.

By following these steps, you’ll ensure your silk rug remains clean and well-maintained without incurring the hefty costs of professional cleaners.

Preventative Measures You Can Take

A little effort in preventative care can go a long way in extending the life of your silk rug. Consider these tips:

  • Location: Keep silk rugs in low-traffic areas to minimize wear and tear.
  • Regular Maintenance: A bi-weekly brooming and vacuuming routine can keep dust at bay.
  • Stain Removal: Address spills immediately with simple solutions to avoid long-term damage.

Taking these actions helps create a safe environment for your silk rug.

Final Thoughts on Keeping Your Silk Rug Pristine

Caring for your silk rug doesn’t have to be an overwhelming task filled with complicated procedures. By using basic natural products and gentle techniques, you can perform routine cleanings while preserving the rug’s color and texture. Remember, every little effort contributes to the beauty of your cherished rug, helping it to continue catching the eyes of your guests year after year.

If you’re committed to maintaining your home’s elegance and functionality, follow these practical steps, and don’t hesitate to adopt additional cleaning hacks suited for all types of rugs.

Home Maintenance

0 Views

0 Comments

Write A Comment

*
*
Related Posts All Posts
08.07.2025

How to Unclog a Bathtub Drain Without Chemicals: A Guide for Homeowners

Update Unlocking Solutions: DIY Techniques for Clogged Bathtub Drains Every homeowner has faced the frustration of a clogged bathtub drain, often accompanied by the frustration of standing water and unpleasing aromas. Yet, armed with simple tools and easy-to-follow techniques, you can tackle this home maintenance challenge without resorting to harsh chemicals. Not only does this promote a healthier living environment, but it also helps save money on costly plumbing services for minor clogs. Understanding the Problem: Causes of Clogs The journey to a clean bathtub drain begins with an understanding of what causes these pesky clogs. Hair, soap scum, and mineral buildup create a sticky mess that can severely impede water flow. Over time, these materials accumulate, necessitating intervention. By routinely checking and maintaining your drain, you can prevent severe blockages and maintain optimal water flow. Tools You’ll Need for the Job Before delving into the process, gather the essential tools required to effectively unclog your bathtub drain: 4-in-1 screwdriver Utility knife Needle-nose plier Heavy wire for bending into a hook These items will help you tackle most clogs with ease and efficiency. Step-By-Step Instructions to Unclog Your Bathtub Here are four easy DIY approaches you can take to successfully unclog your bathtub drain: 1. Flushing the Drain with Boiling Water This natural method is often the simplest and most effective. Boil a kettle of water and pour it slowly down the drain. The heat helps dissolve soap scum and grease that may have built up over time. 2. The Power of Baking Soda and Vinegar Combine half a cup of baking soda and a half cup of vinegar to form a powerful cleaning solution. Pour this mixture down the drain and let it sit for at least 30 minutes to allow chemical reactions to break down blockages effectively, followed by a hot water flush to push debris along. 3. Manual Removal of Blockages If chemical-free methods don’t do the trick, it may be time to venture into the depths of your drain. Unscrew the drop stopper with a screwdriver and remove any visible debris using pliers or a hook made from heavy wire. This hands-on approach ensures you can tackle the stubborn clumps blocking your drain. 4. Ensuring Regular Maintenance Prevent clogs before they start by routinely cleansing your drain with monthly treatments of boiling water or baking soda and vinegar. These proactive measures will help maintain clear pathways for your plumbing system, saving you from larger renovations down the line. Why Going Chemical-Free Matters Using commercial drain cleaners may provide a quick fix, but these products can be harsh on your plumbing and detrimental to the environment. Embracing eco-friendly approaches not only fosters a cleaner home but also complements sustainable living practices. By opting for natural solutions, you're investing in your health and the planet. Call to Action: Take Charge of Your Home Maintenance! Now that you're equipped with effective methods for unclogging your bathtub drain, it's time to take charge of your home maintenance. Dive into these DIY strategies and experience the satisfaction of unblocking your drain naturally and sustainably. If you’re inspired to learn more about maintaining your home efficiently, stay tuned for practical tips and insights from articles like this!

08.05.2025

Discover the Right Way to Mop Your Floor for Sparkling Clean Results

Update The Essential Guide to Proper Floor Mopping Do you feel like your floors look dirtier after completing what should be a cleansing task? That can happen easily if you're overlooking some crucial steps. Learning how to properly mop your floors not only enhances their appearance but also extends their lifespan. Let’s dive into the effective ways to mop your floor correctly. Why Sweeping is Essential Before Mopping Before you even think about grabbing a mop, give your floors a thorough sweep or vacuum. It might seem like a trivial step, but it’s crucial to remove dust, dirt, and debris. Without this step, you risk spreading these particles around rather than effectively cleaning them up. By starting with a clean slate, you will notice a significant difference in the results. Two Bucket System: The Secret to Clean Floors One common mistake homeowners make is not using two buckets while mopping. Fill one bucket with your chosen cleaning solution and keep the other with clean water. When mopping, dip your mop into the cleaning solution, wring it out thoroughly, and use the clean water bucket to rinse it. This method prevents dirt from being redeposited on the floor, ensuring a truly clean surface. Choosing the Right Cleaners for Different Floor Types The type of flooring you have greatly affects which cleaning products should be used. Here are tailored recommendations: Hardwood Floors: Use a pH-neutral soap, avoiding harsh chemicals that can strip the finish. A slightly wet mop is key. Laminate Floors: Similar to hardwood, keep the mop slightly damp, and be quick to blot spills to avoid damage. Vinyl Floors: An effective cleaning solution is a vinegar and water mix that sanitizes without leaving a sticky residue. Stone Tiles: Stick to mild, pH-neutral cleaners, as harsh chemicals can discolor and damage the surface. Ceramic Tiles: Again, vinegar works wonders by cutting through residues while being safe for your family and pets. Steps to Achieve a Pristine Floor Clear the Room: Stripping the area of furniture and obstacles is essential to ensure thorough cleaning. Start Sweeping: This sets the groundwork for effective mopping. Mop Technique: Begin at the farthest corner of the room and work your way backwards to avoid stepping into your newly cleaned area. Rinse Regularly: Continuously rinse your mop to keep it clean and effective. Air Dry: After use, let your mop air dry completely to avoid mildew buildup. What Happens When You Cut Corners? Many homeowners assume that more soap equals cleaner floors. This misconception can lead to sticky residues that attract dirt more easily. Additionally, using an unclean mop will only push grime around, leaving floors looking worse than before. Understanding the correct way to mop not only improves your aesthetic but also creates a healthier home environment. Embracing Sustainable Practices in Cleaning Are you looking to incorporate eco-friendly cleaning habits into your routine? Consider natural solutions such as baking soda and vinegar for their effective and non-toxic properties. This not only benefits the environment but also safeguards your family’s health. Understanding how to properly mop your floors ensures they remain clean and pristine while extending their life. By employing the right techniques and cleaning products specific to your flooring, you create a healthier environment in your home. To further foster a cleaner living space, examine your cleaning habits—perhaps it's time to rethink your cleaning routine. Remember, investing a bit of time now ensures a cleaner, healthier home for years to come!

08.04.2025

Why Swiffer is the Ideal Option for Cleaning Vinyl Plank Flooring

Update Can You Really Use a Swiffer on Vinyl Plank Flooring? Cleaning your home is essential for maintaining a healthy environment, especially for vinyl plank flooring that can elevate your interior aesthetic while requiring specific care. You may wonder if Swiffer, a popular cleaning brand, is safe to use. The simple answer is yes! Swiffer products, especially the Wet Jet, are designed to effectively clean and maintain vinyl flooring without causing damage. The Benefits of Using Swiffer on Vinyl Floors Using a Swiffer on vinyl flooring comes with distinct advantages that will make your cleaning routine easier. Here are a few benefits: Easy Application: Swiffer products are designed for convenience. The mops are light, easy to maneuver, and ideal for busy homeowners. Gentle on Floors: Swiffer Wet Jet effectively cleans without scratching, so you can maintain the luxurious look of your vinyl floors. Quick Drying: One of the top benefits of using Swiffer is that it dries quickly, reducing the risk of any water damage to your flooring. Versatile Cleaning: Whether it’s dusting away pet hair with dry cloths or removing stains with Wet Jet solutions, Swiffer caters to your cleaning needs. Your Go-To Swiffer Products When it comes to selecting the right Swiffer products for vinyl plank flooring, here are the top few to consider: Swiffer Wet Jet: The ideal choice for liquid spills and deep cleaning. It includes a cleaning solution that effectively lifts tough stains without causing harm to the floor. Swiffer Dry Cloths: Use dry cloths to quickly gather dust and debris. They are very convenient for a light clean between deeper cleaning sessions. Swiffer Dusters: Great for reaching into corners and areas where dirt collects, ensuring you maintain a spotless home. Cleaning Tips for Maintaining Vinyl Flooring Maintaining your vinyl flooring requires a bit more than just choosing the right cleaning tools. Here are practical tips to extend the life and beauty of your vinyl floors: Sweep Regularly: Make it a habit to sweep or use your Swiffer to pick up crumbs and pet hair frequently. Spot Clean Stains Immediately: Address any spills or stains right away. Leaving them can lead to more work down the line. Avoid Harsh Chemicals: When cleaning, stick with products designed for vinyl flooring; harsh chemicals can lead to discoloration over time. Use Mats and Rugs: Place area rugs at entryways to minimize dirt from shoes, and help protect your floors. Common Misconceptions About Vinyl Flooring Care There are a few myths surrounding cleaning vinyl plank flooring that can mislead homeowners: Myth: Water Ruins Vinyl Floors. While too much water can be harmful, using Swiffer Wet Jet in moderation is quite safe. Myth: All Mops are Safe on Vinyl Floors. Not all cleaning tools are created equally—opt for softer, non-scratch alternatives like Swiffer to avoid damage. Myth: Cleaning Vinyl is Complicated. In reality, maintaining vinyl flooring is simple with the right tools and techniques. Conclusion: The Smart Choice for Your Home Choosing Swiffer products is an excellent way to maintain the pristine condition of your vinyl plank flooring. This dynamic brand not only simplifies the cleaning process but also ensures that your floors remain spotless and beautiful. Don't forget to embrace additional cleaning habits like sweeping daily and using protective mats to further prolong the life of your flooring. Take charge of your home maintenance today! If you’re ready to invest in cleaning solutions, consider Swiffer to enhance your cleaning routine.

Terms of Service

Privacy Policy

Core Modal Title

Sorry, no results found

You Might Find These Articles Interesting

T
Please Check Your Email
We Will Be Following Up Shortly
*
*
*